The Kitchen of Our Dreams
Our biggest project to date, we are very proud of this kitchen project and what we have created. There are so many things to consider when designing a kitchen - and this is our guide to our major selections and sources. We hope to continue to share all the little details in future posts.

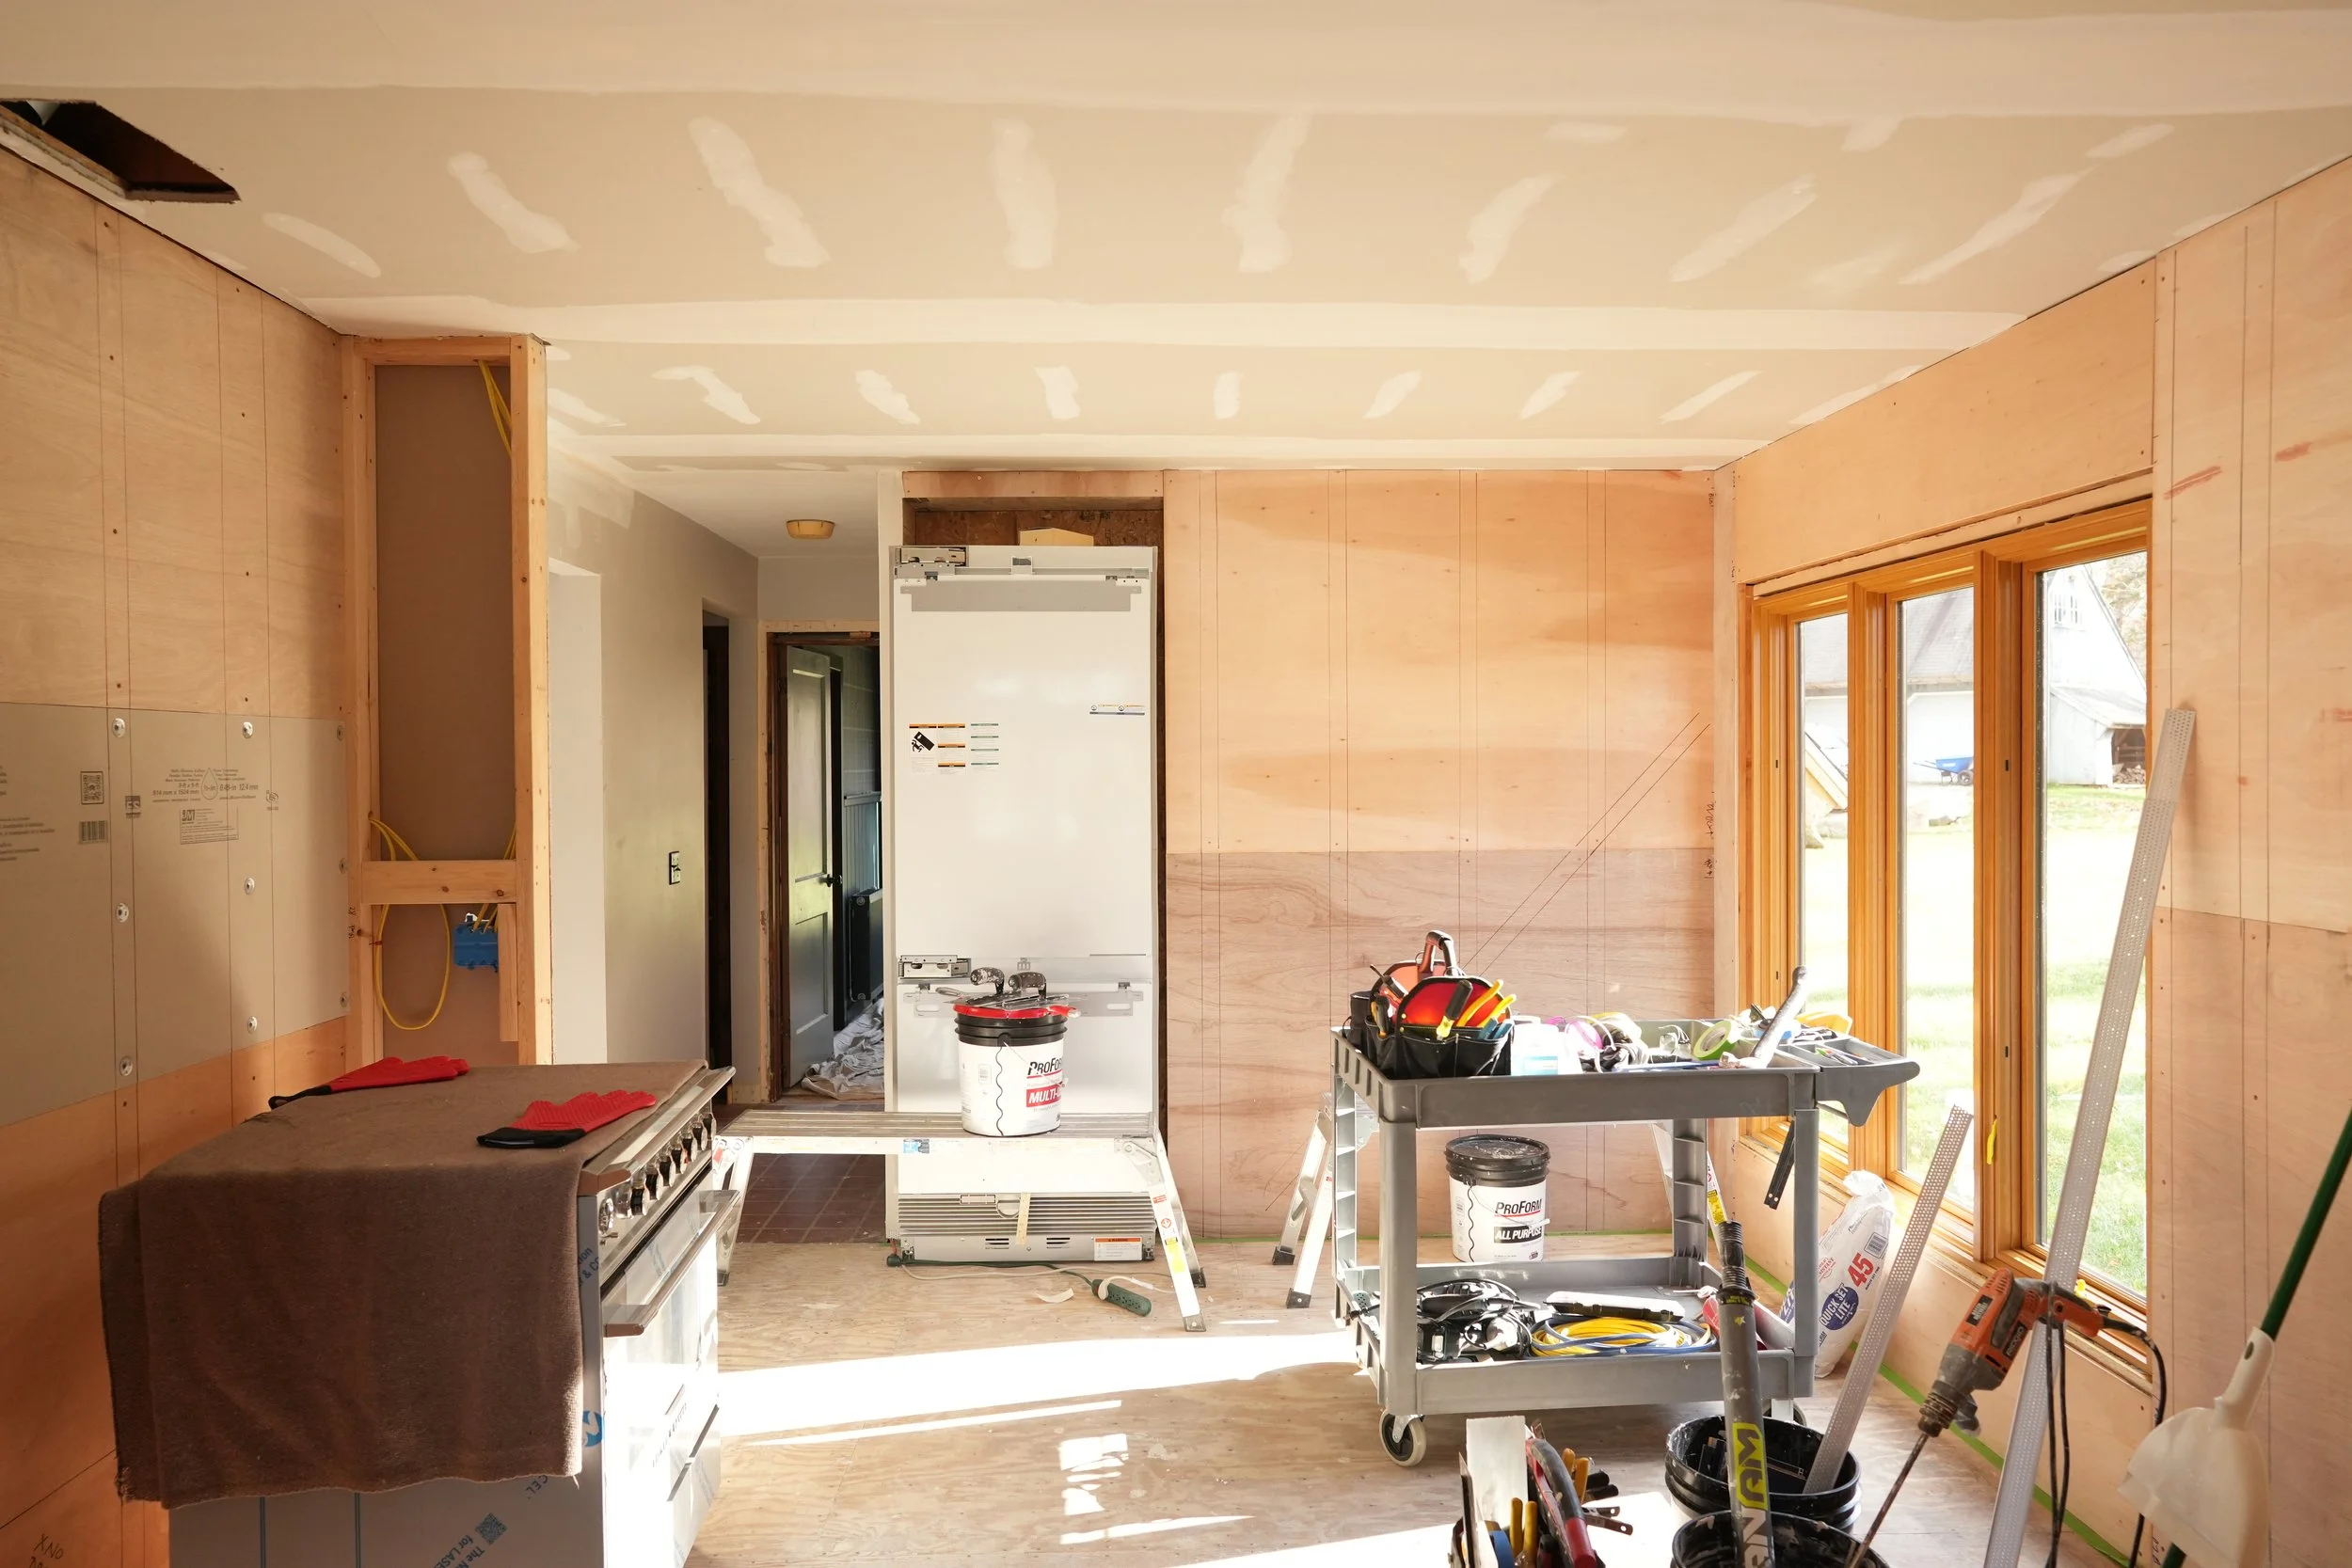
A Quick Look-back
Many of you already know that our home was gutted when we purchased it. One of the first spaces we completed was the Kitchen (the first time around) and many of our decisions were... regrettable. The kitchen we installed was technically fine but as we continued to renovate the surrounding rooms it just didn't fit. We documented that process across these blog posts:
CabinetS
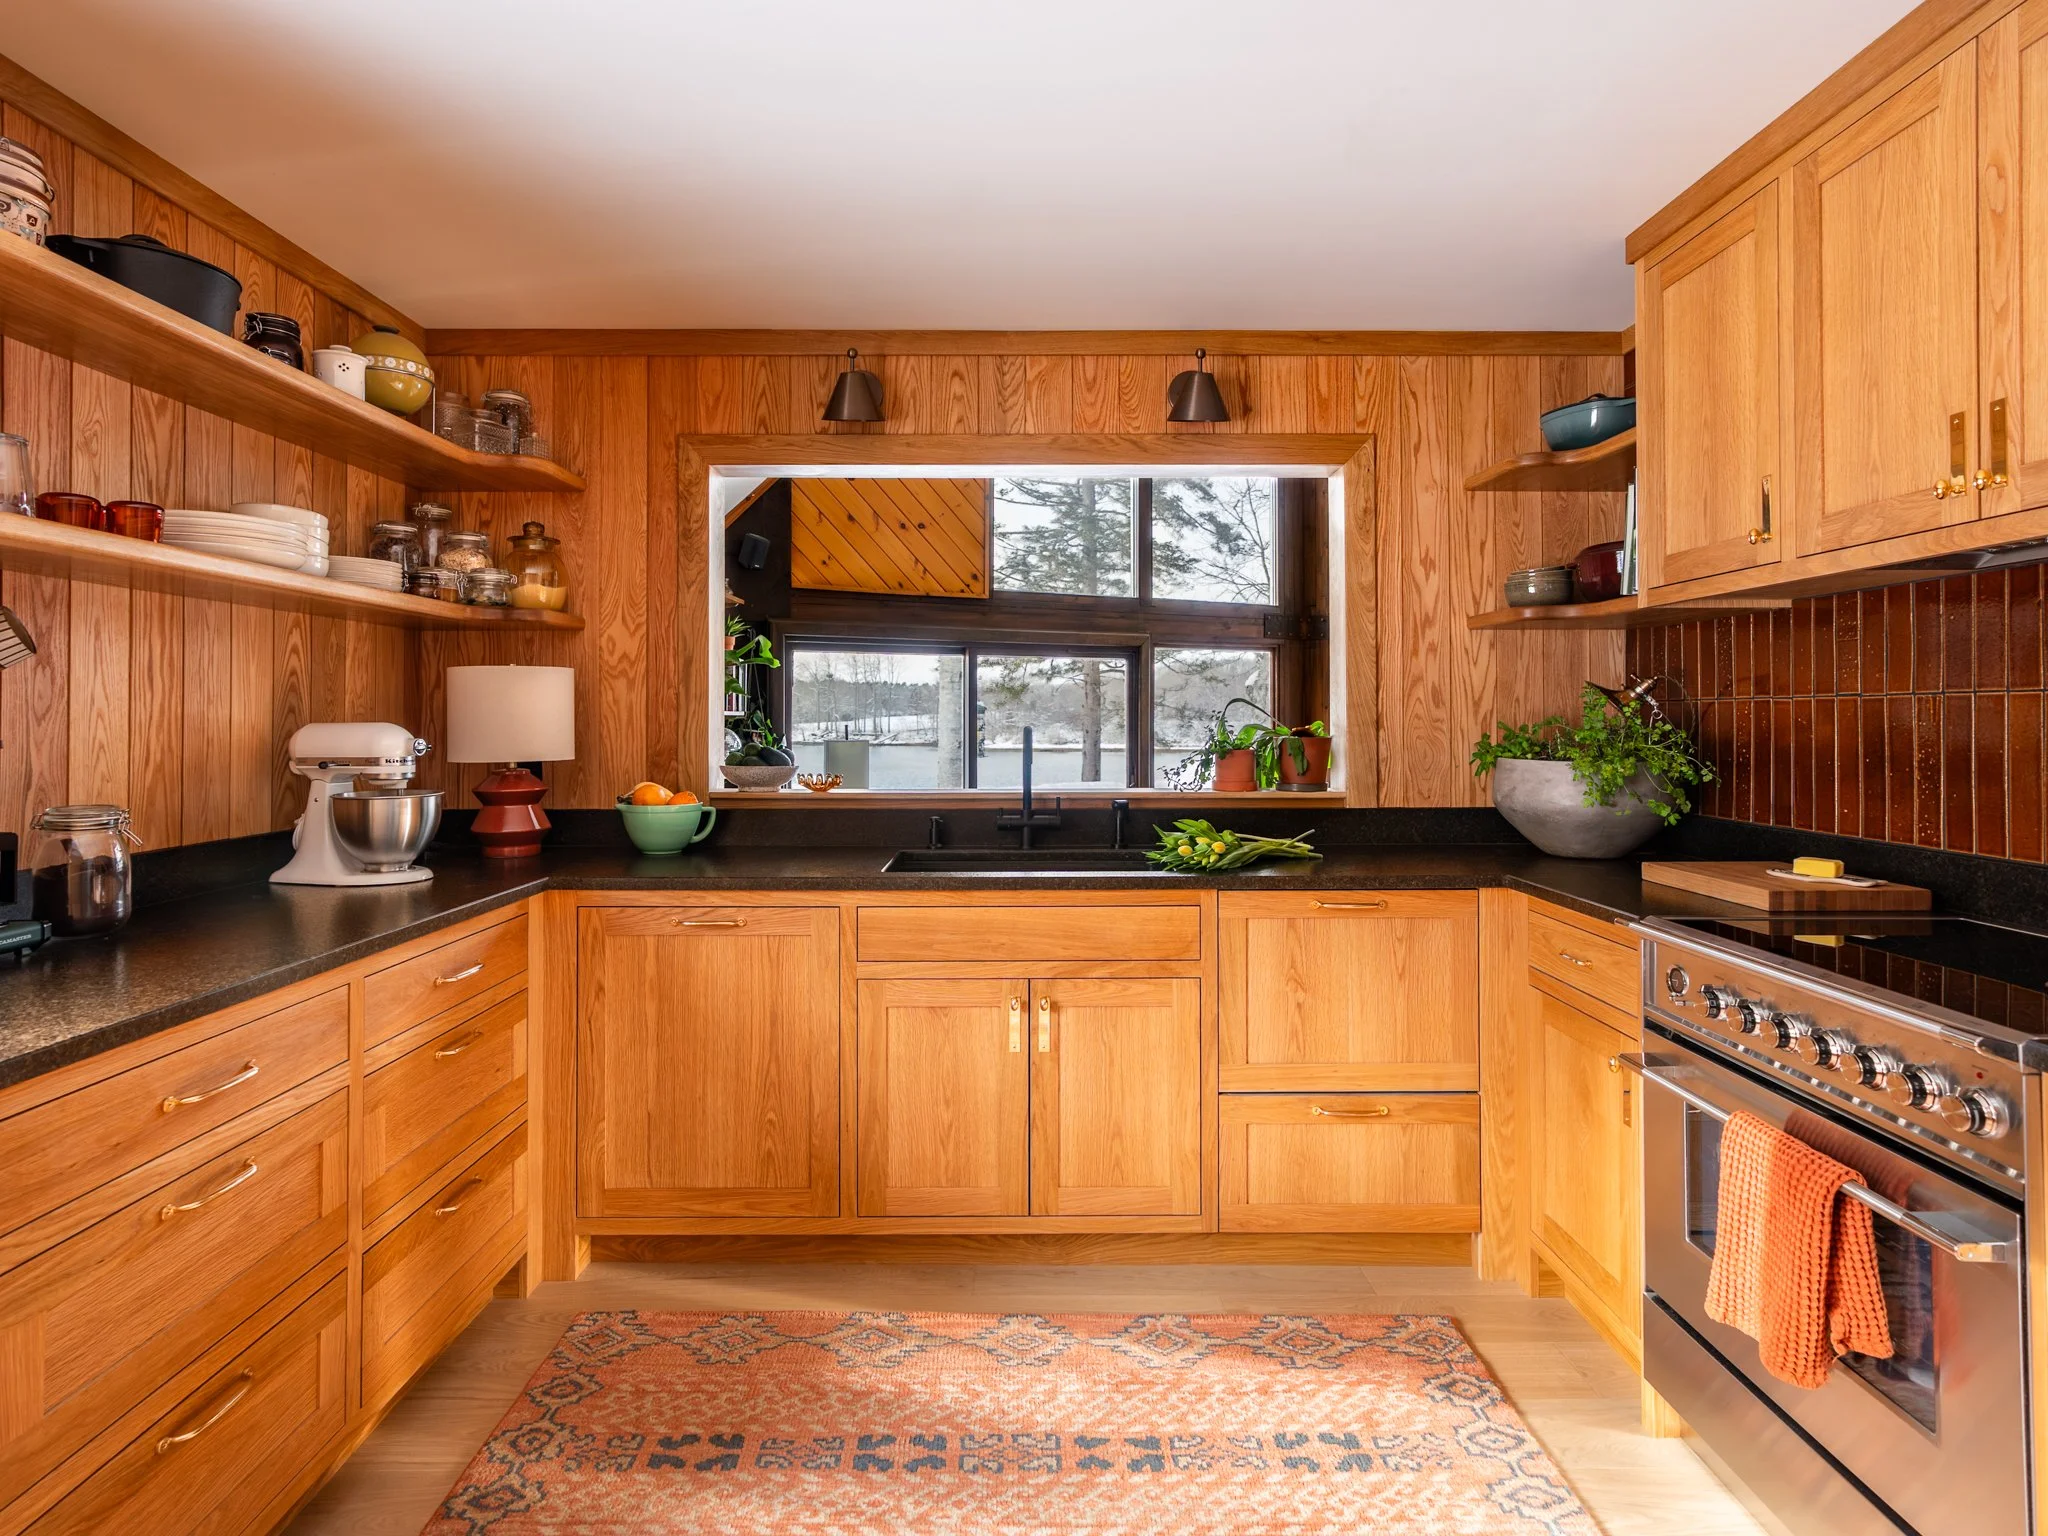
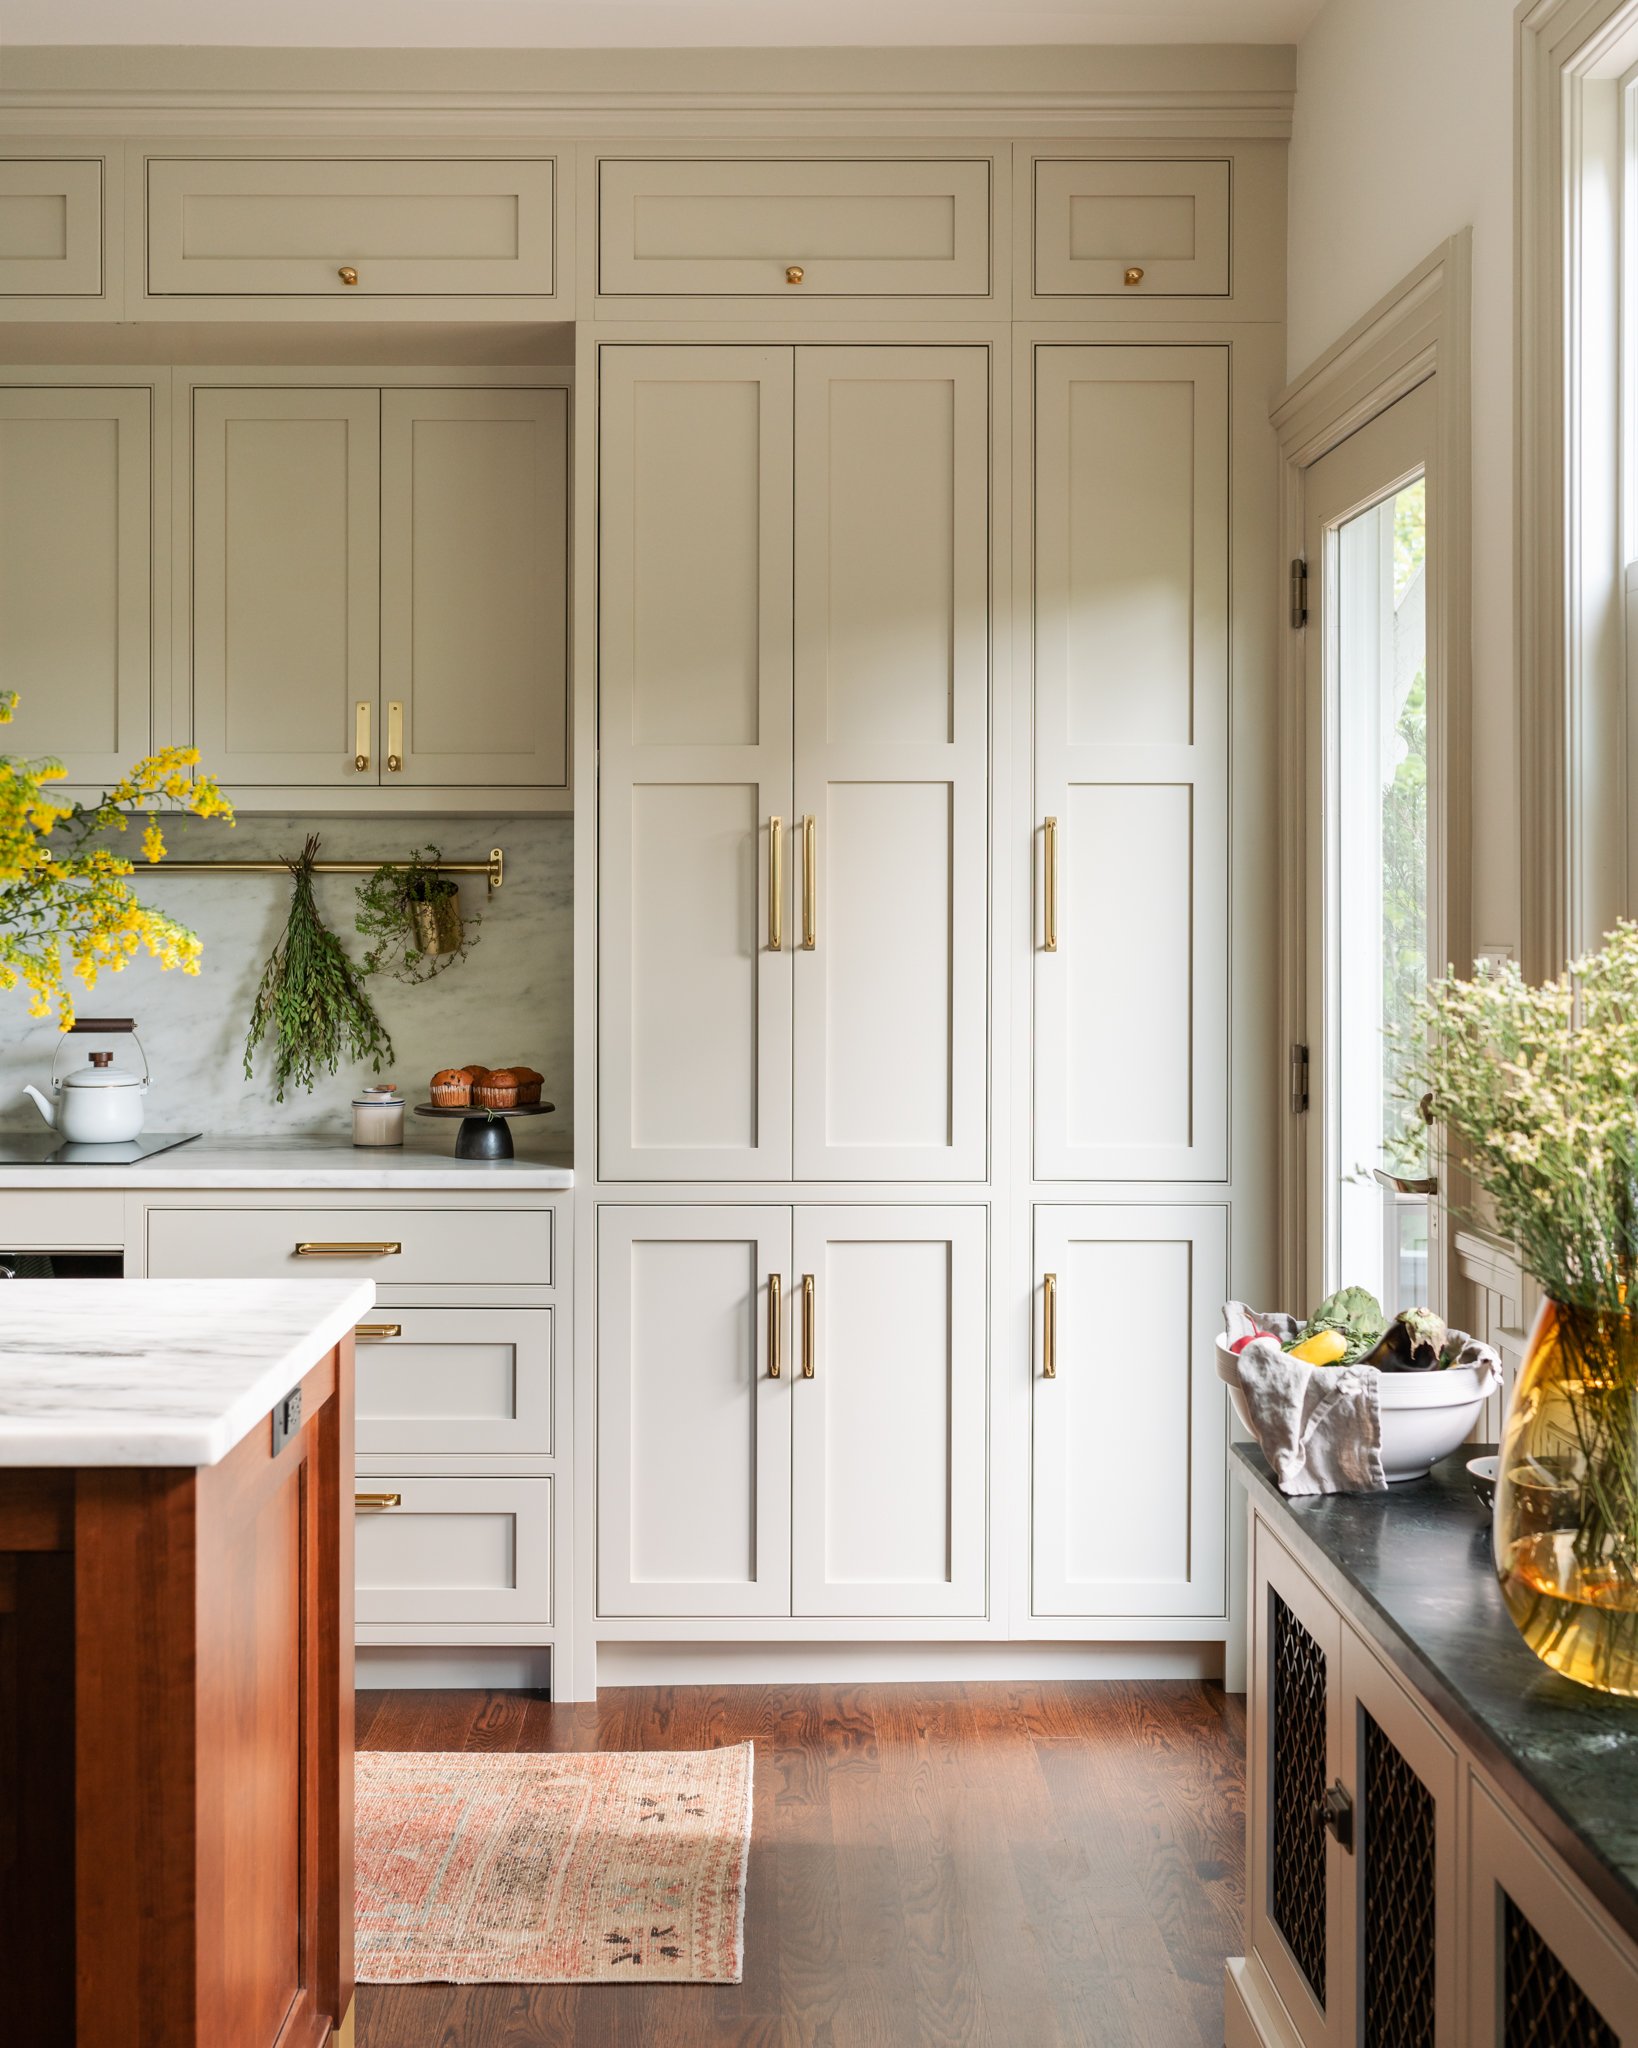
Cabinets are typically the first thing people think of when considering a new kitchen. To achieve the look we wanted we selected inset cabinets. This means that the door sits inside of the frame (instead of on top), a traditional detail that would be found in many older and victorian homes.
We sourced our cabinets from a company that works as an intermediate between you and Conestoga - the actual maker of the cabinets - to help with design, ordering, and installation education. While many people have DIY'd these cabinets, they do recommend having some experience or a contractor on hand. They were able to handle all of our unique scenarios with "semi-custom" solutions and we could not be happier with the result.
// Major Challenges: Our kitchen was particularly complex due to uneven floors, walls, and how integrated each component was. One mistake on the left would have created havoc 20' to the right. This was made more complicated by the fact that our cabinets have "legs that touch the floor" as part of the face frame - and needed to be scribed. An incorrect cut and we would need to order an entirely new cabinet. A typical kitchen with independent upper and lower cabinets would have been much easier to install.
// Getting Help: Nothing in our history or projects has brought us more relief than Ian Gardner from @playingwithsawdust. He reached out offering any advice we may need and we ended up hiring him to complete the entire cabinet installation. He understood the plan right from the start and really changed the trajectory of the project. He is talented, honest, reliable, and just a really special guy. Thank you Ian!
Cabinet Detail
// RTA Cabinets
Materials: Solid Maple Cabinet Boxes, MDF Painted Doors, Cherry Island, Dovetail Drawers
Face Frame: Inset 1/4" beaded
Door Style: Albany (shaker door)
Hardware (Hinges/Glides): All top of the line Blum hardware with integrated soft close standard
Cabinet Color: Accessible Beige by Sherwin Williams - More about the color here
Island Finish: Cherry with Colonial Stain and Sable Glaze with a 15% topcoat sheen
Approximate Cost: $25,000 // Notes: We had a large number of cabinets with a few upgrades (inset doors, custom paint), Cabinet prices have increased some since we submitted our order due to material costs
Hardware
Hardware is one of the most important features of any kitchen. Hardware sets the tone and feel of the space - the pieces you get to see and touch each and every day. An investment in this category goes a long way in elevating any space. From the very beginning we spec'd Rejuvenation hardware for this project. Following our initial designs we were fortunate enough to join the Rejuvenation Project Collective.
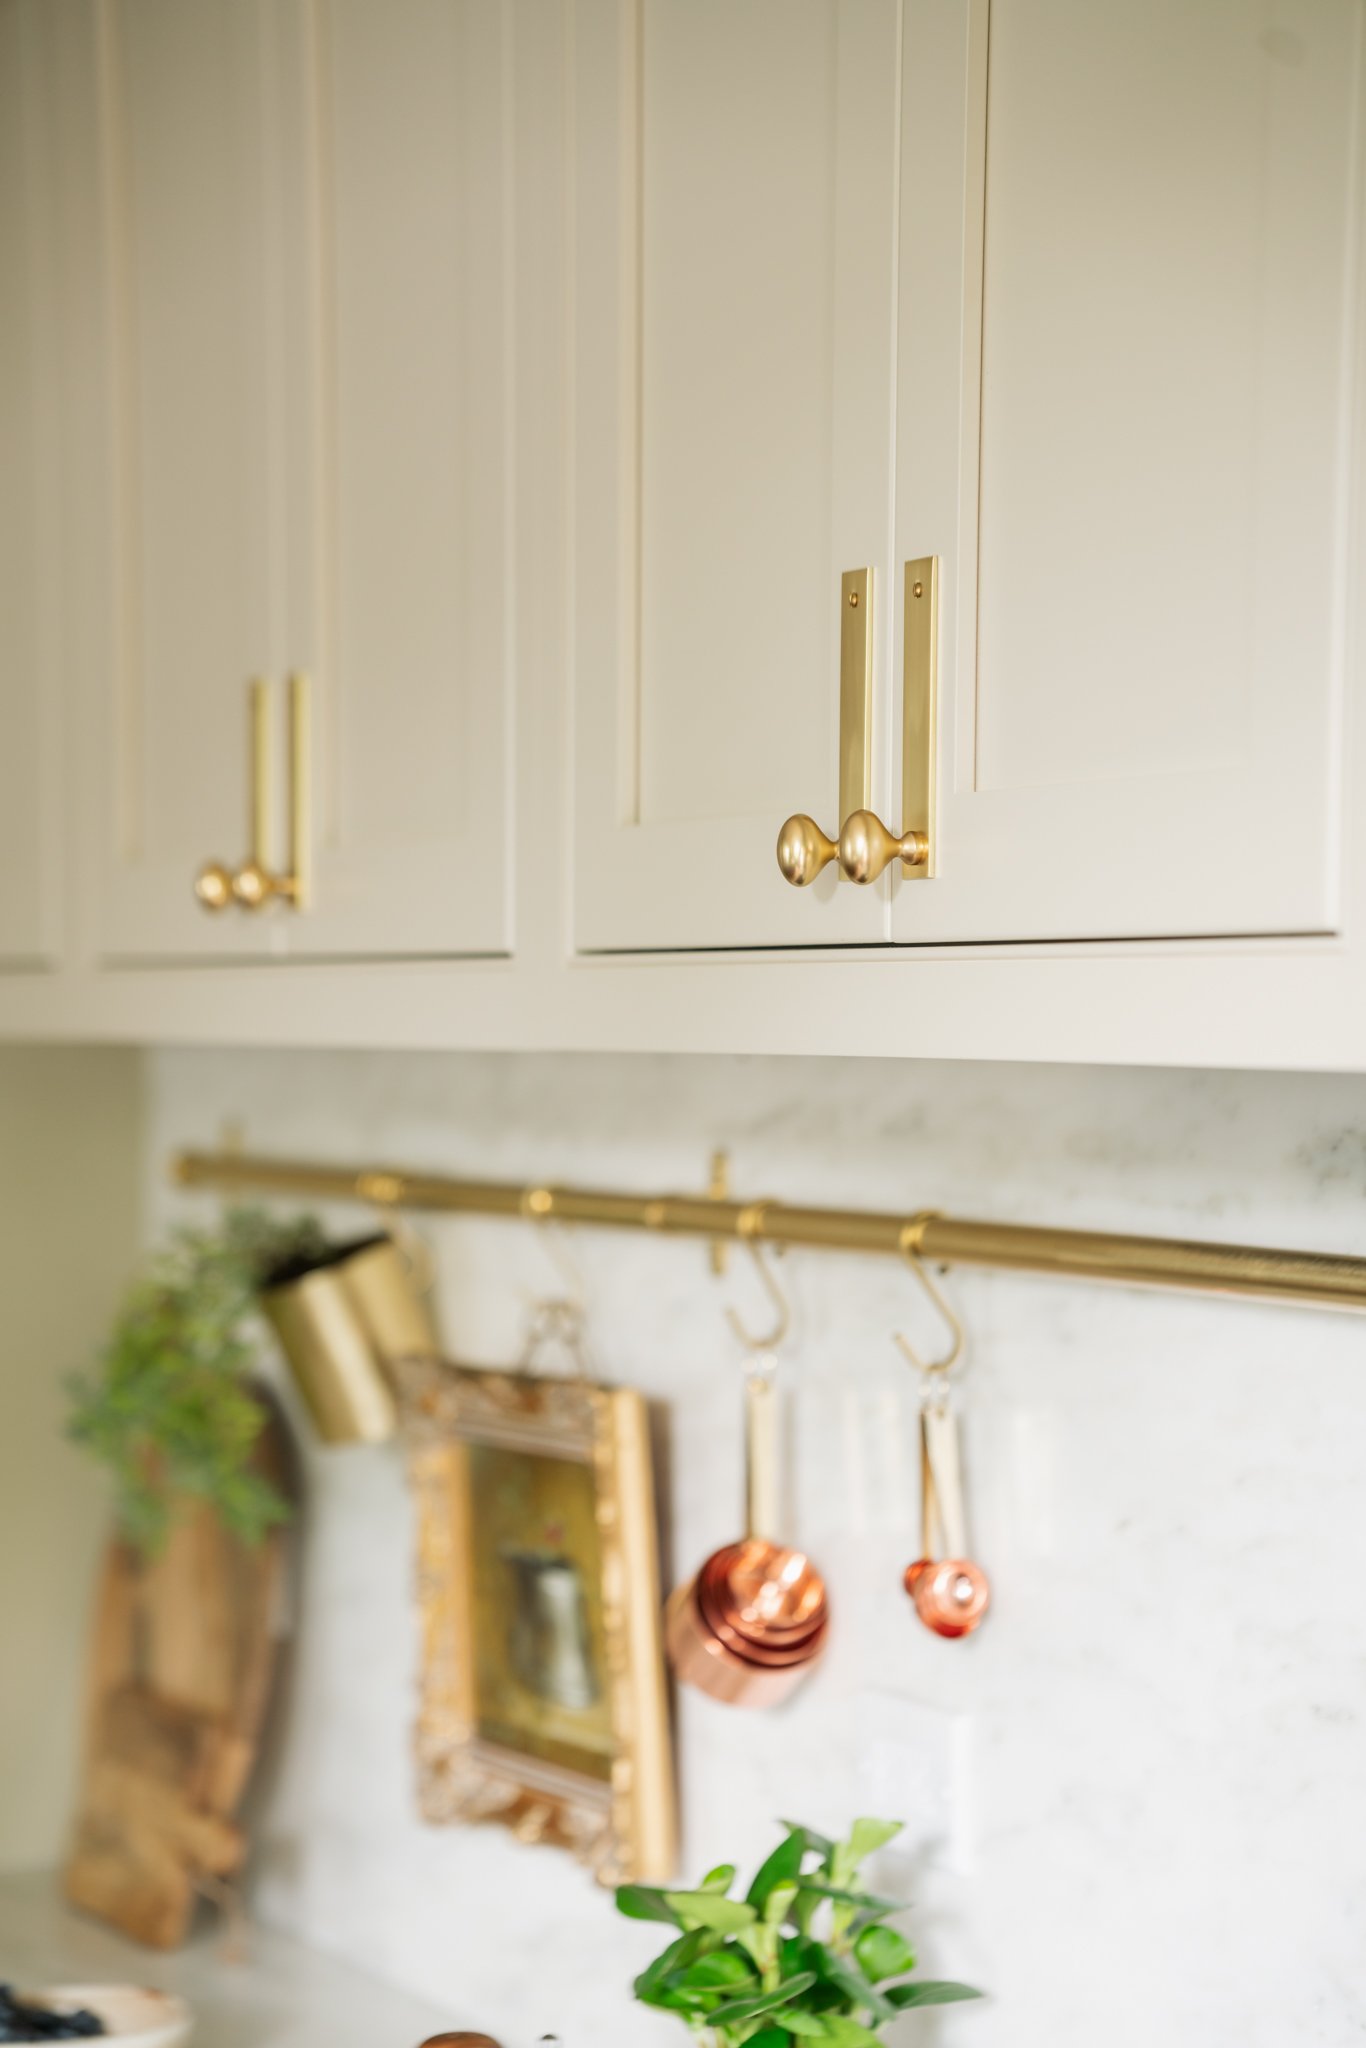
One of our favorite hardware pieces is the Accessory Rod mounted to the marble backsplash. Not only is it functional, but it's also so beautiful and really breaks up the solid stone slab. We have selected to hang art, plants, and other utensils for now and are excited to see how we utilize it moving forward.
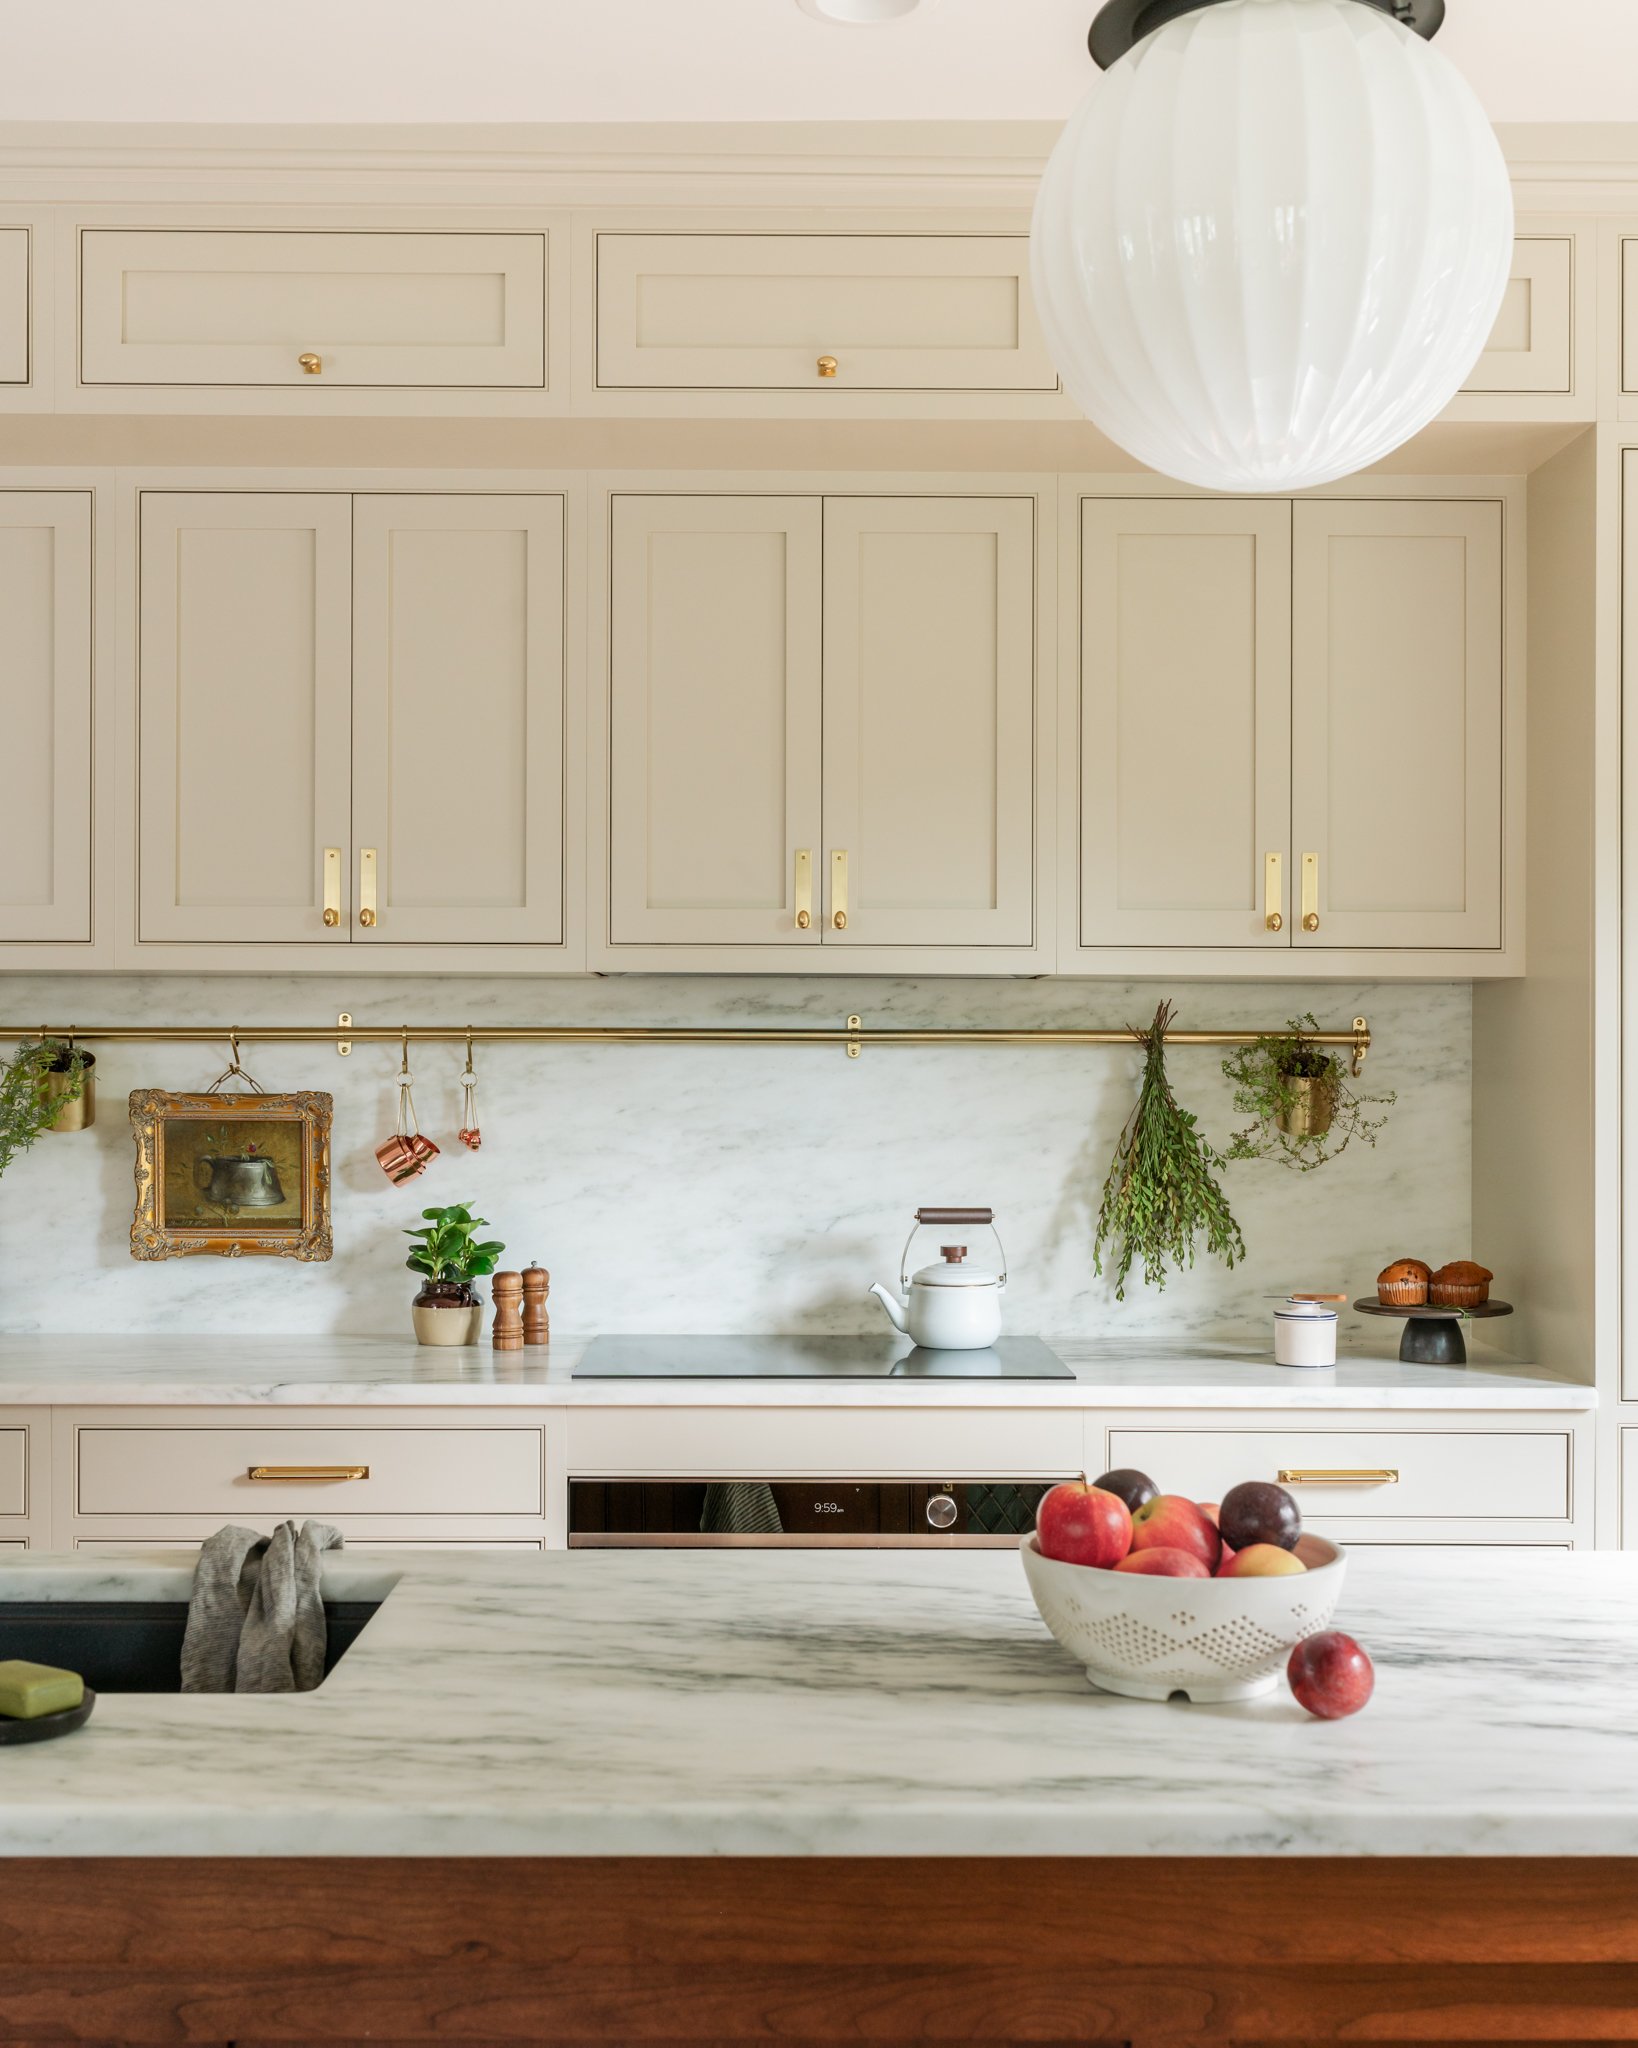
We installed Hood Classic Pendants which dramatically changed the scale of the space. Of all the changes we made between kitchen version this had one of the largest impacts because we never previously got to the pendant step - and we cannot stop looking at them.

Hardware Sources
// Rejuvenation Hardware
Refrigerator Pulls:
Rigdon Appliance Pull 18" / 12"Drawer Pulls:
Patton Drawer Pull in various sizes
Upper Cabinet Pulls:
Medium Oval Cabinet Pull with 4" Drawer Backplate (custom configuration)Soffit Pulls:
Medium Oval Cabinet Pull with Square Cabinet BackplateRadiator Box Latches:
Large Oval Cupboard Latch in Brushed AntiqueBrass Backsplash Rod:
Inside-Mount Cafe RodPendants:
Hood Classic Pendant in Oil-Rubbed Bronze 36" with 15" Opal Fluted Doric GlobeIsland Outlet Covers:
Lewis Single GFCI Switch Plate in Oil-Rubbed BronzeAll hardware is Aged Brass unless otherwise specified
Approximate Cost: $4,500 // Rejuvenation provided the hardware for this project
// Regency Grills
Sourced from James Gilbert & Son
Antique Brass, Small Diamond / Medium Diamond, Alternating floral type
Cost: £950.02 with shipping
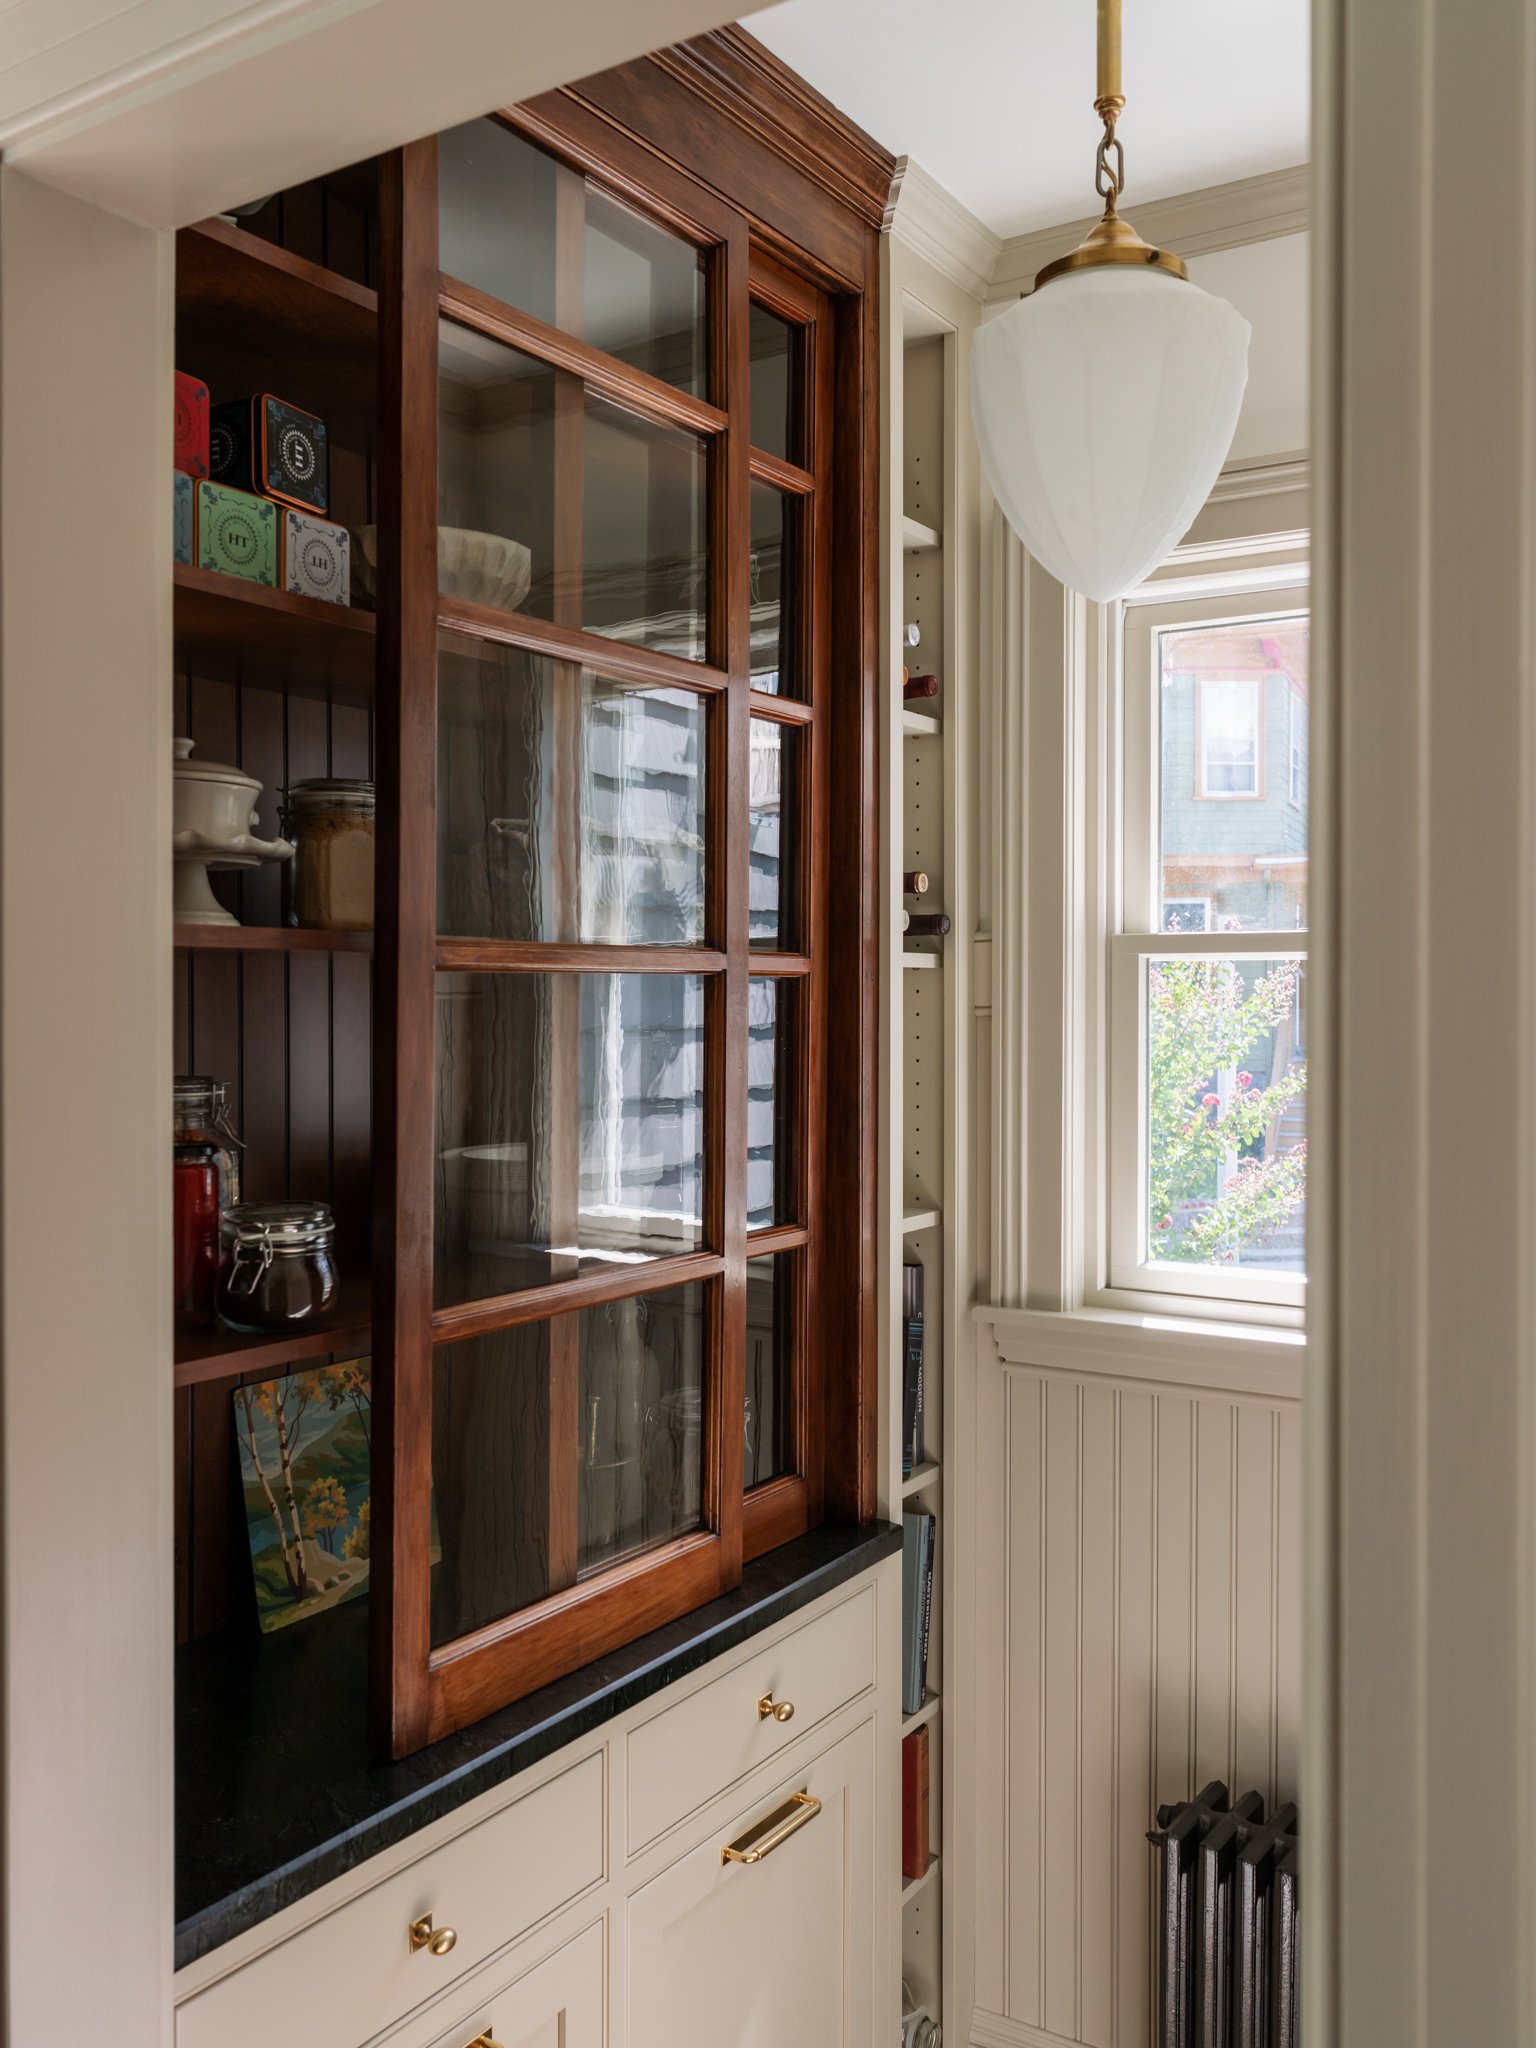
// Pantry Pendent
Sourced at Nor'East Architectural Salvage
Counters
Marble makes our kitchen feel ALIVE. Over the years we have done it all, granite, quartz, soapstone, and marble - and while they all have their pros and cons there is nothing like this natural stone. Many people try, but truly mimicking this stone is simply impossible. The texture, the depth, it's all just incredible.
We used Danby Marble from Vermont Quarries for this project and chose Olympian White Danby Select. Rumor has it that Martha Stewart herself prefers Danby Marble - and the way we see it, if it's good enough for Martha, it's good enough for us. Truth is, not all marble is equal and Danby has among the lowest absorption rates.
Visiting Boston Marble and Granite (the stone distributor) was such a fun experience and they carry so many Vermont Quarry products - we think its VERY cool that our counters are from New England. They were incredibly nice to work with as homeowners and we would recommend making the trip if you are in the area!
Fabrication and installation was coordinated by Metropolitan Cabinets & Countertops just around the corner. The process began with a visit to our home for templating - this step is always amazing to us - just a few wood strips and a hot glue gun results in very precise work. Once this step was complete we visited Metro to "place" our template on the stone. This allowed us to see exactly which patterns would appear where - and this is when we decided to feature the heavy marble veining in the island (we skipped this step for the soapstone). Shortly after, INSTALLATION! One of the most stressful moments, especially with softer stones like marble which are more likely to break or scratch. We spent most of the day hidden away upstairs bitting our nails. Luckily it turned out beautifully.
While marble has plenty of cons - we hope to watch this stone patina naturally for years to come.
// FAQ: We sized our island to the maximum slab size available - we did this in order to avoid any seams!
Stone Detail
// Marble
Marble Distributor: Boston Marble and Granite
Marble Fabrication & Installation: Metropolitan Cabinets & Countertops
Marble Sealer: Stain-proof Plus Premium Impregnating Outdoor Sealer
// Soapstone
Soapstone sourced, fabricated, and installed by Metropolitan Cabinets & Countertops
Soapstone wax: Real Milk Paint Soapstone Sealer
Marble & Soapstone discounts were provided in exchange for sharing the process and our honest experience
Appliances
From a design perspective we really wanted our appliances to recede into the cabinetry, rather than serve as a feature. To achieve this, we opted for "integrated" options for our refrigerator, dishwasher, and beverage fridge. In a similar fashion, we utilized a stove-top, and built-in oven combo rather than a slide-in range. One bonus of the built-in oven is that it had much higher capacity than most slide in ranges.
While we just wrapped the kitchen up, we have been using many of the appliances for months now - and are so happy with our selections. We are continually impressed with their functionality and quality.

One of the biggest considerations we made in this kitchen was changing from a gas range to an induction cooktop. We have never used induction before and while we would like to say that it was primarily for environmental reasons it was actually for a more selfish reason - we were tired of cleaning the gas range. In the end its a win win and in our two weeks of cooking we are VERY IMPRESSED (ie. never going back). Much more on this soon!
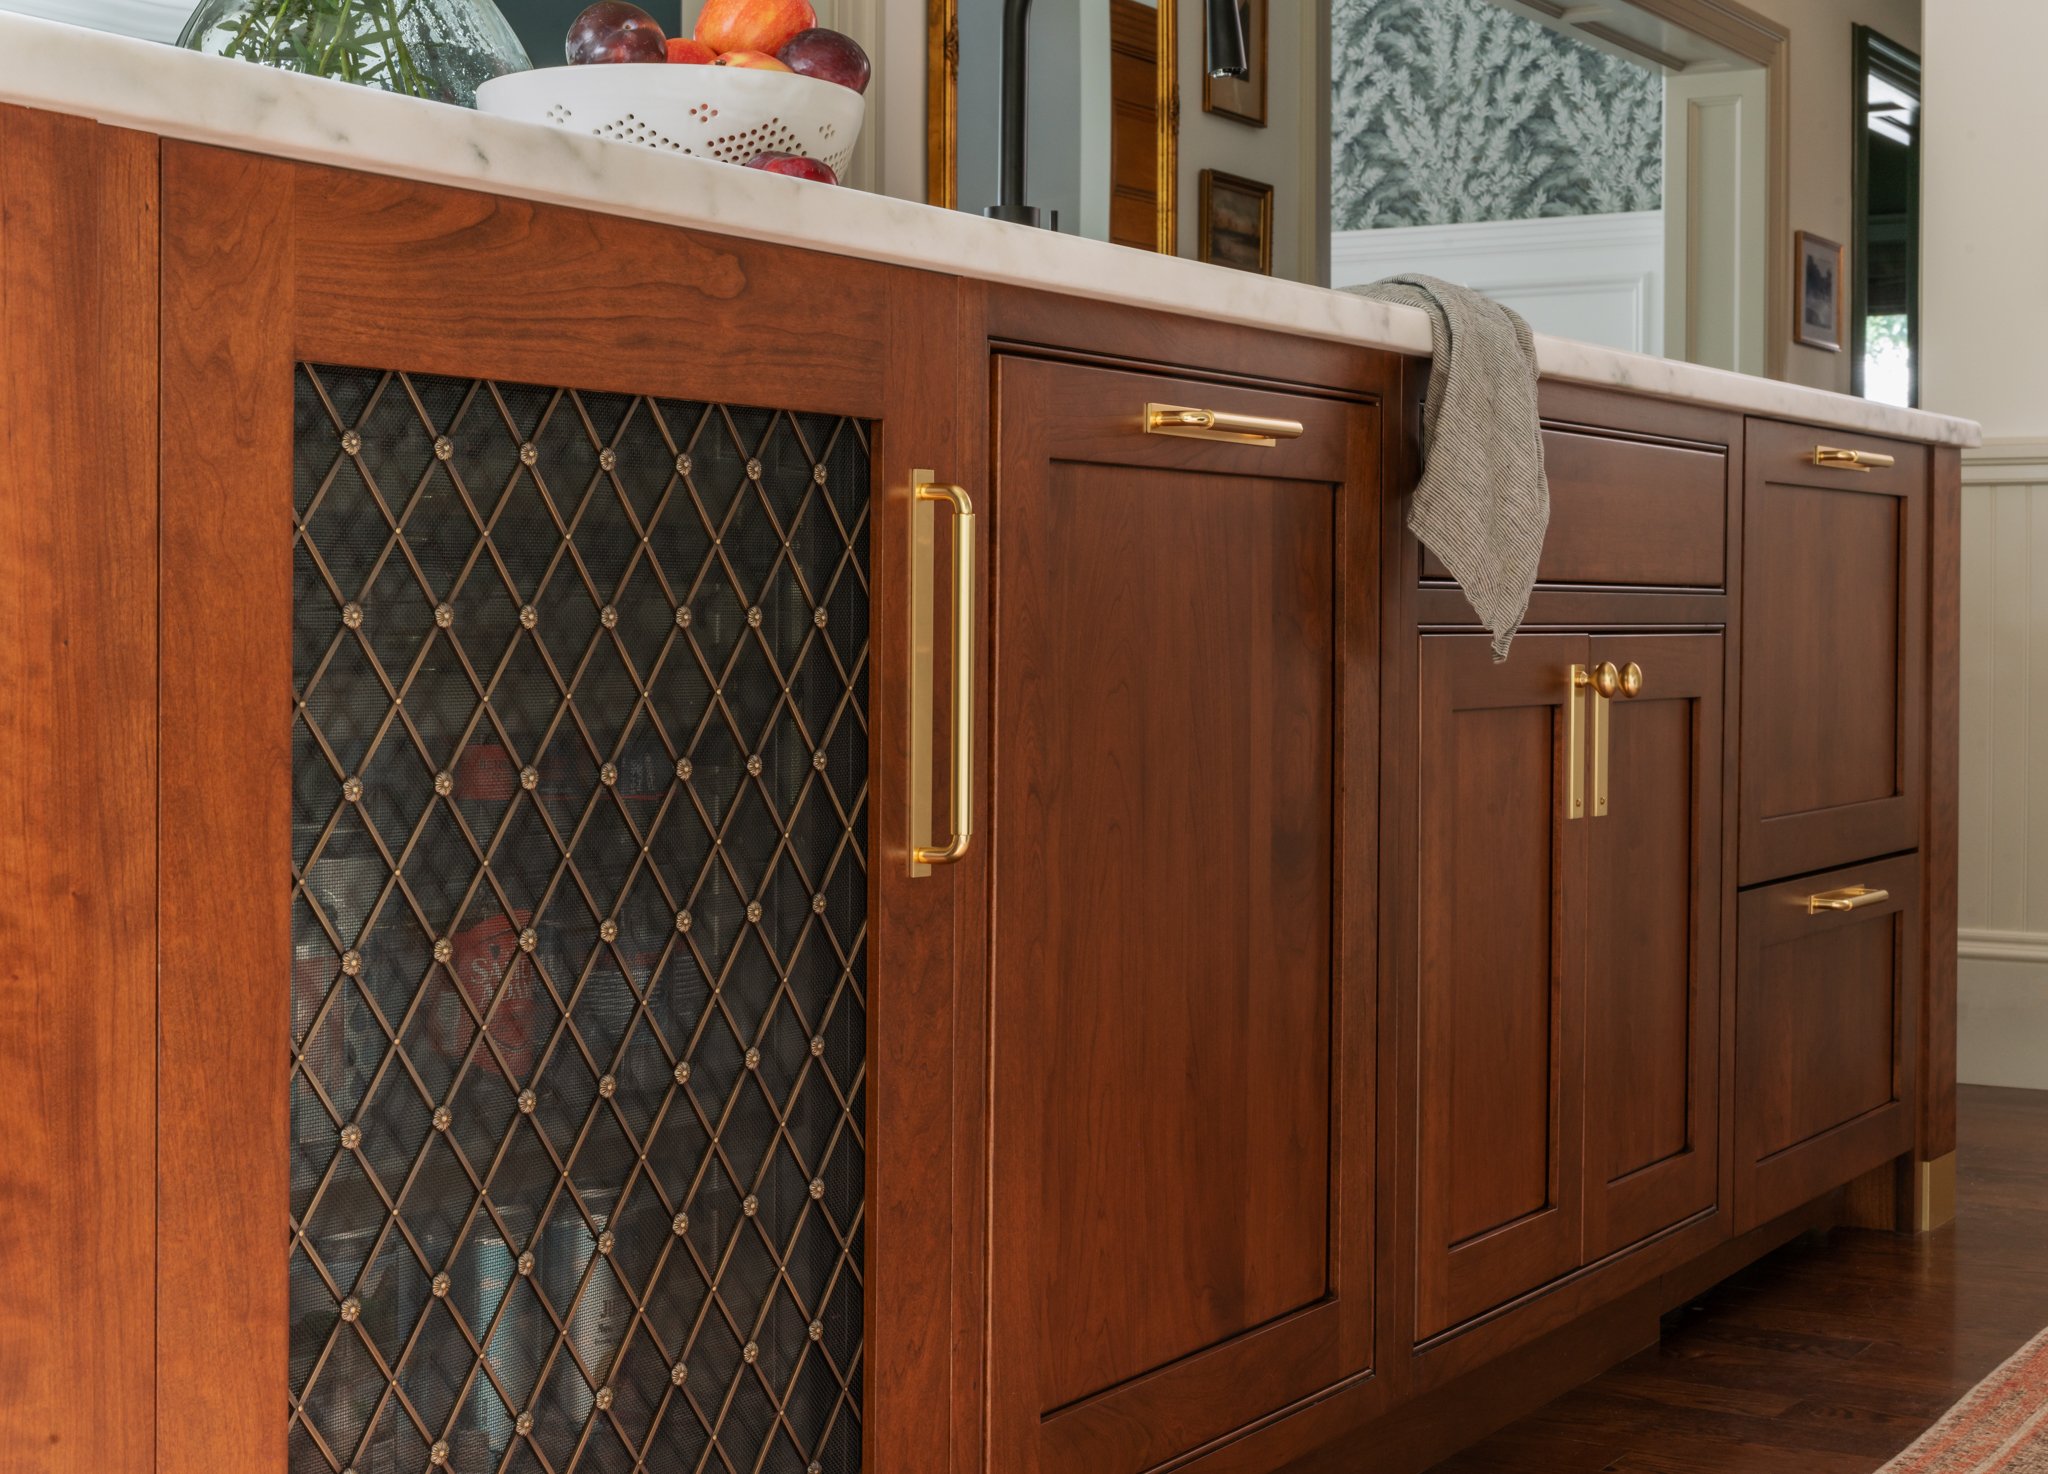
This integrated Landmark Beverage Fridge got us through our renovation spending most of the last year sitting in our living room. We always wanted it to be in the island and are so happy with our custom grill upgrade, which is not only beautiful, but adds character and ties the island details into the adjacent radiator box.
If you look closely in that last photo you can see the integrated double door dishwasher at the very end of the island. Yes - they run independently which has been a great feature.
Appliance Detail
// Fisher & Paykel
Refrigerator: Integrated French Door Refrigerator Freezer, 36"
Dishwasher: Integrated Double DishDrawer
Oven: 30" Contemporary Oven
Cooktop: 30" Induction Minimal Cooktop
We purchased these appliances through our local Yale Appliance and had a great experience!
Approximate Cost: $15,600 // We received a discount in exchange for sharing our honest experience throughout the process
// Landmark
Beverage Fridge: 24 Inch Wide Single Zone Wine and Beverage Cooler
We faced the Fridge with Regency Grilles mentioned above in Medium Diamond, alternating floral type
Approximate Cost: $2,700 // We were gifted this product by Ferguson Showrooms
Sink & Faucet
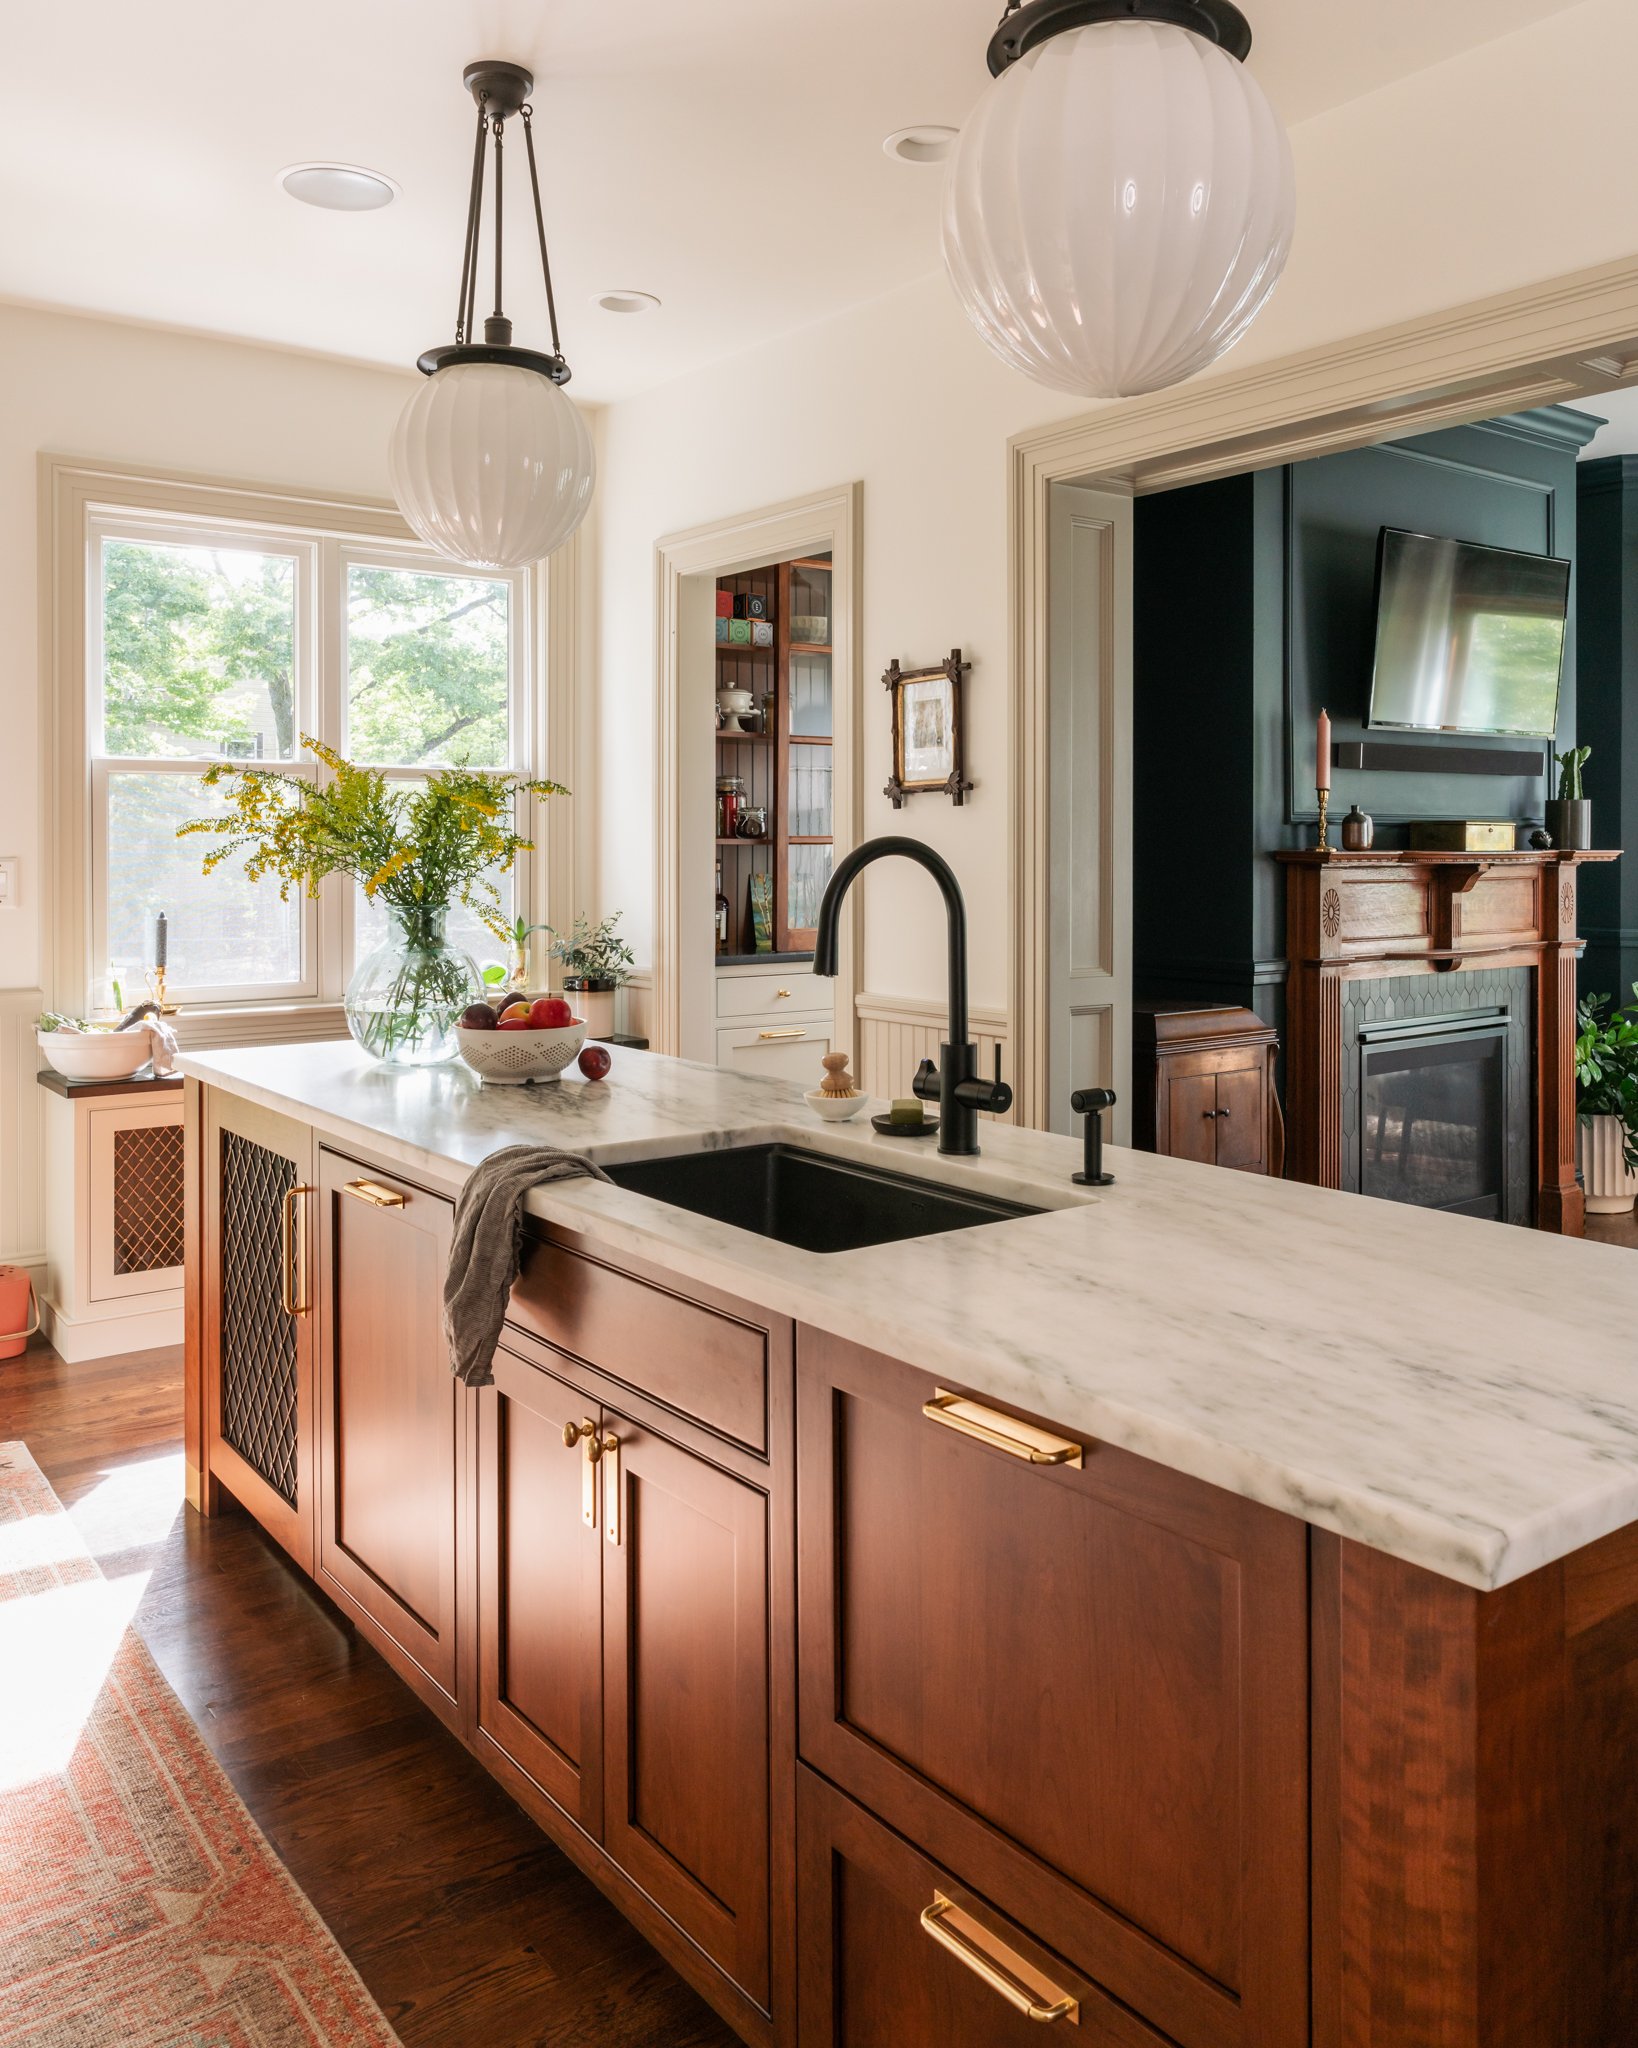
With the sink prominently featured in the island, we had to make a decision on the best material for the job. Rather than use a light or stainless steel sink (we low-key hated out old stainless sink due to scratching) we opted for a dark, granite composite sink. David continuously said "I want the most indestructible material possible" randomly throughout this entire project.
The dark color helps balance the other dark features we have throughout the space (stovetop, lighting, soapstone) and the granite composite feels very resilient and clean. It's also one of those "workstation" systems and we have found ourselves using the nesting accessories (cutting board, drying rack) quite a bit. If you look at the next image you can see the small lip which holds the included accessories.
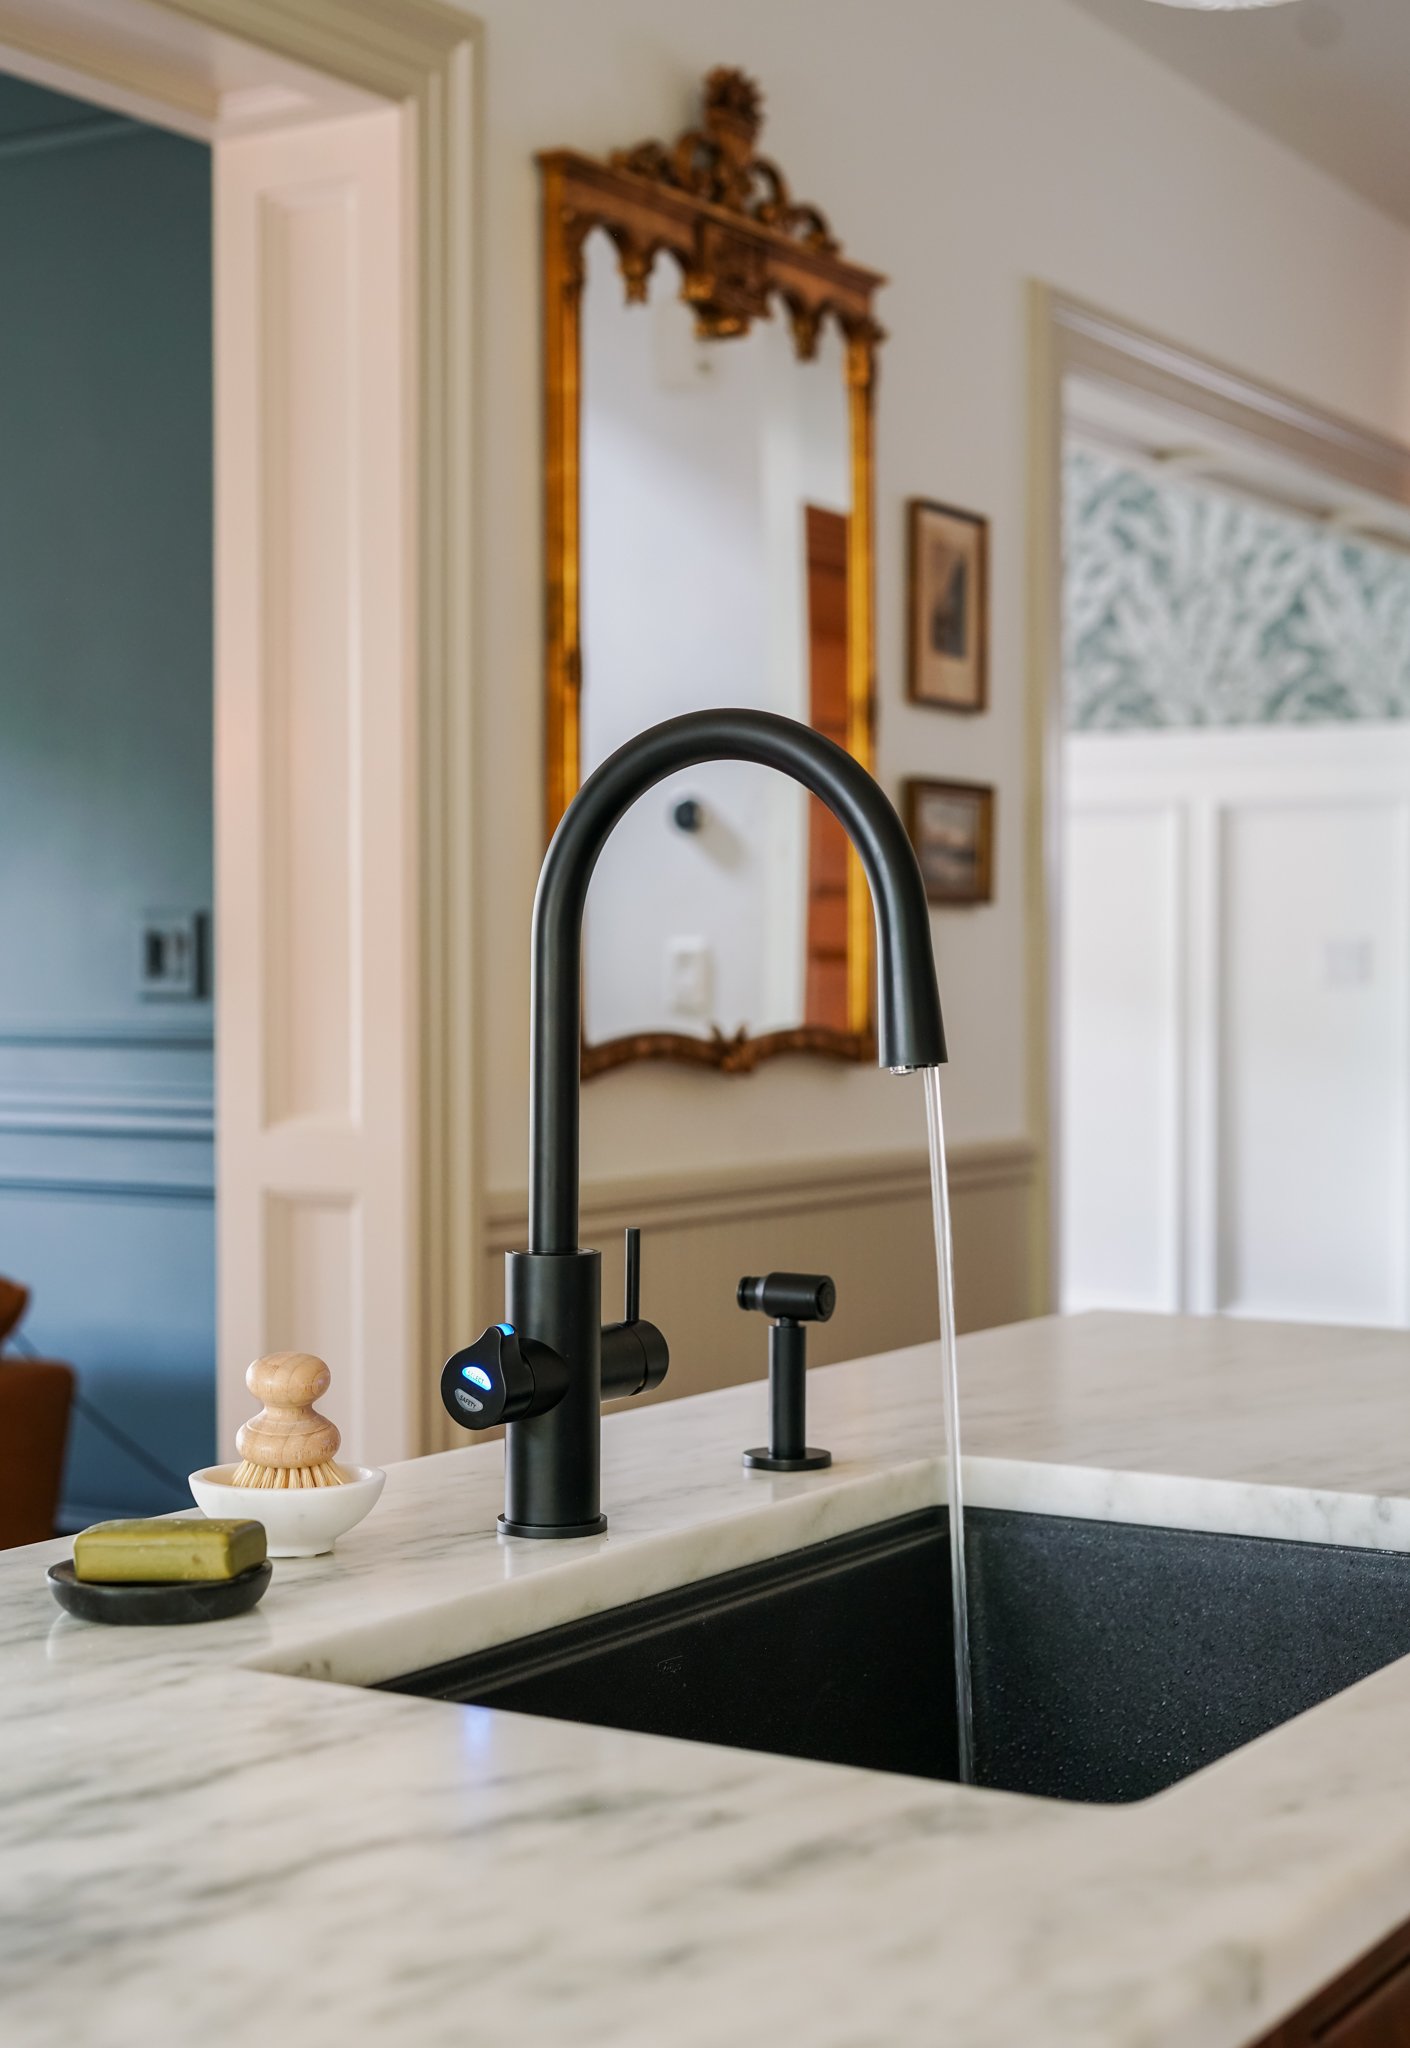
When it comes to kitchen faucets - there are a lot of appliances and fixtures you can choose from to suit your individual needs. There are water filtration systems, insta-hot water taps, counter top carbonated water appliances, and zillions of faucet choices... the list goes on. While doing research and considering our options we kept coming across Zipwater for one major reason: (and pardon us for sounding like QVC here) IT DOES IT ALL plus, our addiction to soda water.
The Zipwater faucet supplies the typical tap water you would expect, BUT ALSO provides chilled filterer water, boiling water, AND chilled sparkling water. ALL IN ONE. This Faucet/Appliance is definitely a splurge but when you consider all of the benefits it provides, it becomes a very attractive option.
Because the Zipwater faucet comes with a companion appliance we are storing under the sink we planned ahead. We chose on off center (right sided) drain, and a slim profile disposal. All the the "under the sink stuff" is to the right, leaving enough space for the appliance on the left. Don't worry - we have a full post coming on this soon!
Sink & Faucet Detail
Sink: Kraus - Bellucci Black Granite Composite 30 in. Workstation
Side Sprayer: Kingston Brass - Concord, Matte Black
Faucet: Zip Water - HydroTap Design Range CELSIUS All-In-One ARC Tap, Matte Black
Disposal: Moen
Faucet Cost: $5,823 plus installation // We were gifted this product in exchange for sharing our honest experience throughout the process


Final Thoughts
Kitchen projects are a big undertaking - from the disruption to your every day life, the level of complexity, and of course - the cost. We worked endlessly on this project and are so thankful for the support and encouragement along the way.
One of our most asked questions was regarding cost. No matter how you cut it - kitchens are expensive - and expensive varies by individual perspective and circumstance. We added up all of the major elements of our project described in this blog post and the total cost was about $80,000 retail. We did have a unique opportunity to work with brands in some cases, which helped us stretch our personal budget further, but did not impact our final choices. Our cost estimate does not include all of our sweat equity or the things you grab from the hardware store (screws, glue, jigs, paint, trim, etc).
Thoughts on price: We had considerable savings by choosing RTA cabinets - one of the most expensive categories in a kitchen renovation. We are still impressed by the cost given the number of upgrades and customizations we had - and the level of quality we received. In terms of hardware - we would advocate for the budget we used given the everyday impact that hardware provides, however there are certainly very beautiful alternatives at lower price points. Lastly we do consider our appliances, stone choices, and faucet to be luxury items. These could be substituted for more affordable options that would decrease your overall cost. We have created beautiful kitchens at lower price points and we are confident that you will be able to as well - at any price point.