A Knotty Pine Paneling Makeover
Knotty pine paneling is back, baby! Or at least it is for us… queue this AHS clip.

Few things go together better than wood paneling and rustic charm so we decided to go all in on the Green Room 2.0, and we are so so happy with the final result.
If you're just tuning in, we did do a quick upgrade of this room when we first bought the cabin in Fall 2023. It was important to us to be able to host family and friends right away, so we mostly painted (walls and floor), and added a trim feature wall. It was a pretty good room, and it was the room we lived in last winter while renovating our primary suite.

The original room - we quickly primed the purple walls and sealed the floor with Kilz.

Green Room 1.0 - This quick refresh included deck paint on the floor, a wall detail, and some furnishing.
So why are we renovating again? Well it was always the plan. This room was carpeted for 50 years. When we moved in, we immediately removed the carpets from both rooms and painted the floor with Kilz to block any smell. Well, on a hot summer day, the Kilz didn’t cut it. So now over a year into this project, it is finally time to take up the subfloors and really complete this space.

We removed the detail wall, trim, and subfloor - only the drywall and rough cut boards remained. Shortly after this photo, we also ripped out the baseboard heat (the new radiator will be installed before next winter).
Why Paneling?
We are big believers in using materials common to the era of the home, and home style. Over the last year we have been working on a master plan (a big Canva mood board) and wanted to use panelling details to add cohesion throughout our home. In our recent primary bedroom project for example, we re-purposed the existing wall panelling for an elevated look, then we added tongue and groove (t&g) panelling in the adjoining bathroom. This extension of the panelling throughout both spaces made them feel a bit more relatable to each other.
Another bonus was that in this guest room, we chose to use knotty pine - an extremely common material, especially up here in Maine, and relatively inexpensive. We spent somewhere around $1,500 in pine and it’s a huge bang for our buck - we were able to completely transform the entire experience of this room. For a small room without any significant architectural details (there is nothing particularly cool about this room) we think that the panelling helps tell a story in a way that paint just can’t - all while injecting a bit of character.
In terms of wood species, pine is widely available and much more affordable than other hard or exotic wood options. We were able to put in an order with our local lumber yard (we ALWAYS implore you to discover your local lumber yard) for at home delivery. We calculated our needs and placed the order to material waste - lucky for us, our ceilings are just shy of 8’ which meant we could use full 8’ boards. Pine is also a soft wood which means it's lighter and overall easier to work with.


T&G Installation
Once you complete a couple of calculations , and get a couple of boards installed, things pick up quickly for a project like this. We started at the center of the longest wall (the bed wall in this case) so that the left and right sides would be exactly symmetrical. If you don’t do this (and you just work from one end to the other) your last board will likely be different than your first - and we don’t want that!
Once you find your center line you have two options - center the first board, or center the joint of the first two boards. In order to determine the best option you have to measure out both scenarios. The purpose of this very annoying exercise? To avoid ending on tiny slivers of a board at the ends.

In our case, we chose for the first board on the wall to be centered. This would result in a decent size board on the left and right ends of the wall, while keeping the wall perfectly symmetrical.
Once we were ready to install, we applied glue to the back of the board, made sure it was level, and nailed it at the very top and bottom. We knew we would be adding baseboard and crown so we would never see these holes. We did not apply any nails in the centers - counting on the glue for that part.
We debated removing the existing drywall but decided against it. Believe it or not, drywall offers some insulative value and fire resistance. There really was no reason to take it out. We did however make as many holes as we needed to fix the electrical.
Once the back wall was complete, we completed this process on the remaining walls - ALWAYS starting and calculating the best option from the walls center.
Trim
We finished this fun woodworking project with trim - something that we've really been honing our skills on. We actually made all of our own simple trim for the primary suite and while it was tedious, it was well worth it. For this project we used 1x4 pine boards and a simple quarter-round router bit. Milling it yourself definitely takes more time, but it decreases waste, and increases our options. If you want to skip this part, your local lumber yard will likely carry a selection of pre-milled profiles like baseboard and crown that you can choose from.
We installed baseboard, window trim & stool (sills are on the outside), and door casings. We used a standard trim profile for the crown that was carried by our local Ace Hardware.
Finishing the Panels
With knotty pine you have a few options. It will color quickly when exposed to UV and we love that look. However, boards are raw, and feel unfinished so its most common to at least add a clear sealer like shellac or polyurethane. You also have the option to stain the wood to a color of your choosing.
For us, we started by sanding all of the panels with 220 grit paper and our orbital sander. We have both a battery and corded orbital sander but you will notice we linked the corded version - it just works better. We did the hard-to-reach spaces by hand before breaking out the shellac. Shellac is an old school product that sits on top of the wood. It’s a great finish if its not at risk of being exposed to a lot of moisture. I wouldn’t use it on a coffee table for example.
For this project, we bought a gallon of amber colored shellac. We then added a mahogany tint to make the amber more of a warm brown. The linked product, TransTint, is potent stuff and a little goes a long way. We added a bit at a time to the gallon and then tested the color. Make sure to wear gloves too, our hands were dyed for days.
To apply the finish, your best bet is a brush and an audiobook (Stephen King lovers - have you read this one?). As I mentioned shellac sits on top of the wood, and it can be layered - each layer being more pigmented. So you run the risk of having darker and lighter areas. I used my favorite paint sprayer to apply the finish - and to be completely honest - it was the hardest finish project I have done. Shellac, unlike paint, is thin like water. So I started spraying and it came out FAST. Would I do it again? Probably, but I would have practiced a lot more before hand. If you are unfamiliar with spraying, maybe stick to a brush for this project.
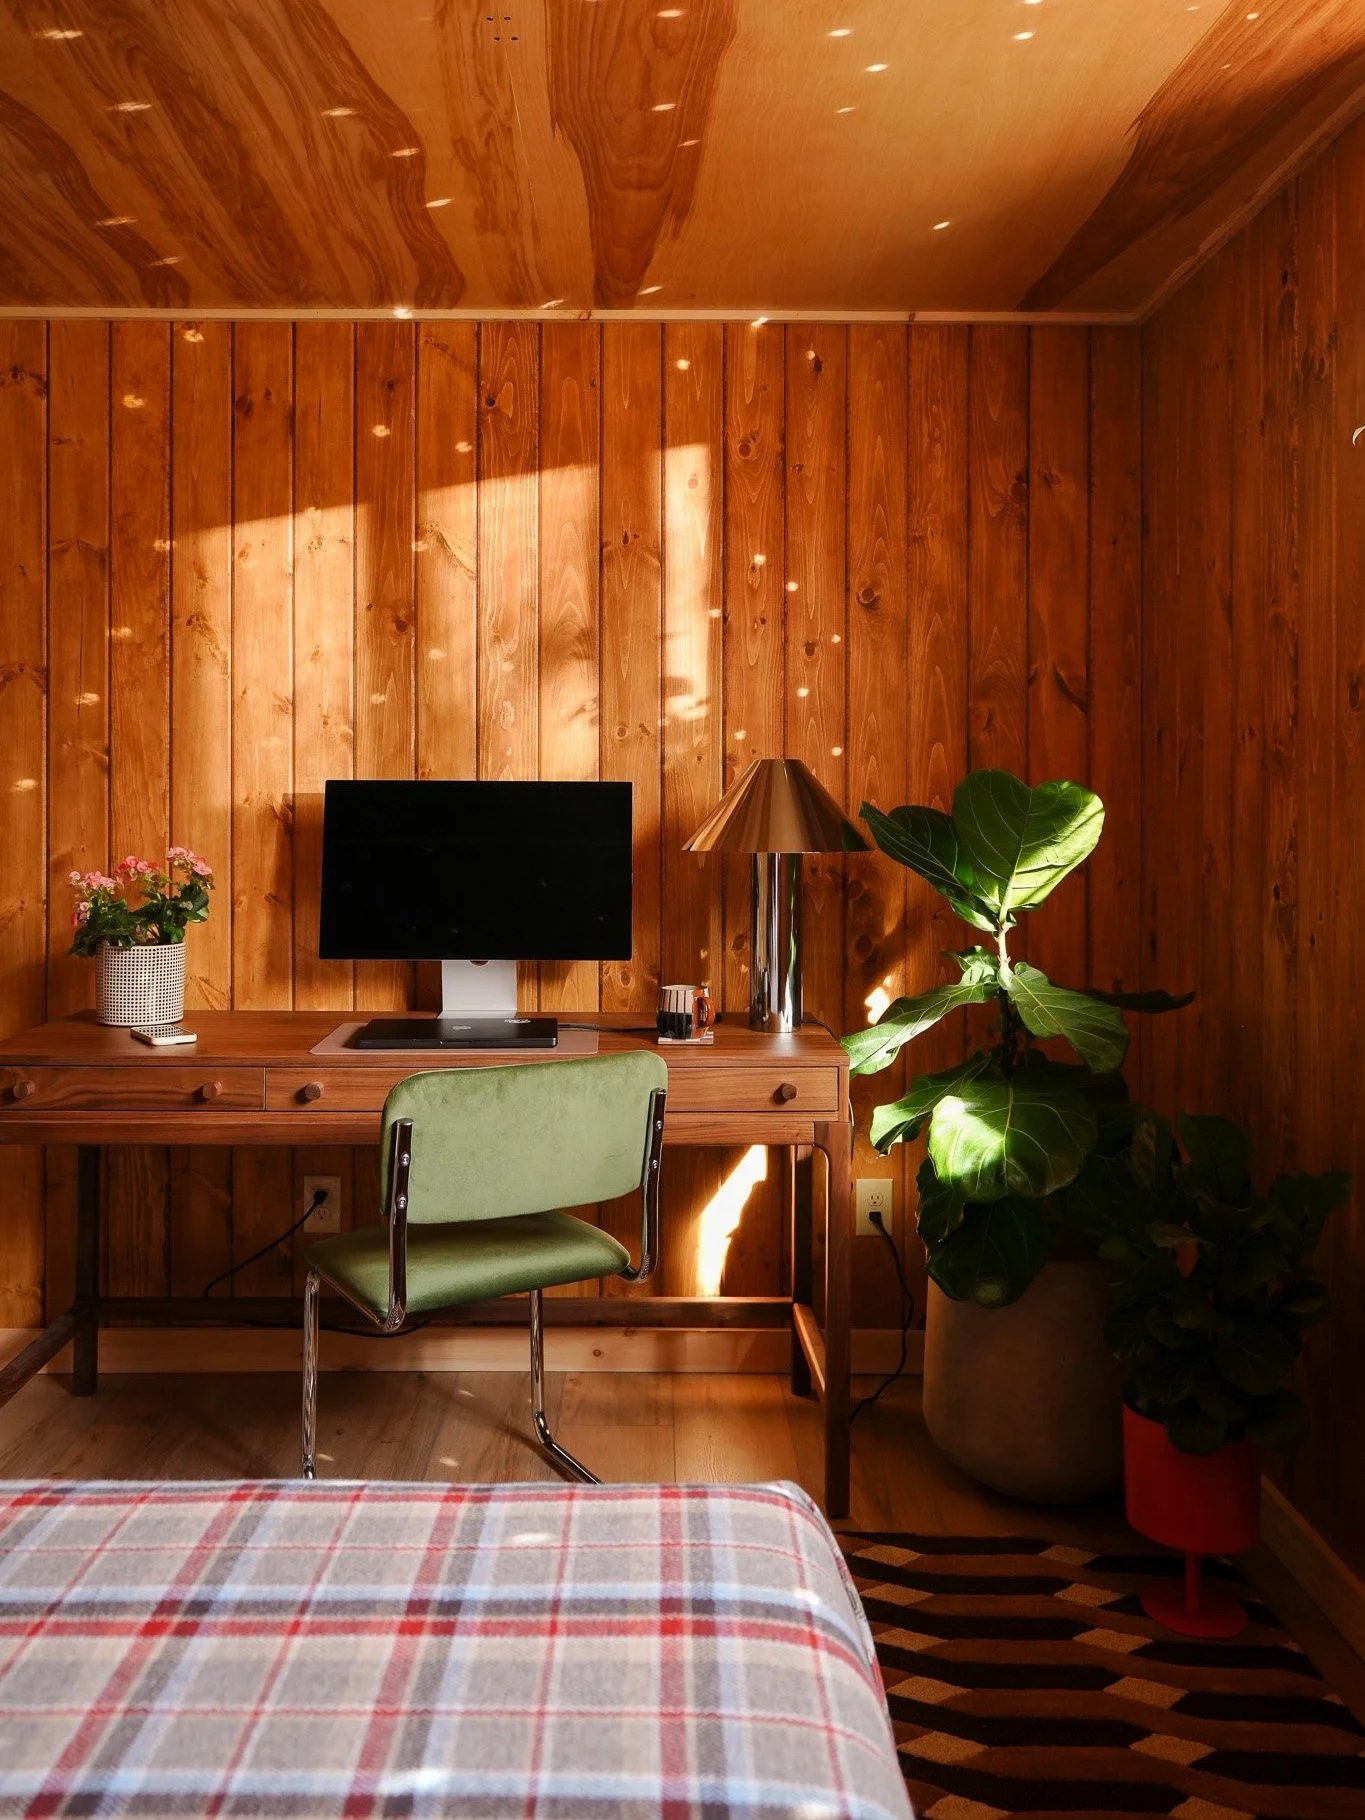
Decor and Furnishings
We’ve said it before and we hope we’ll get to say it again, but working with AllModern rules and their wide, but curated selection, helped us curate the perfect campy-cozy aesthetic.
For this room, our biggest goal was to find the perfect staple pieces that fit the vibe. We love the selection we decided on and we are so excited to watch this room continue to evolve as we layer in vintage pieces, art, and decor.


Final Thoughts
We really liked the first version of this space - but we love this version even more. This was always the plan, and it’s ok to iterate on your projects over time!
If you have any suggestions for art behind the bed, fire off in the comments!