Basement Cleanup Project
The speed at which a basement or garage can go downhill, is astonishing. It only takes a single project to devolve from fairly organized, to black hole status. And it’s not always for the lack of effort… it just gets away from you so easily and suddenly you've lost control of your basement. We have identified two primary issues that contribute to the chaos in our unfinished basement:

1. Things don’t have a designated home, and
2. If it does have a home it may be too organized … yes, you read that right.
The second reason, and possibly our most prevalent source of basement clutter, may be surprising. But, when you spend hours super organizing a shelf, maintaining that level organization from day to day is basically impossible.
Our Maine Cabin was built in 1975 and features tall ceilings. We are very lucky - built into a slope means that we have amazing windows and even a full walk out garage door on the backside. This certainly helps when stuck in the basement for the 4 days it took us to complete this project! For this project, the goal is to clean, paint, brighten, and organize the basement so that it is functional and maintainable - not just for Pinterest.
SOURCES & Costs
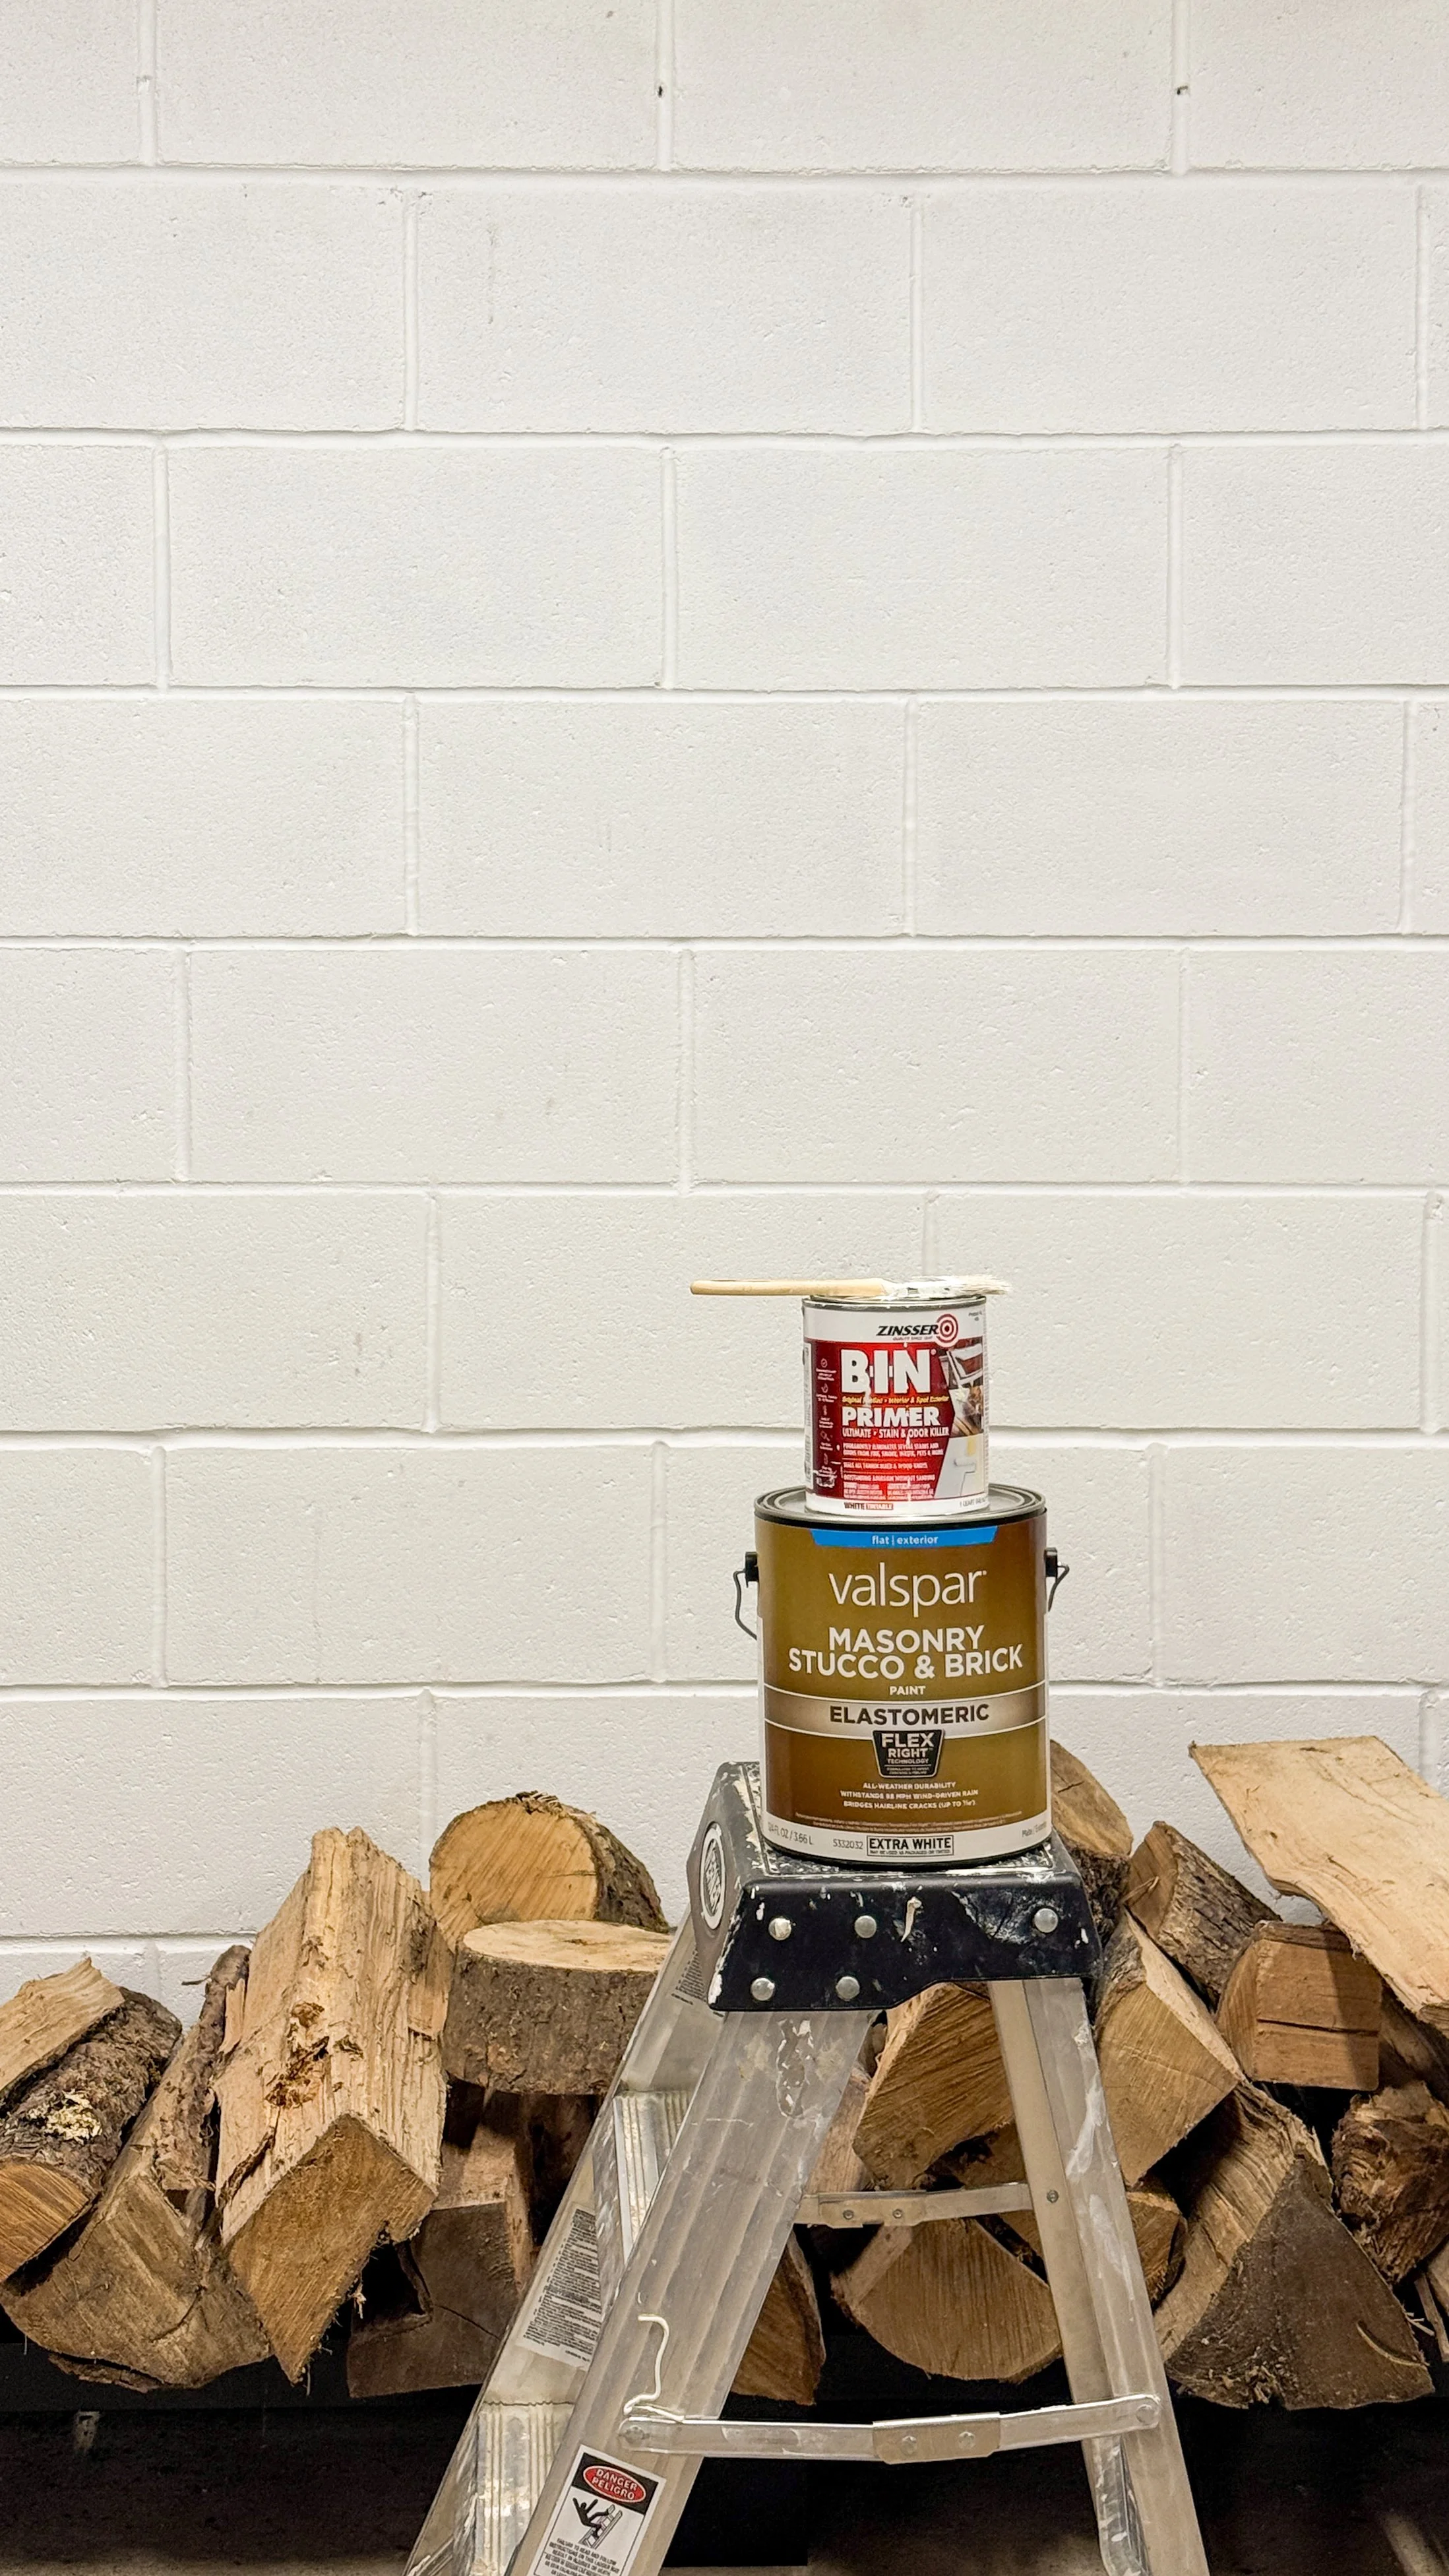
Paint
BIN Primer (for spot priming oil stains) | Valspar Interior/Exterior, Masonry, Stucco, & Brick in Satin
Lighting
Socket to Plug Converters | Utilitech 4-ft 4000 Lumens White Shop Light
Storage
Husky Industrial Shelving in 90”, 75”, and 65” variants | Kobalt X-large 24 Gallon Weatherproof Totes | Project Source Large 27 Gallon Black and Yellow Totes
Laundry Pedestals
Scratch & Dent Section at Lowes.
Rugs
Total Project Cost: ~$1,900
Disclosure: We just posted this Instagram Reel in partnership with Chase that features Pay Over Time®, which is a flexible tool that allows card members to break up eligible purchases of $100 or more into manageable payments. We really LOVE how the project turned out and wanted to create this post to link all of the resources.
Basement Paint
In our house, any foundation that makes contact with the soil, is poured concrete. We vacuumed this clean but decided against applying anything to the surface. We opted to keep this area natural because overtime, it would likely fail from moisture.
Above the poured foundation however, is cinder block. Now, cinder block is hollow in the middle and we do not anticipate having the same issues with moisture or water damage - so paint it is! There are also two areas in our basement where cinder block was used to create interior walls, from floor to ceiling, and we will be painting those too! The perfect opportunity to brighten things up.
Mouse Trails (or other Oil Stains)
We shared some of our basement clean up to our stories - specifically something we called “mouse trails” - and the response was… gross. It's definitely not the most fun part of the cleaning process. However, a lot of you have this issue in your own home, and many of you didn’t know where it came from - we’re actually glad we could share a little bit of the ugly, but real, side of a pretty DIY project! Mice get oil and dirt on their fur and as they race around your basement as part of their nightly routine, they leave behind a very gross, grease trail. Our first step was applying bleach and water to help clean this up.
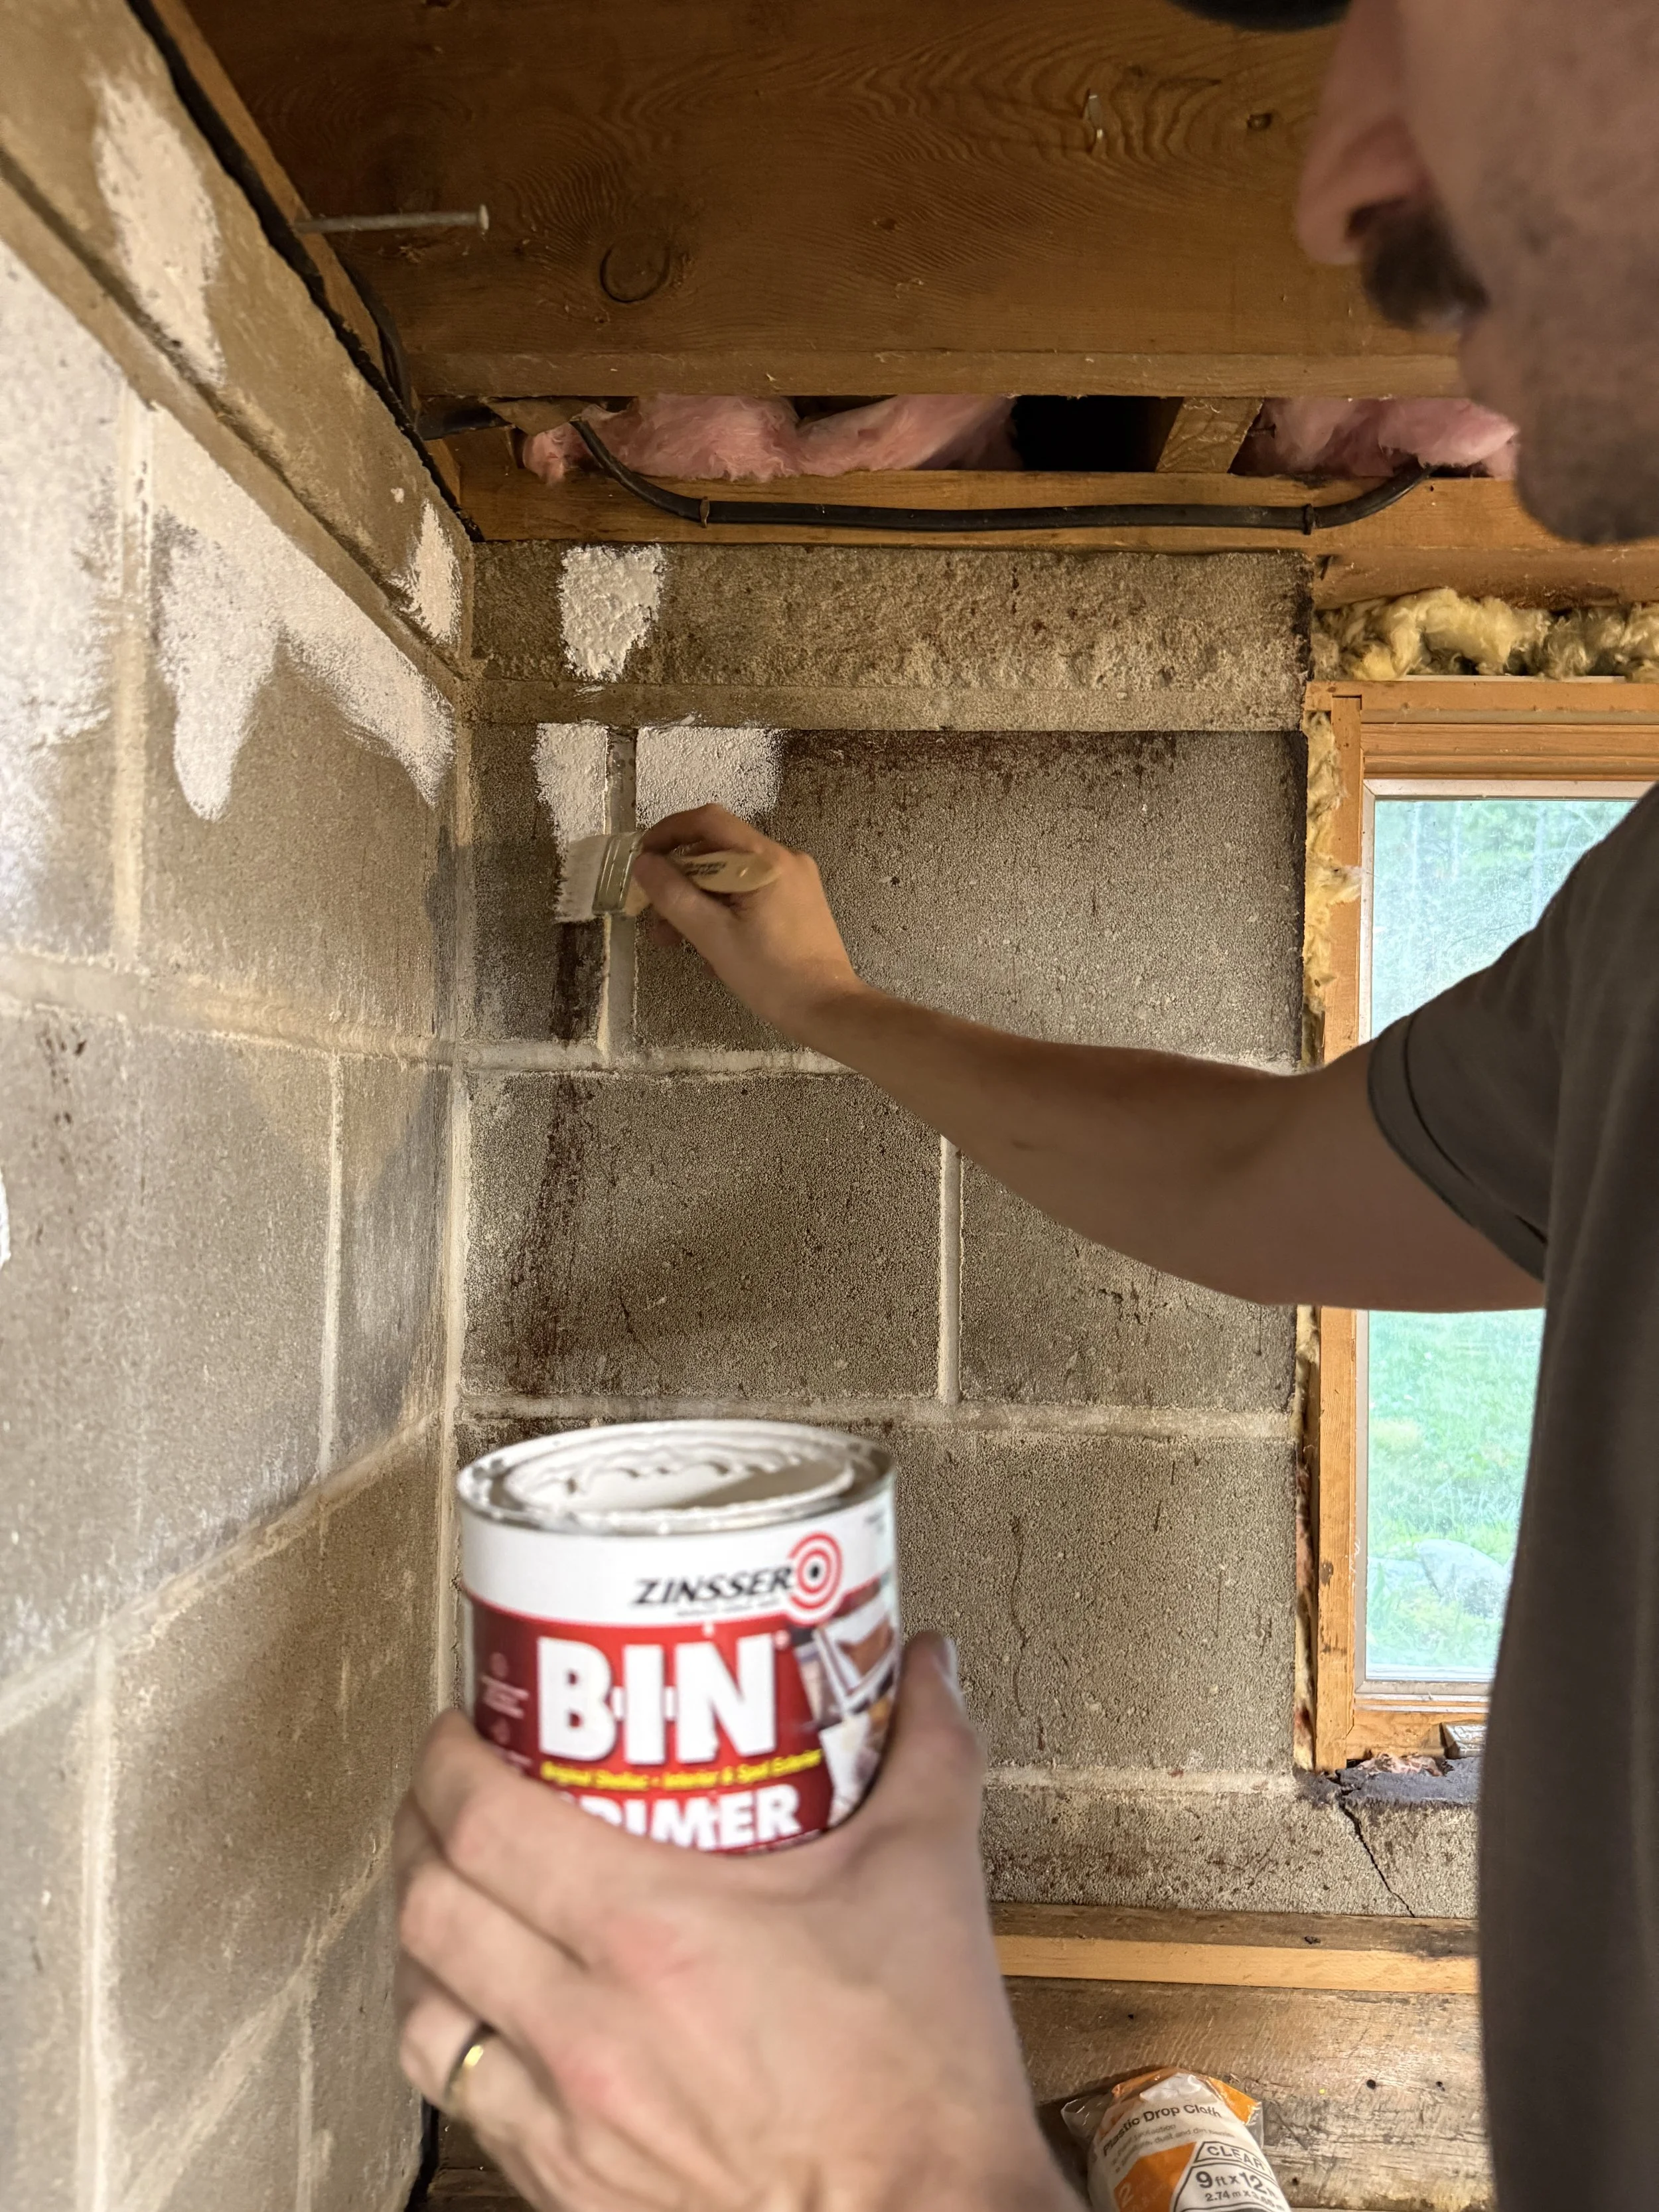
Spot Priming
No matter how much we cleaned these mouse trails, we knew they would likely still bleed through paint (we even tested it). Our solution was to spot prime with BIN Primer. This is an shellac based primer that helps seal the oil in, so it is less likely to bleed through. It worked really well, but we still had some breakthrough (maybe we should have spent more time cleaning). BIN Primer is also a bit watery so we would recommend a drop cloth!
Paint
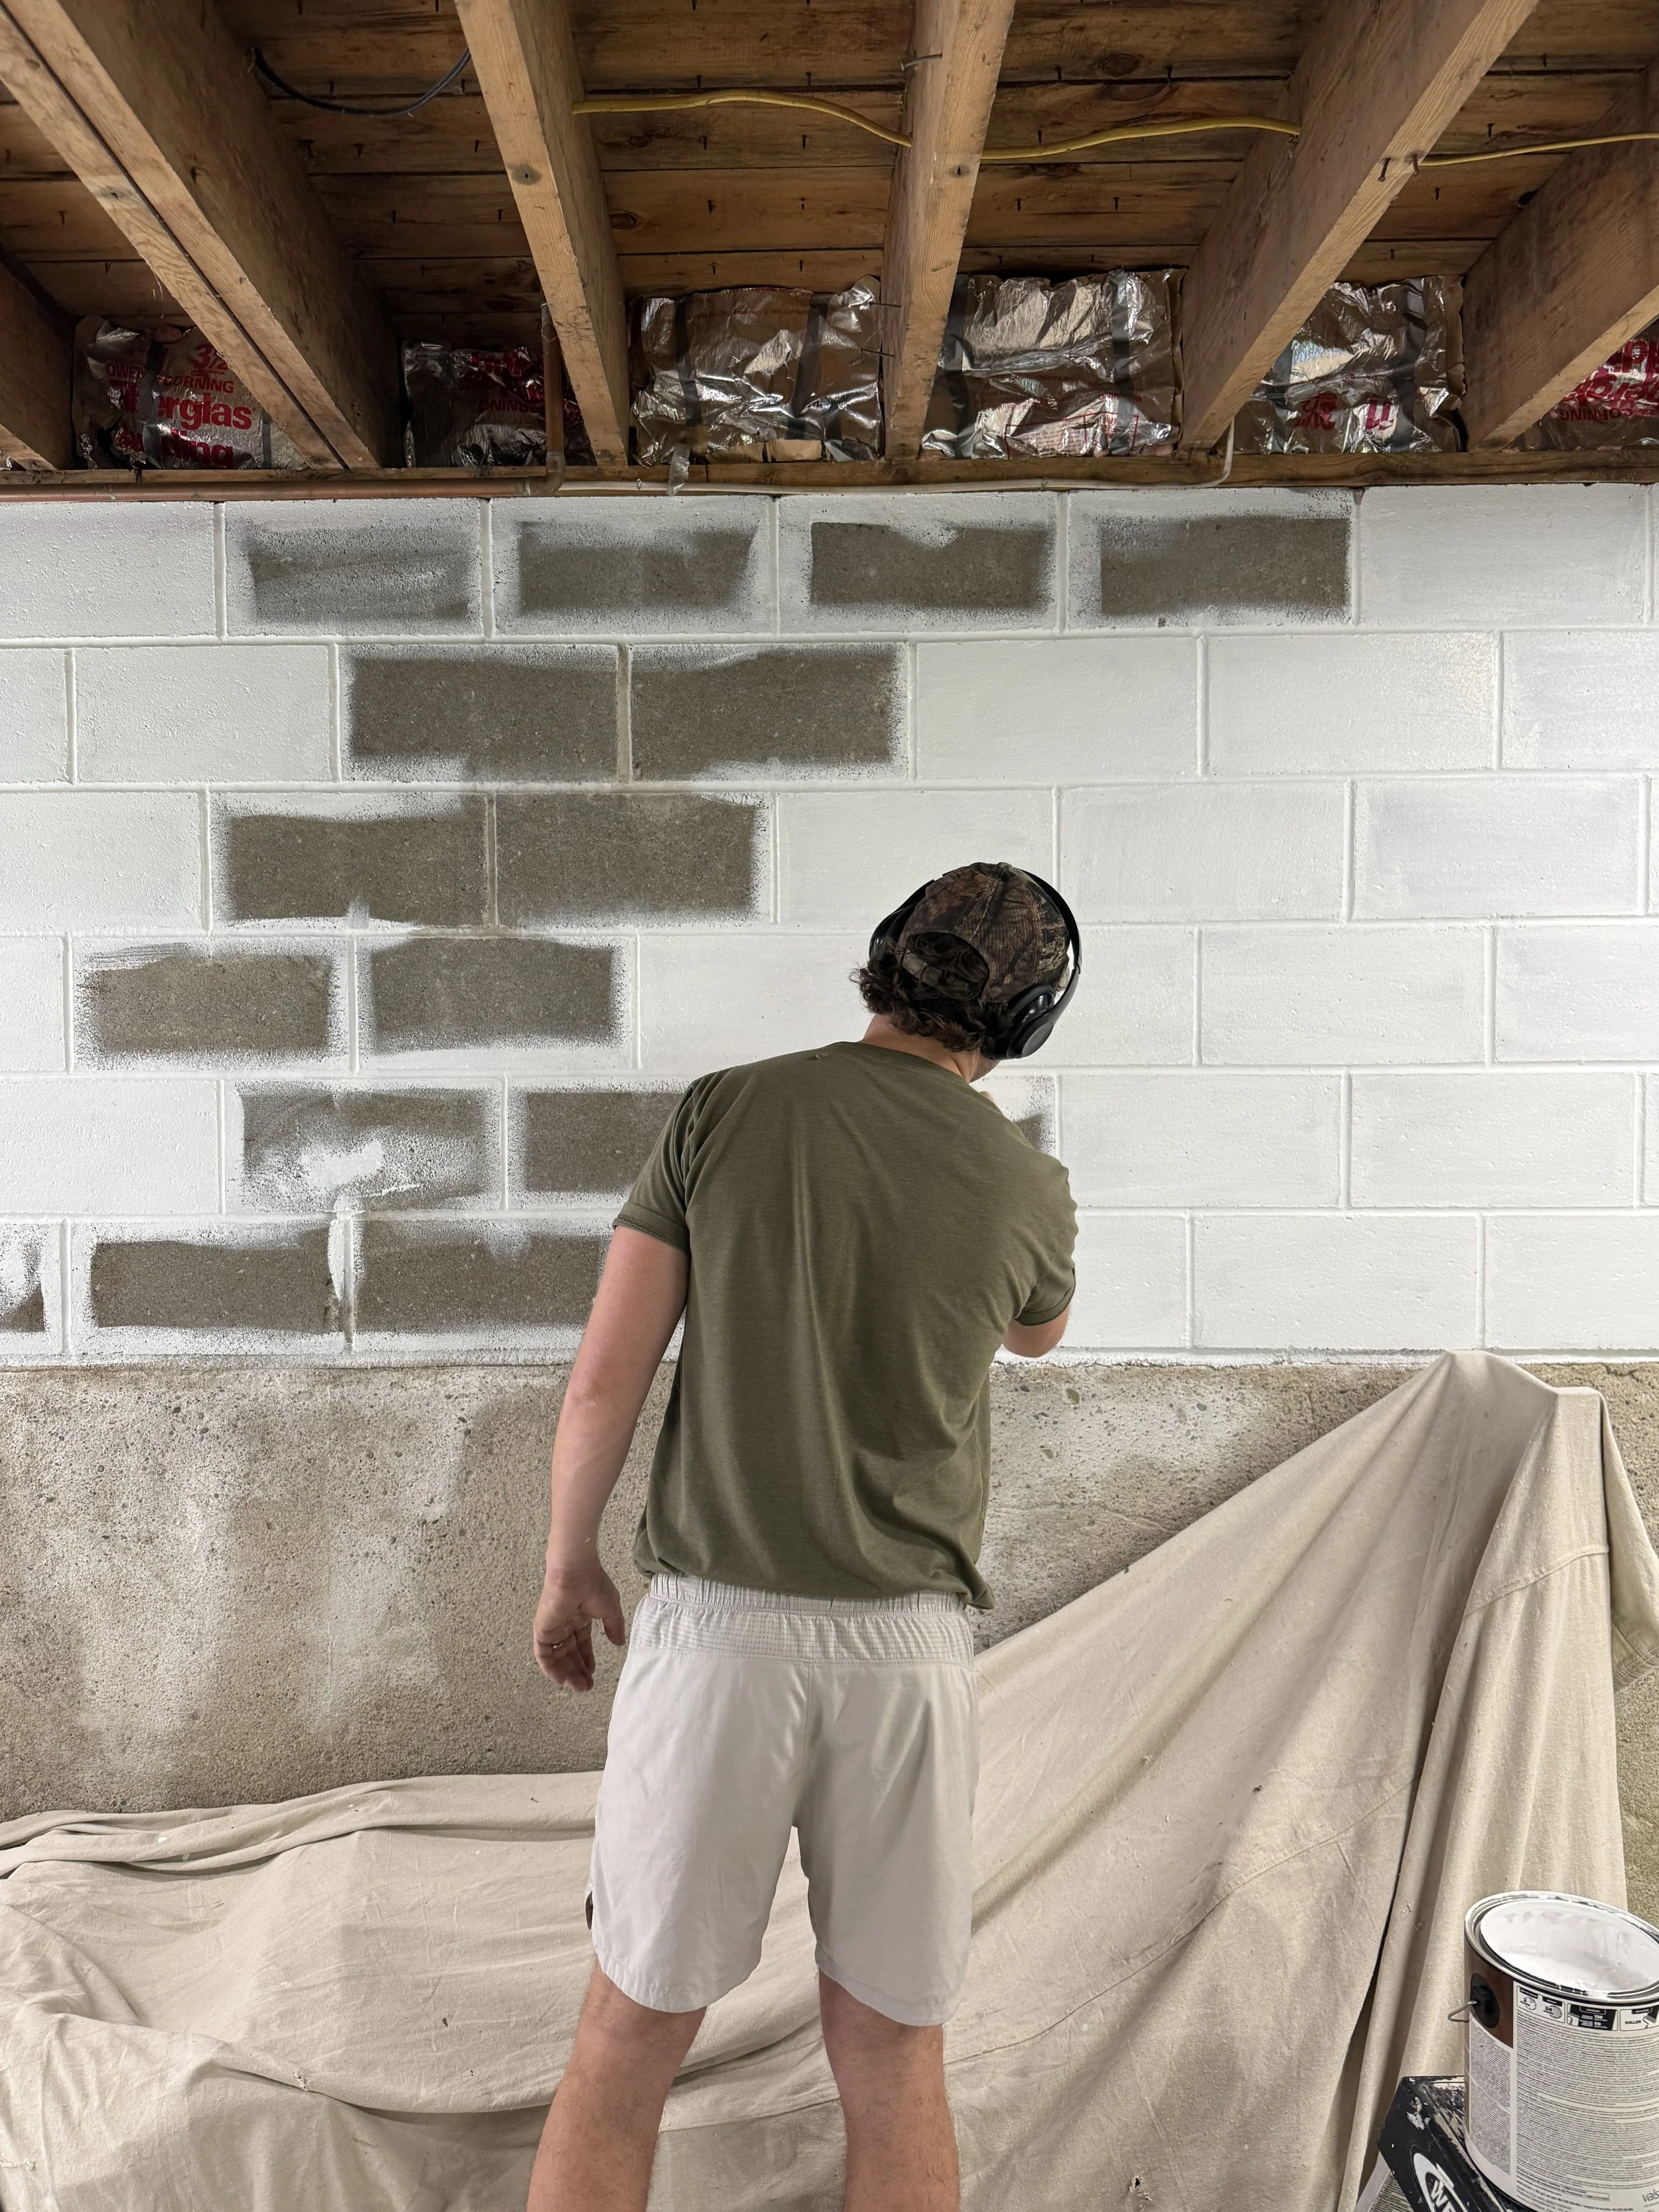
Once our BIN primer dried, we started with paint. We used Valspar Interior/Exterior, Masonry, Stucco, & Brick in Satin for the walls - this paint is tintable, but we opted to keep the Ultra White right out of the can. This paint is THICK, so we were sure to have them shake it for us on the day we planned to apply it. We used about 3 or 4 gallons for the entire project.
We started by painting the edges with a brush, then the grout lines, then the face of the blocks. The first coat was certainly the most intensive and we tried both the brush and rolling - this is a choose your own adventure kinda moment. The block is very porous so we wanted to make sure to get all of the nooks and crannies, the perfect time to start an audio book (Stephen is listening to IT by Stephen King)!
We found that a second coat is required and rolling was enough to get the coverage we needed - using a brush to grab any spots the roller may have missed.
LightING
We really wanted to brighten things up down here to make it feel more like a workshop, and less like a basement. This is the perfect use for LEDs and there are plenty of options out there.
Because we wanted to do this project in just a few days, and we have a very large basement, we thought it better to utilize the existing light sockets rather than re-hardwiring everything. We used these nifty little socket converters to plug our new LED shop lights into. Plus - the existing light switches would continue to work!
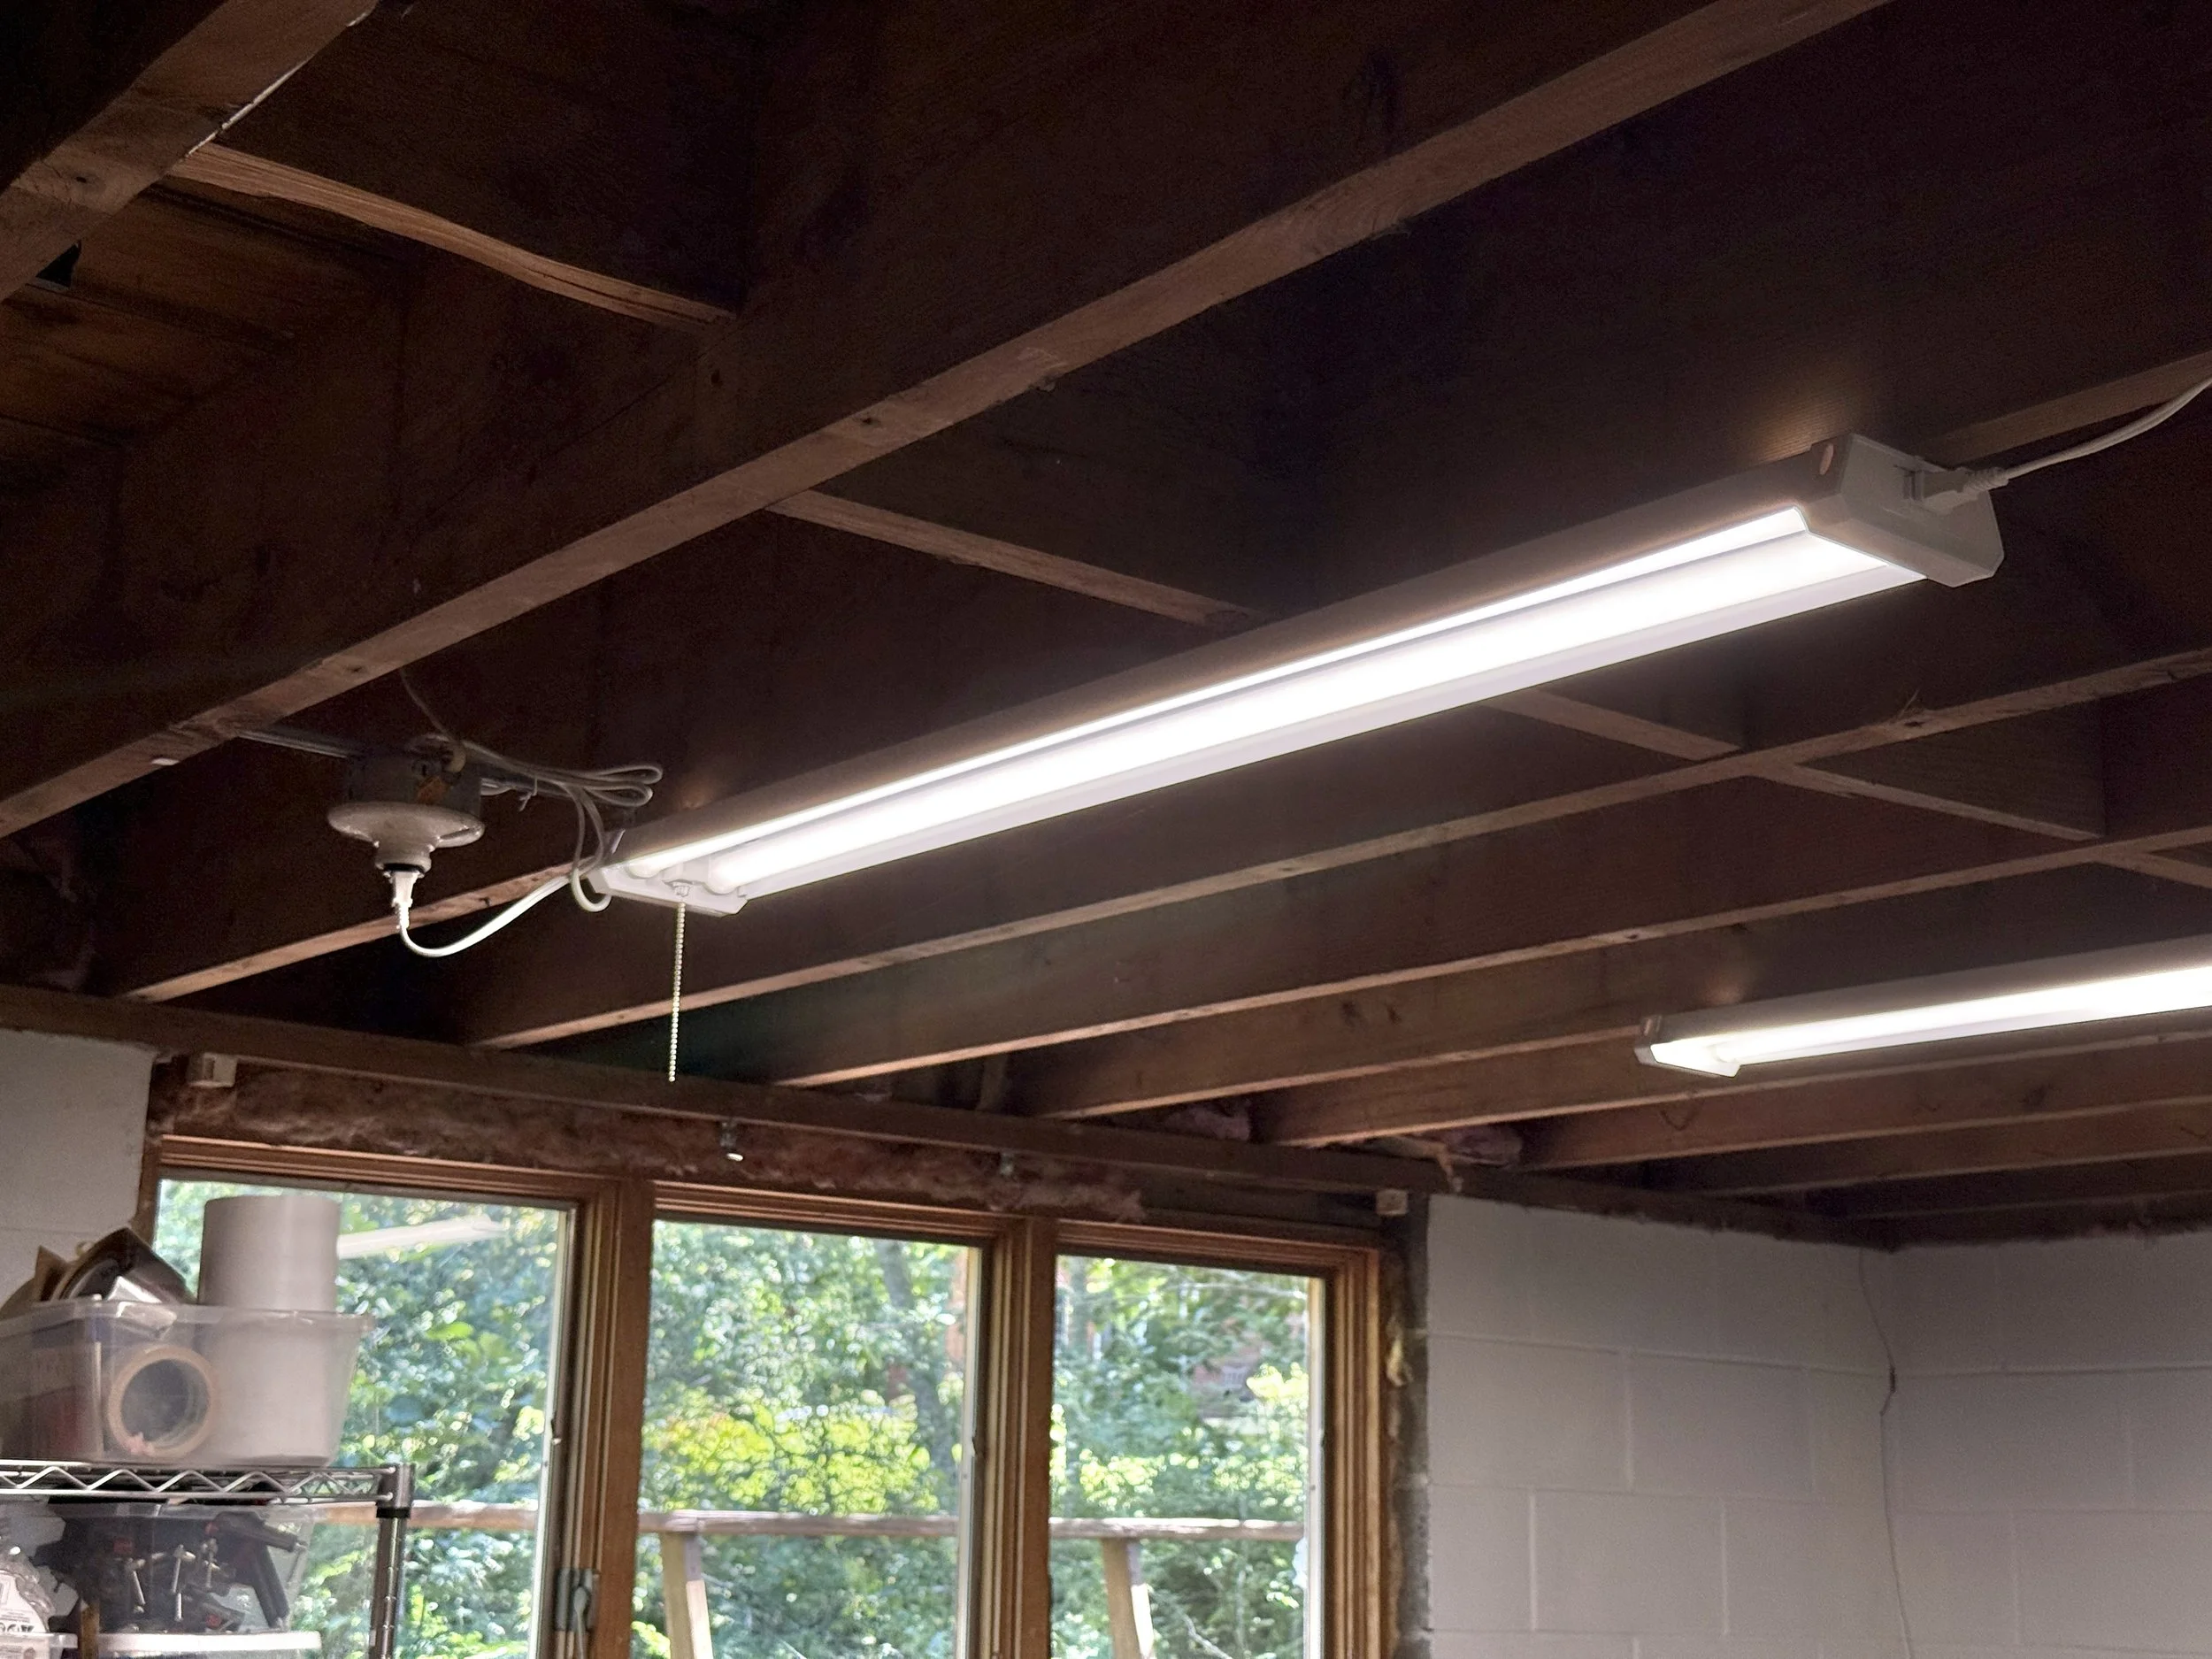
For shop lights, we headed to Lowes and looked around. These 4ft plug in shop lights were perfect, and could be chained together. That meant for each socket, we could plug in 2-3 shop lights to really brighten it up!
In total, we used 14 of these!


Storage
We’re going to cut right to the chase here (get it? Thanks again Chase Pay Overtime) - buying bins is a great way to store things from seasonal items to extra linens. But if you are anything like us, this means you have piles of bins that quickly become a disaster. Inevitably I always seem to need something from the bottom and pull it all out - without the patience to put it all back. We needed shelving, badly.
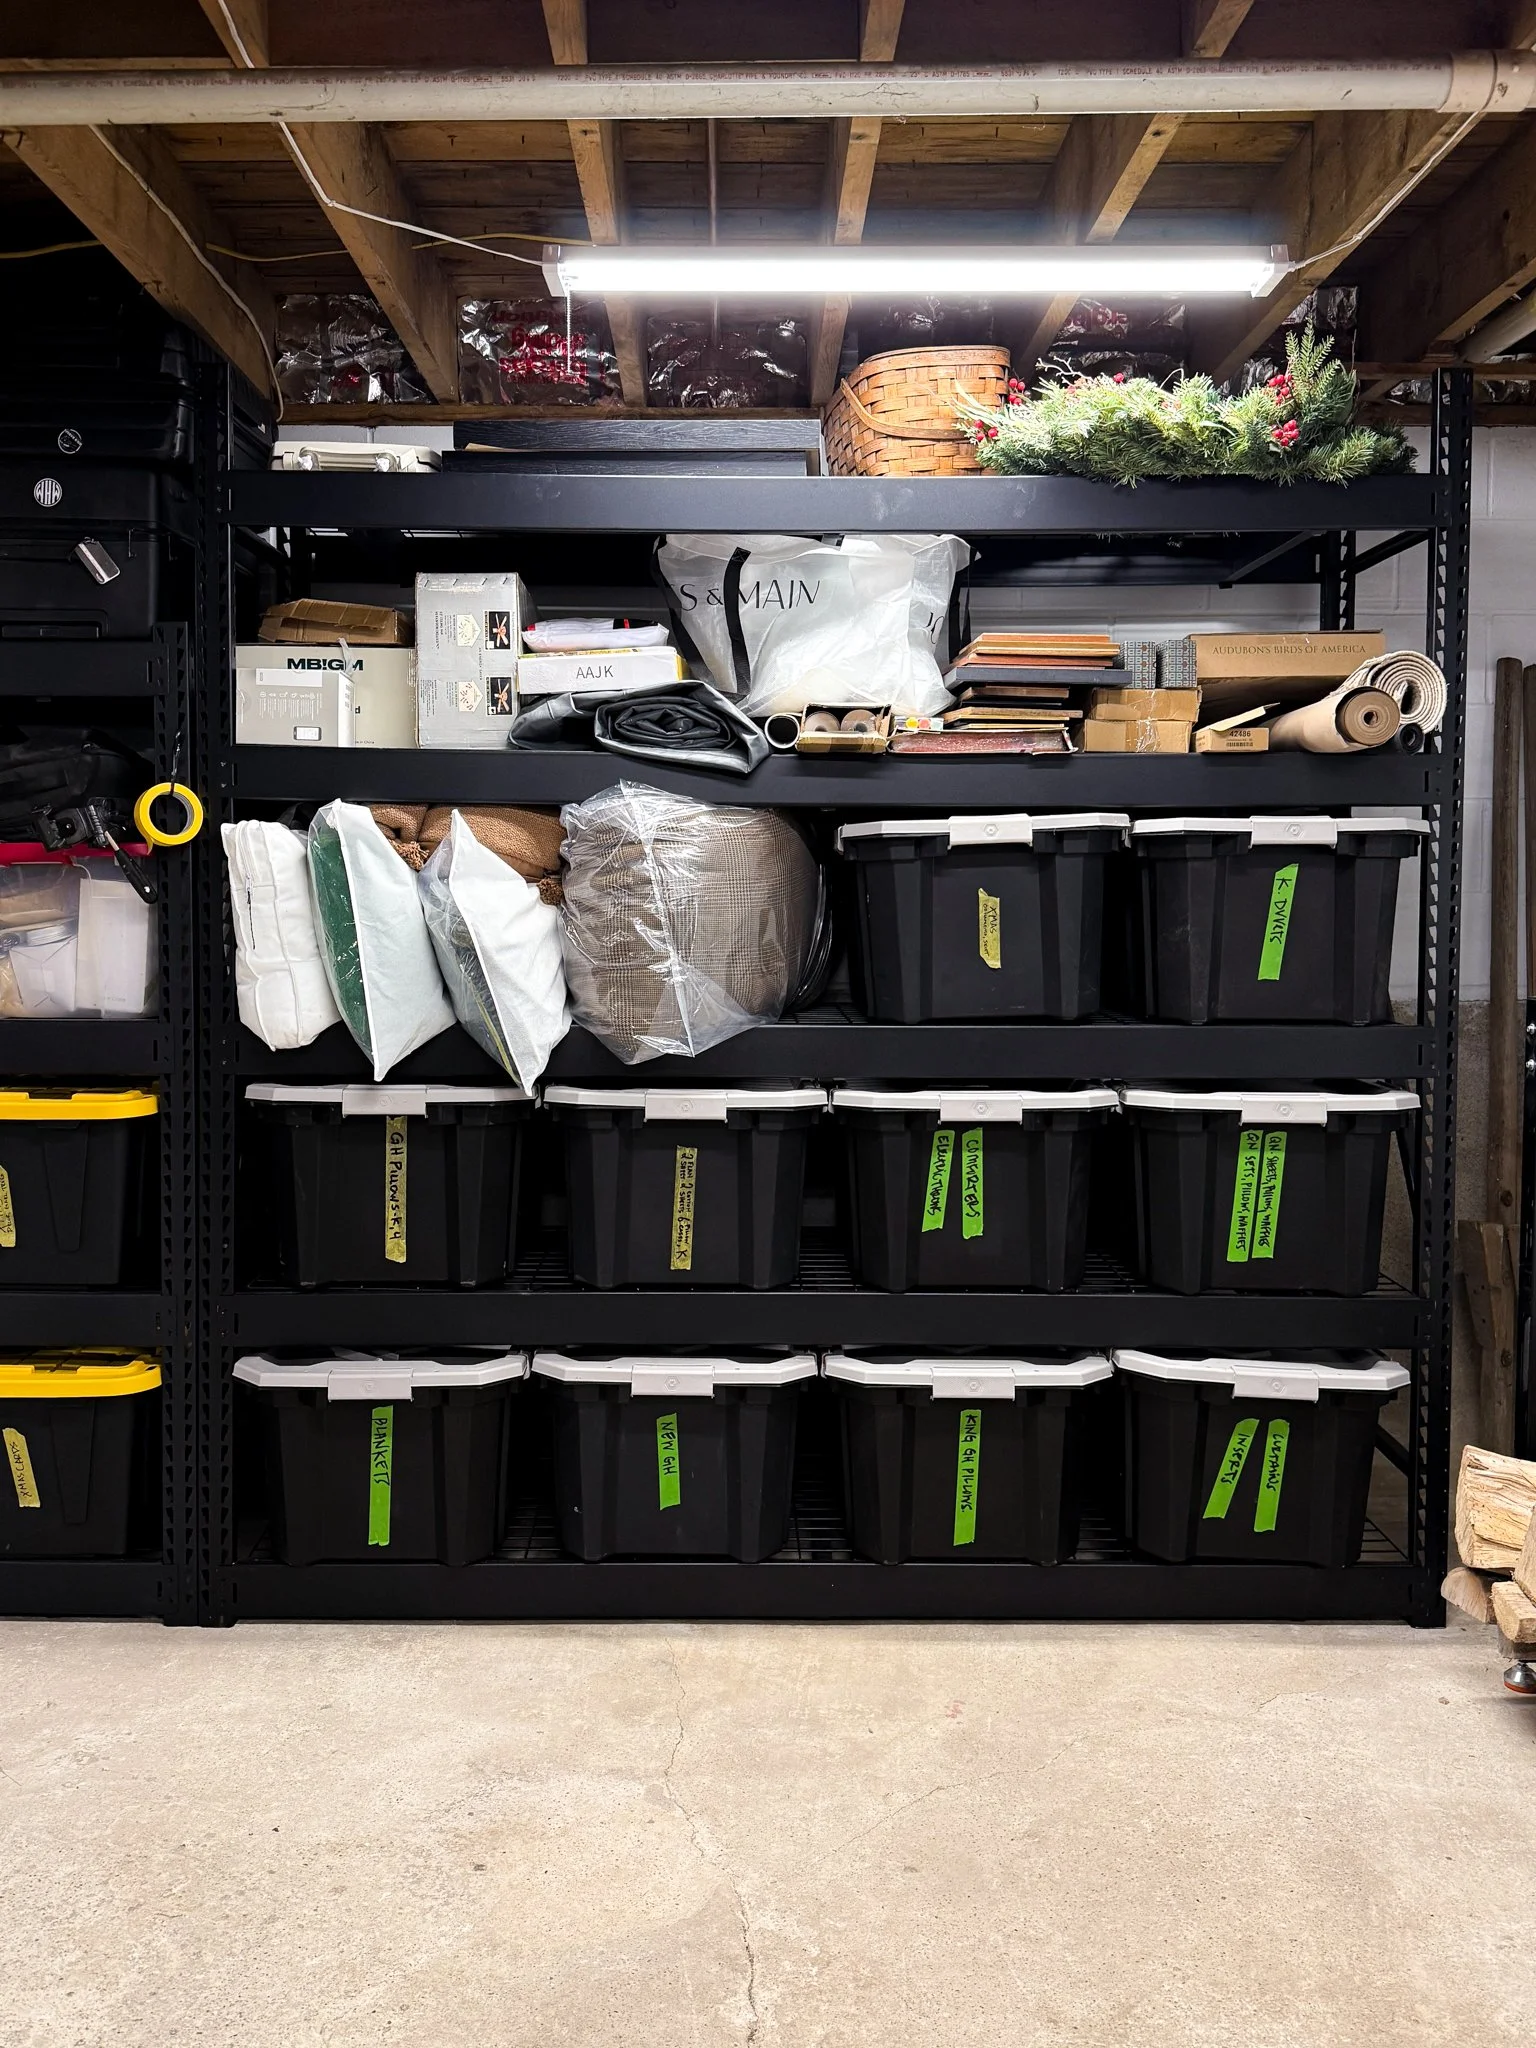


Shelves
In terms of storage solutions, we had two missions. First we wanted something large and industrial - this shelf will be in place for a long time and it needs to be able to hold A LOT. Secondly, we wanted to make sure that it held our new bins efficiently and provided easy access to everything. We actually ended up bringing our new bins into Home Depot, so that we could test some shelving units out.
We landed on these Husky Industrial Shelves that come in various sizes. We tested out all 3 options, and quickly realized that the 90” length option was the most efficient for storing bins - it can hold 16+ bins! We used the 75” shelf to extend our run - making a total of 165” of storage! It didn’t end there either, we bought the 65” shelf to hold tools and other bulky gear. We learned that when in doubt, it's a good idea to go bigger because you'll be surprised at how quickly the storage unit fills up!
We are very, very happy with these (and prefer them over those tall metal racks).
BINS
While clear bins allow you to see what’s inside, they also look messy and tend to be a lot more expensive. We opted for two bin types - one that is waterproof, and one that is cheap. We’re using the waterproof, sealed plastic bins for off-season linens and bedding, and then things like holiday decorations in the cheaper bins. Now, everything has a home and we can avoid our storage areas becoming more like a dumping ground. In order to know what is inside we used painters tape and a sharpie - because we don’t have the time or patience for a label maker.
Even though we have a grand total of 165” of storage, it has filled up so quickly! Somehow when you organize the basement, the other parts of your house also get more organized now that things can have a “home”. How do we have so much stuff??


Final Thoughts
Cleaning out your basement is probably one of those to-do list items that you keep pushing further out. But, when you do finally do it, it feels SO good. It’s also kind of lower-stakes design - it doesn’t have to be beautiful. Anything is better than nothing!