The Maine Kitchen Design
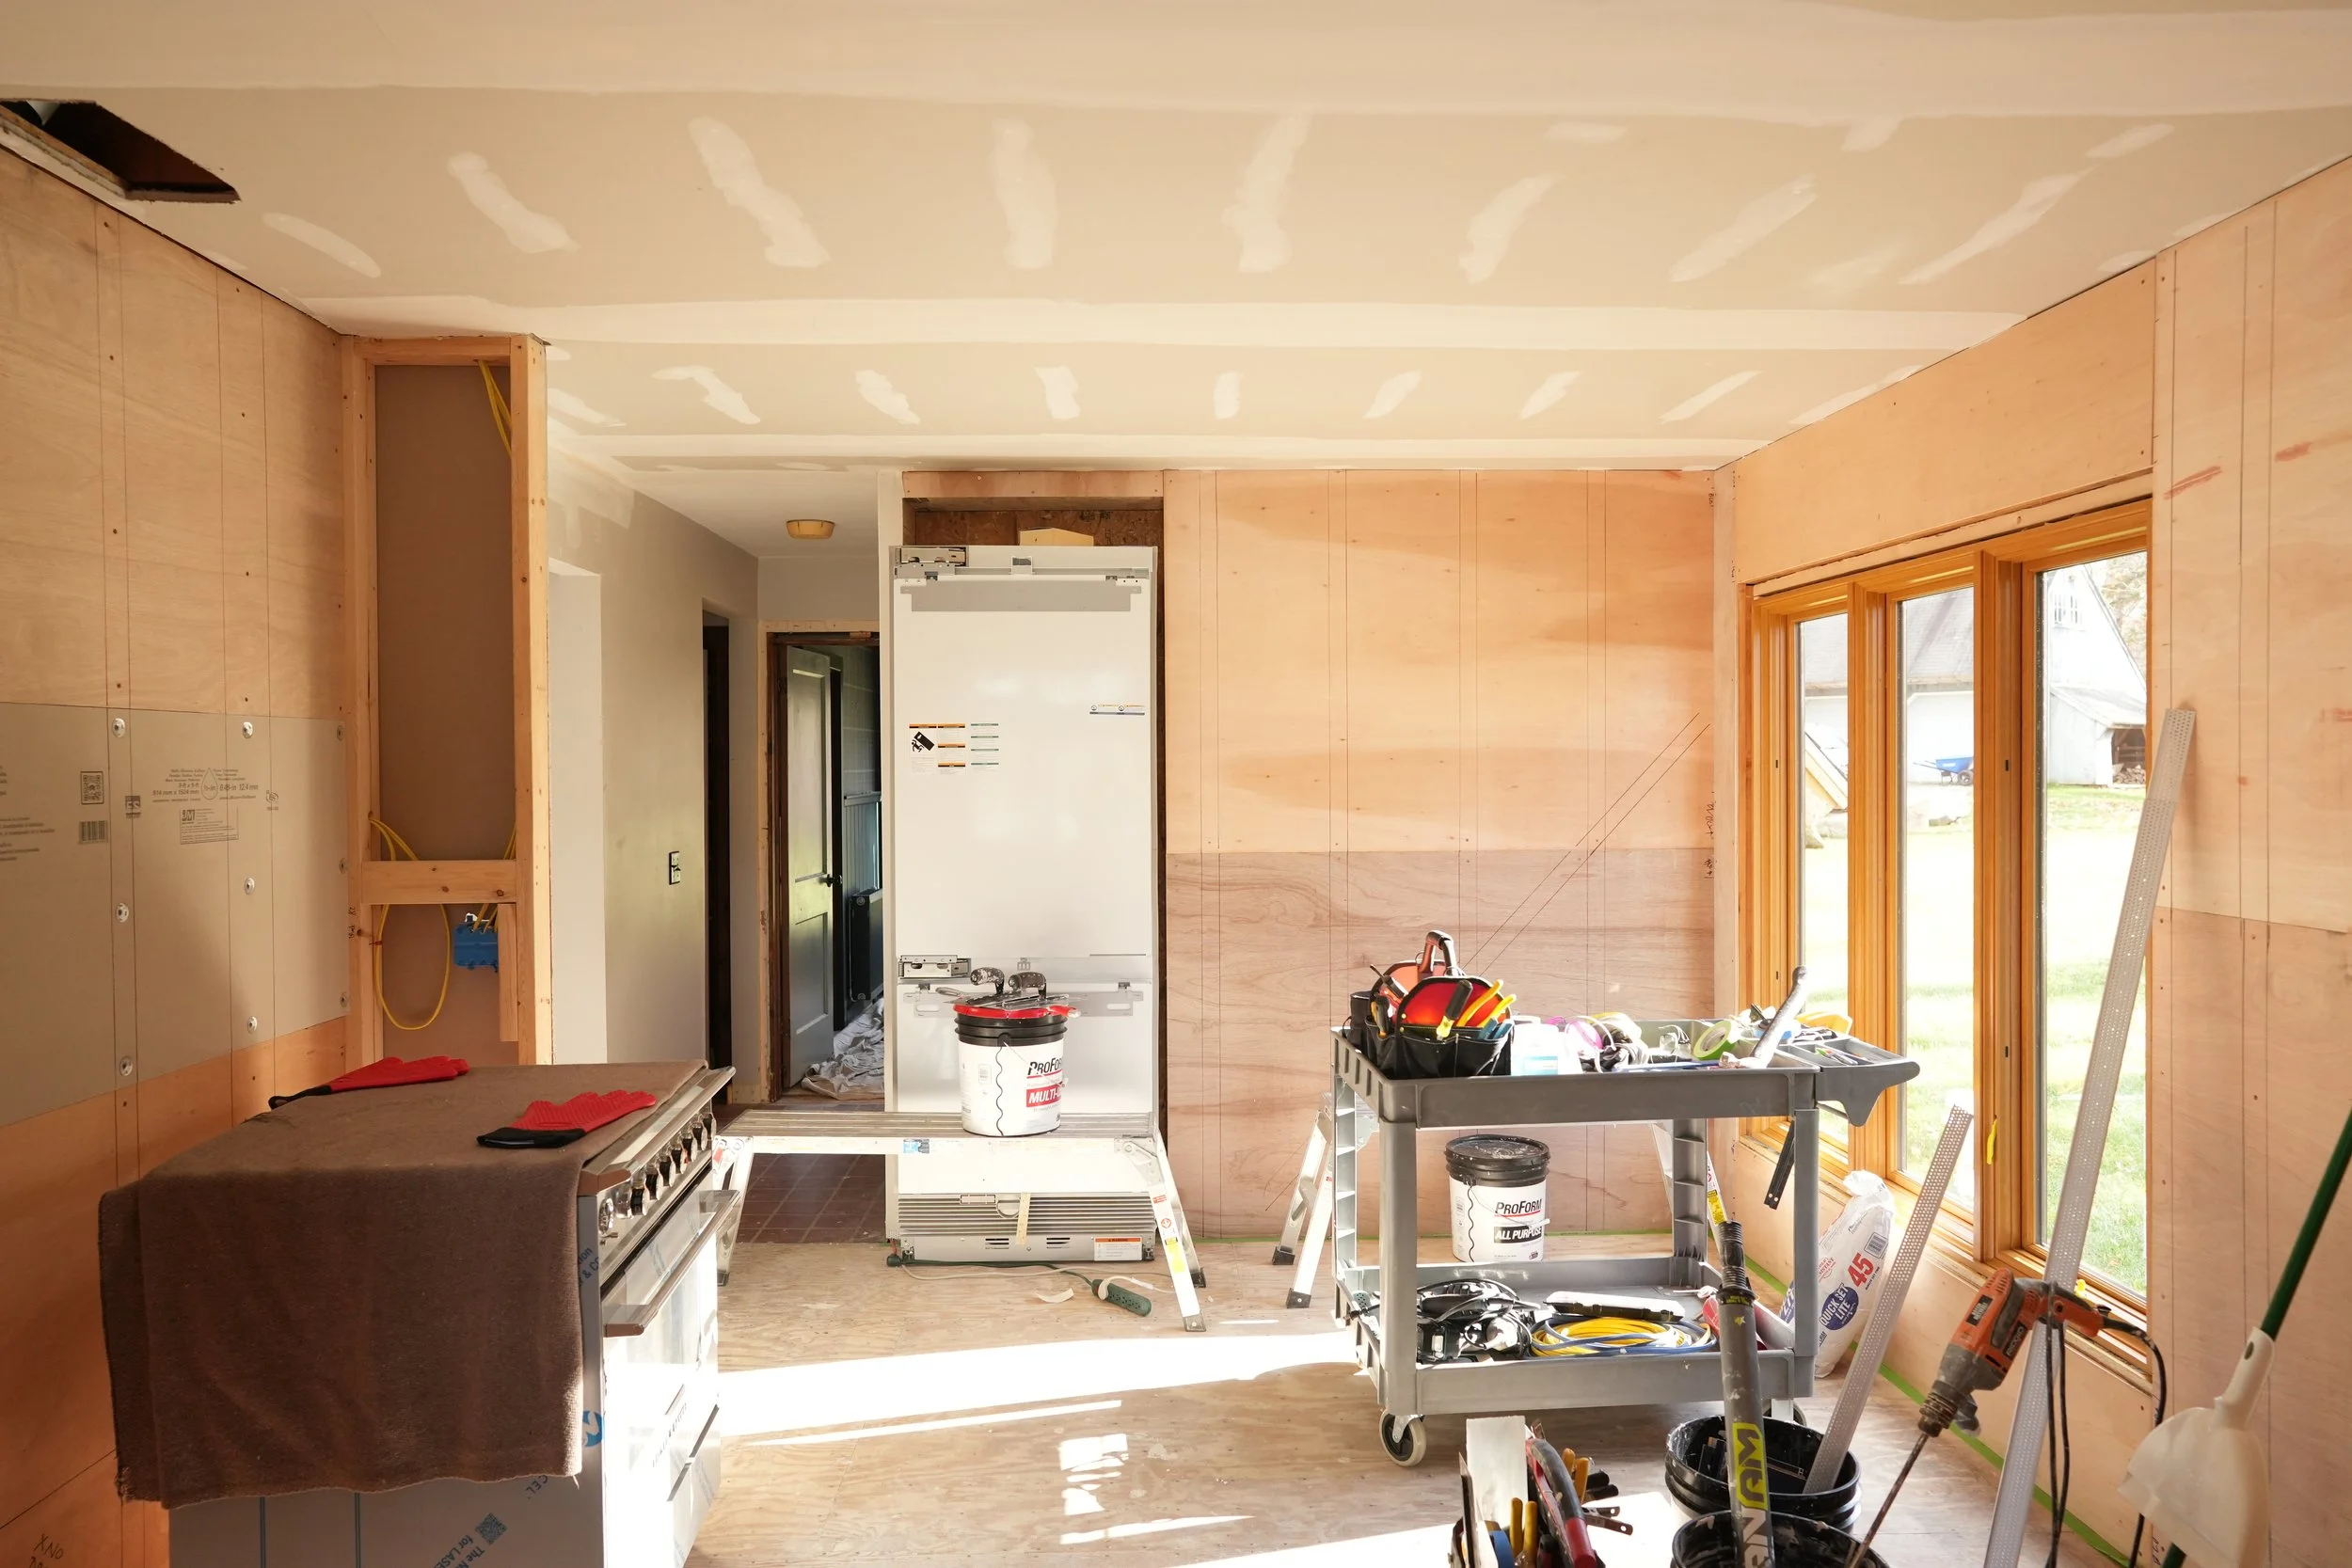
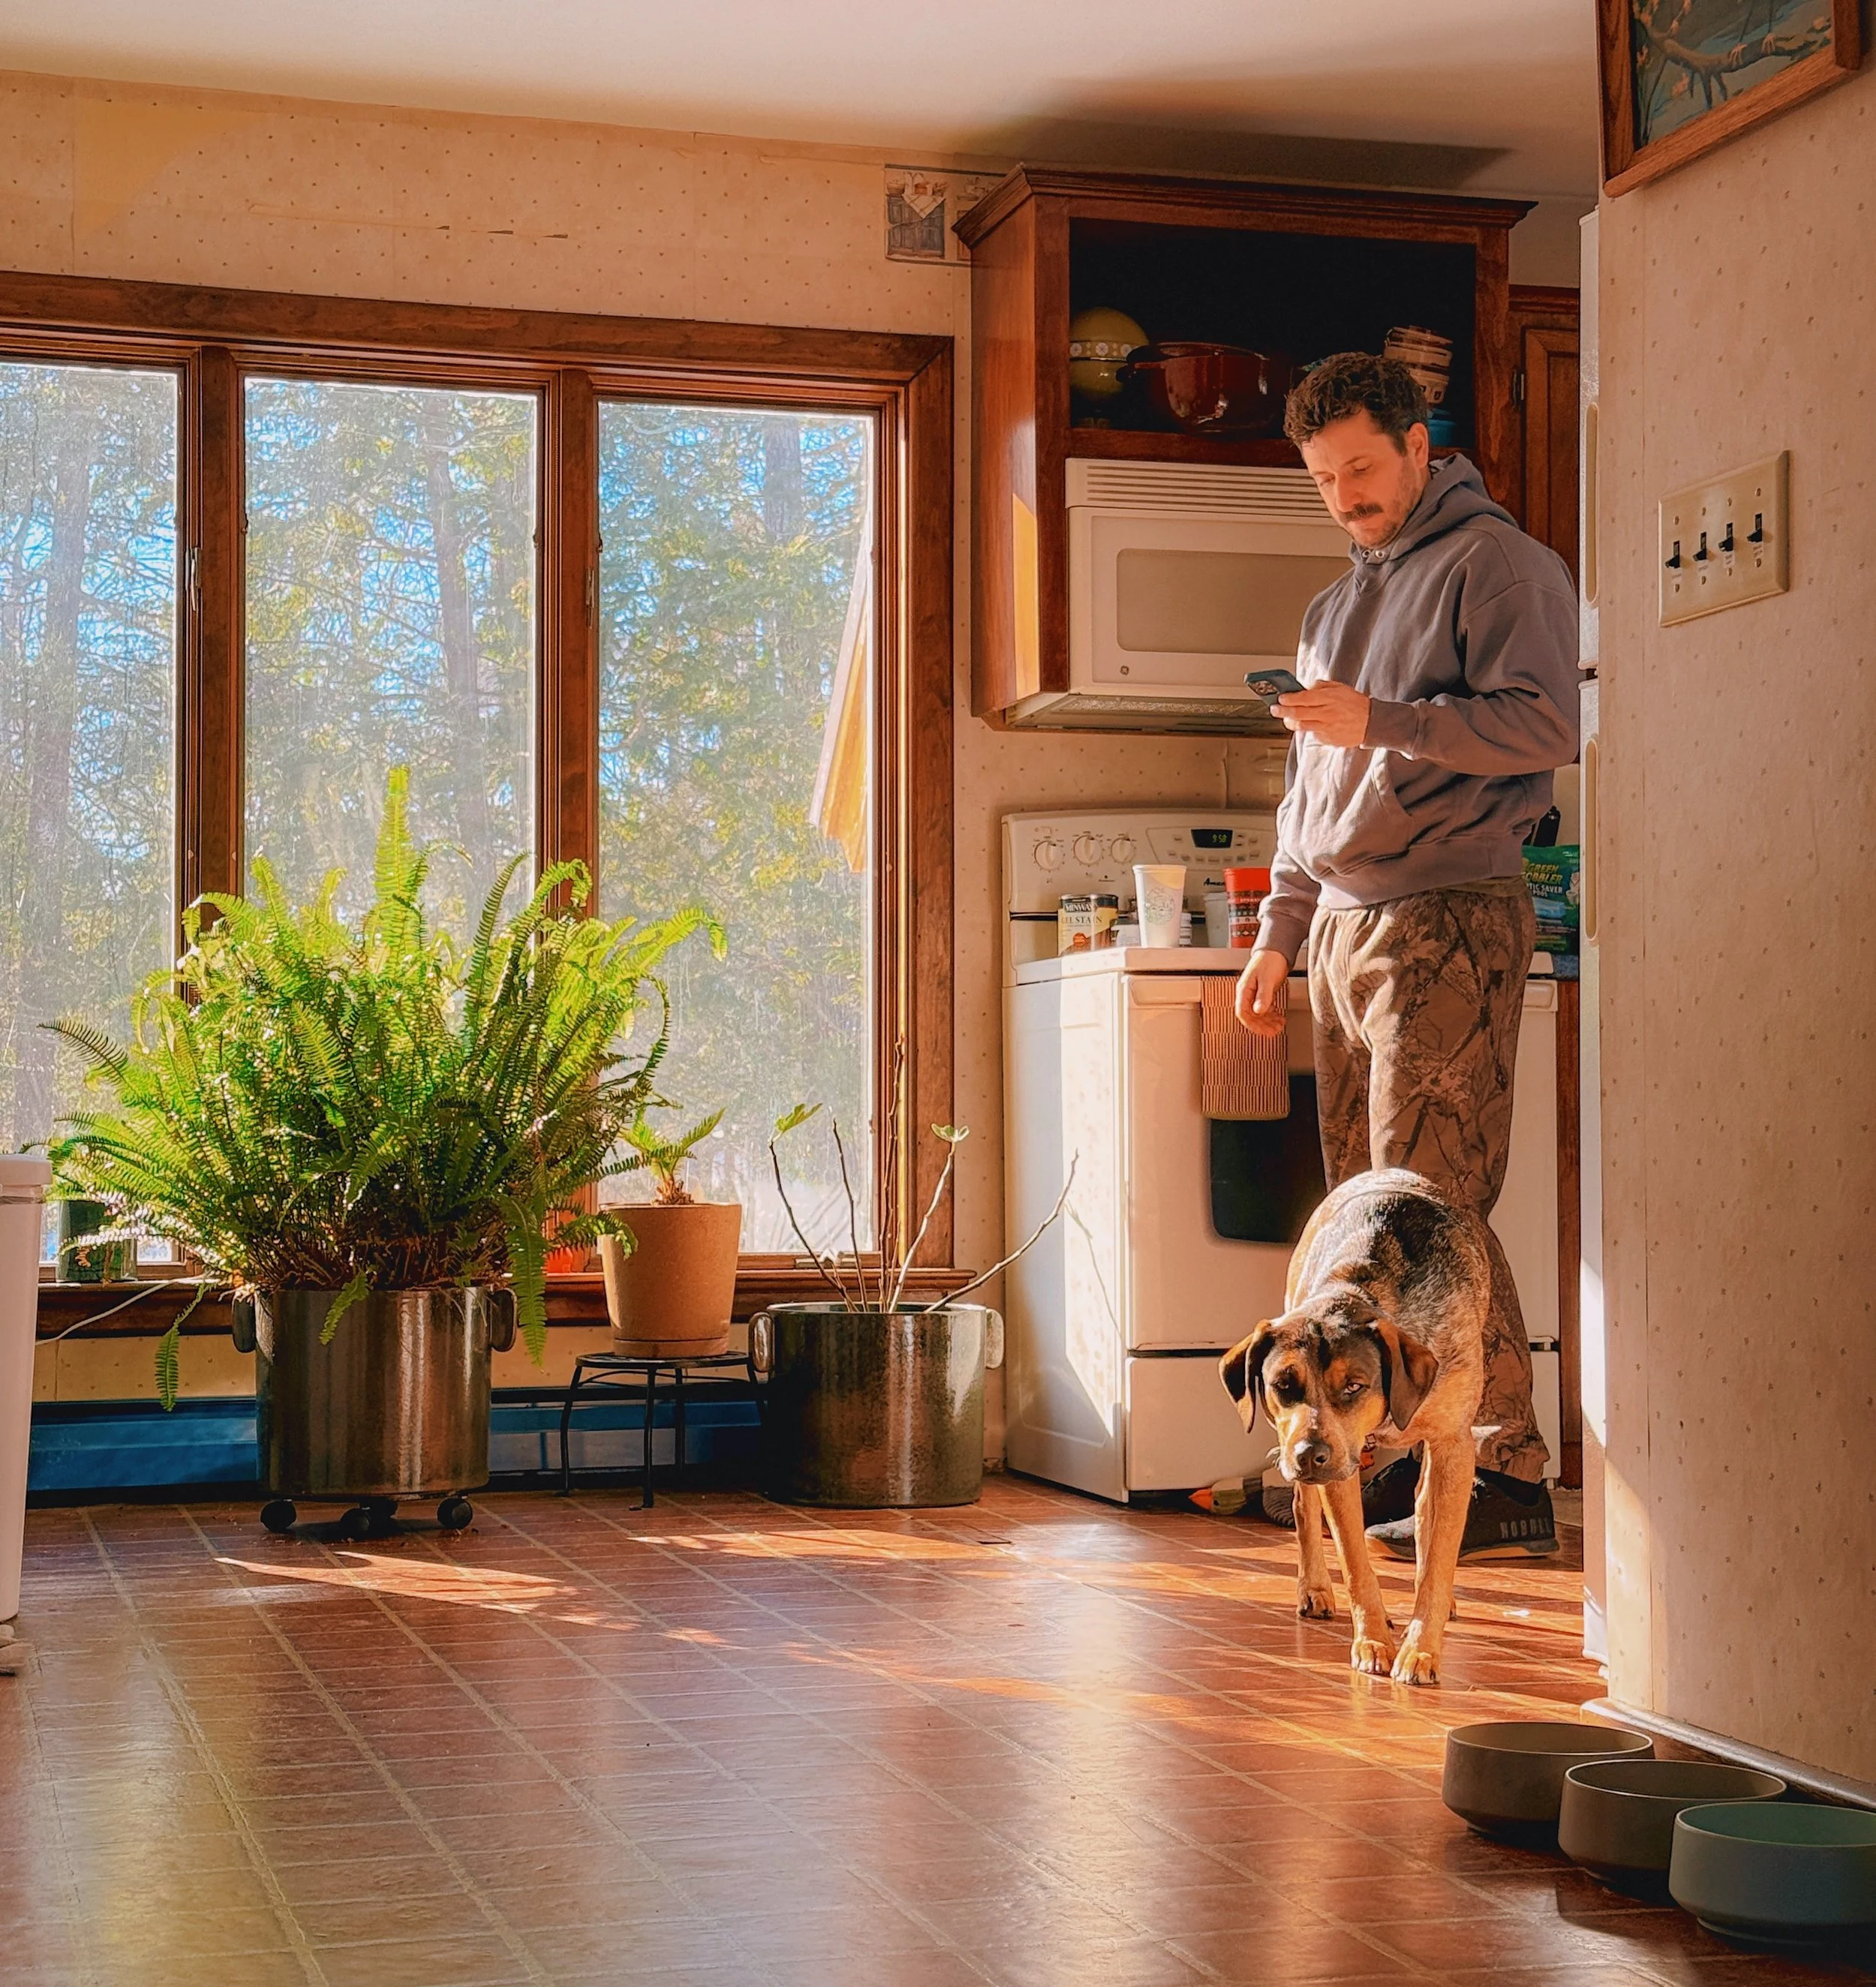
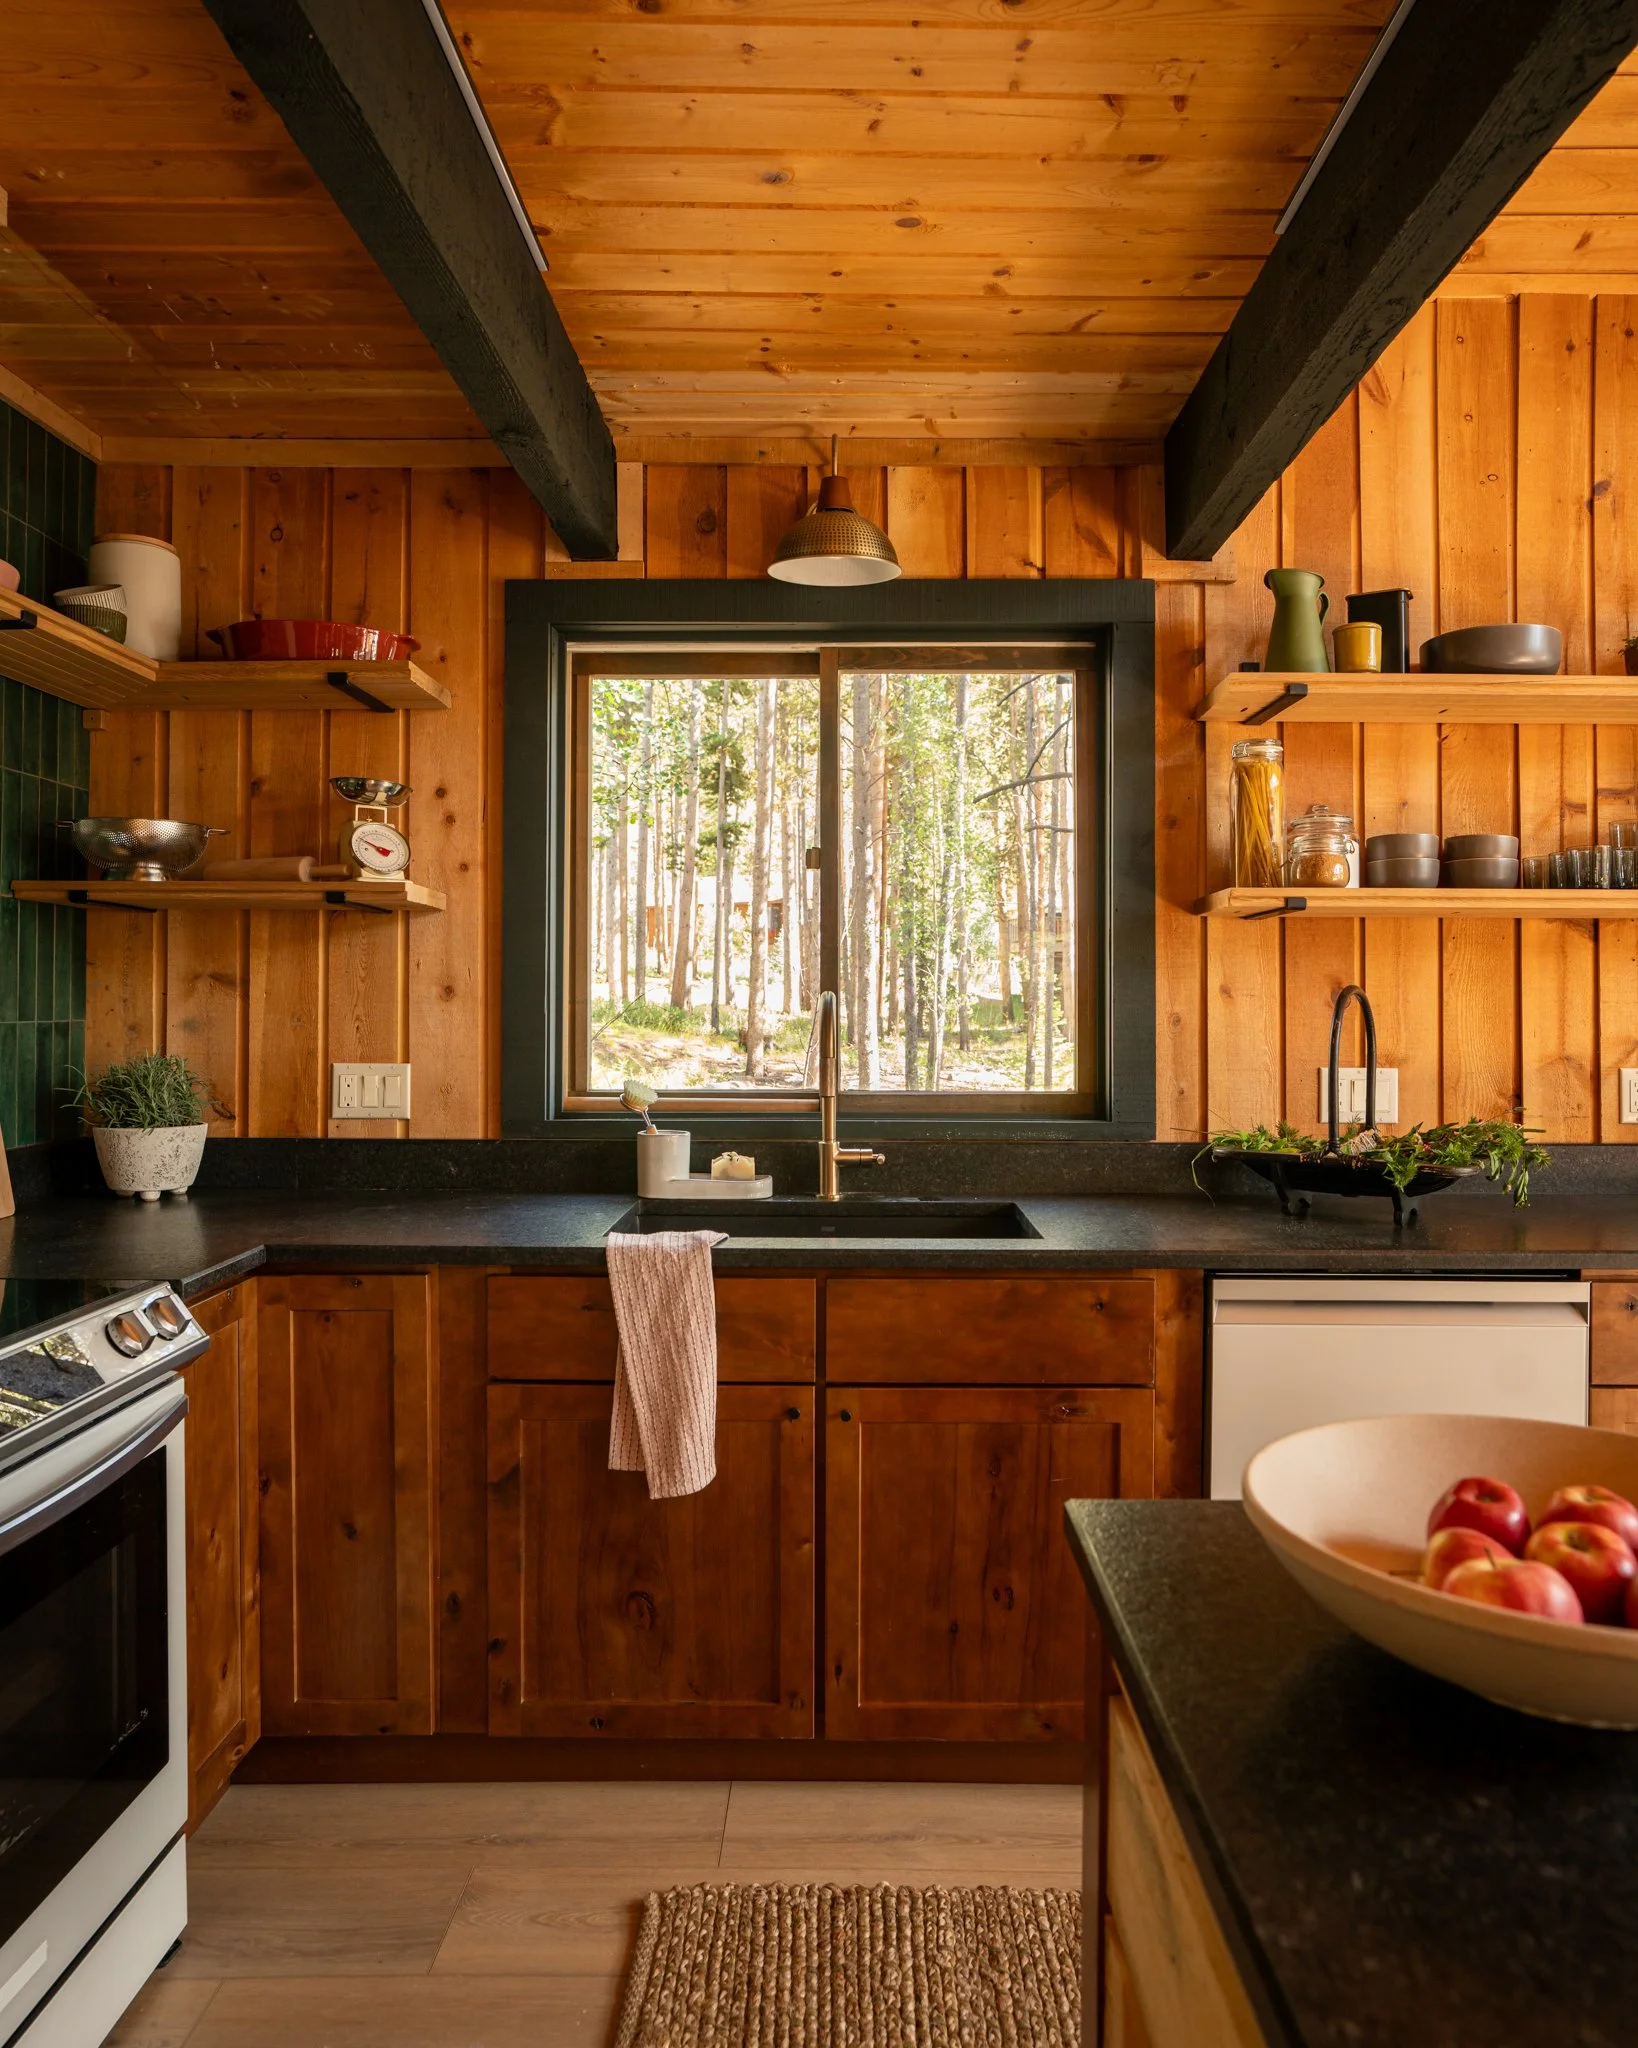
There is something special about the original kitchen in our Maine Cabin. The 50 year old design features handmade worn wood cabinets, a cosmic swirl laminate countertop, and linoleum flooring that gives this home that old Maine cabin feel we love so much. Despite its charm, the kitchen is in desperate need of a renovation.

Since closing in late 2023, we have talked (endlessly) about what this kitchen could one day become. We’ve covered everything from layouts and hardware, to moving walls and changing windows, to floor types and countertop options. But we remained cautious as to not repeat the mistake we made in Boston - knowing that designing a successful kitchen requires more than a conversation, it requires lived in experience.

Over the next two winters and two summers, we collected inspiration from mid-century and coastal kitchens, with wood cabinets and natural materials. We really started to learn what we would love from this kitchen and with time, everything we thought we wanted - changed.


Layout
The layout is by far the most challenging part of this kitchen. The original U shape cabinet layout is small, resulting in short runs and two deep corners. Once you put the drying rack and coffee machine on the counter you are out of space, while the lazy susans below are your primary storage. Plus - the layout included the refrigerator and the range, which made everything feel super crammed.

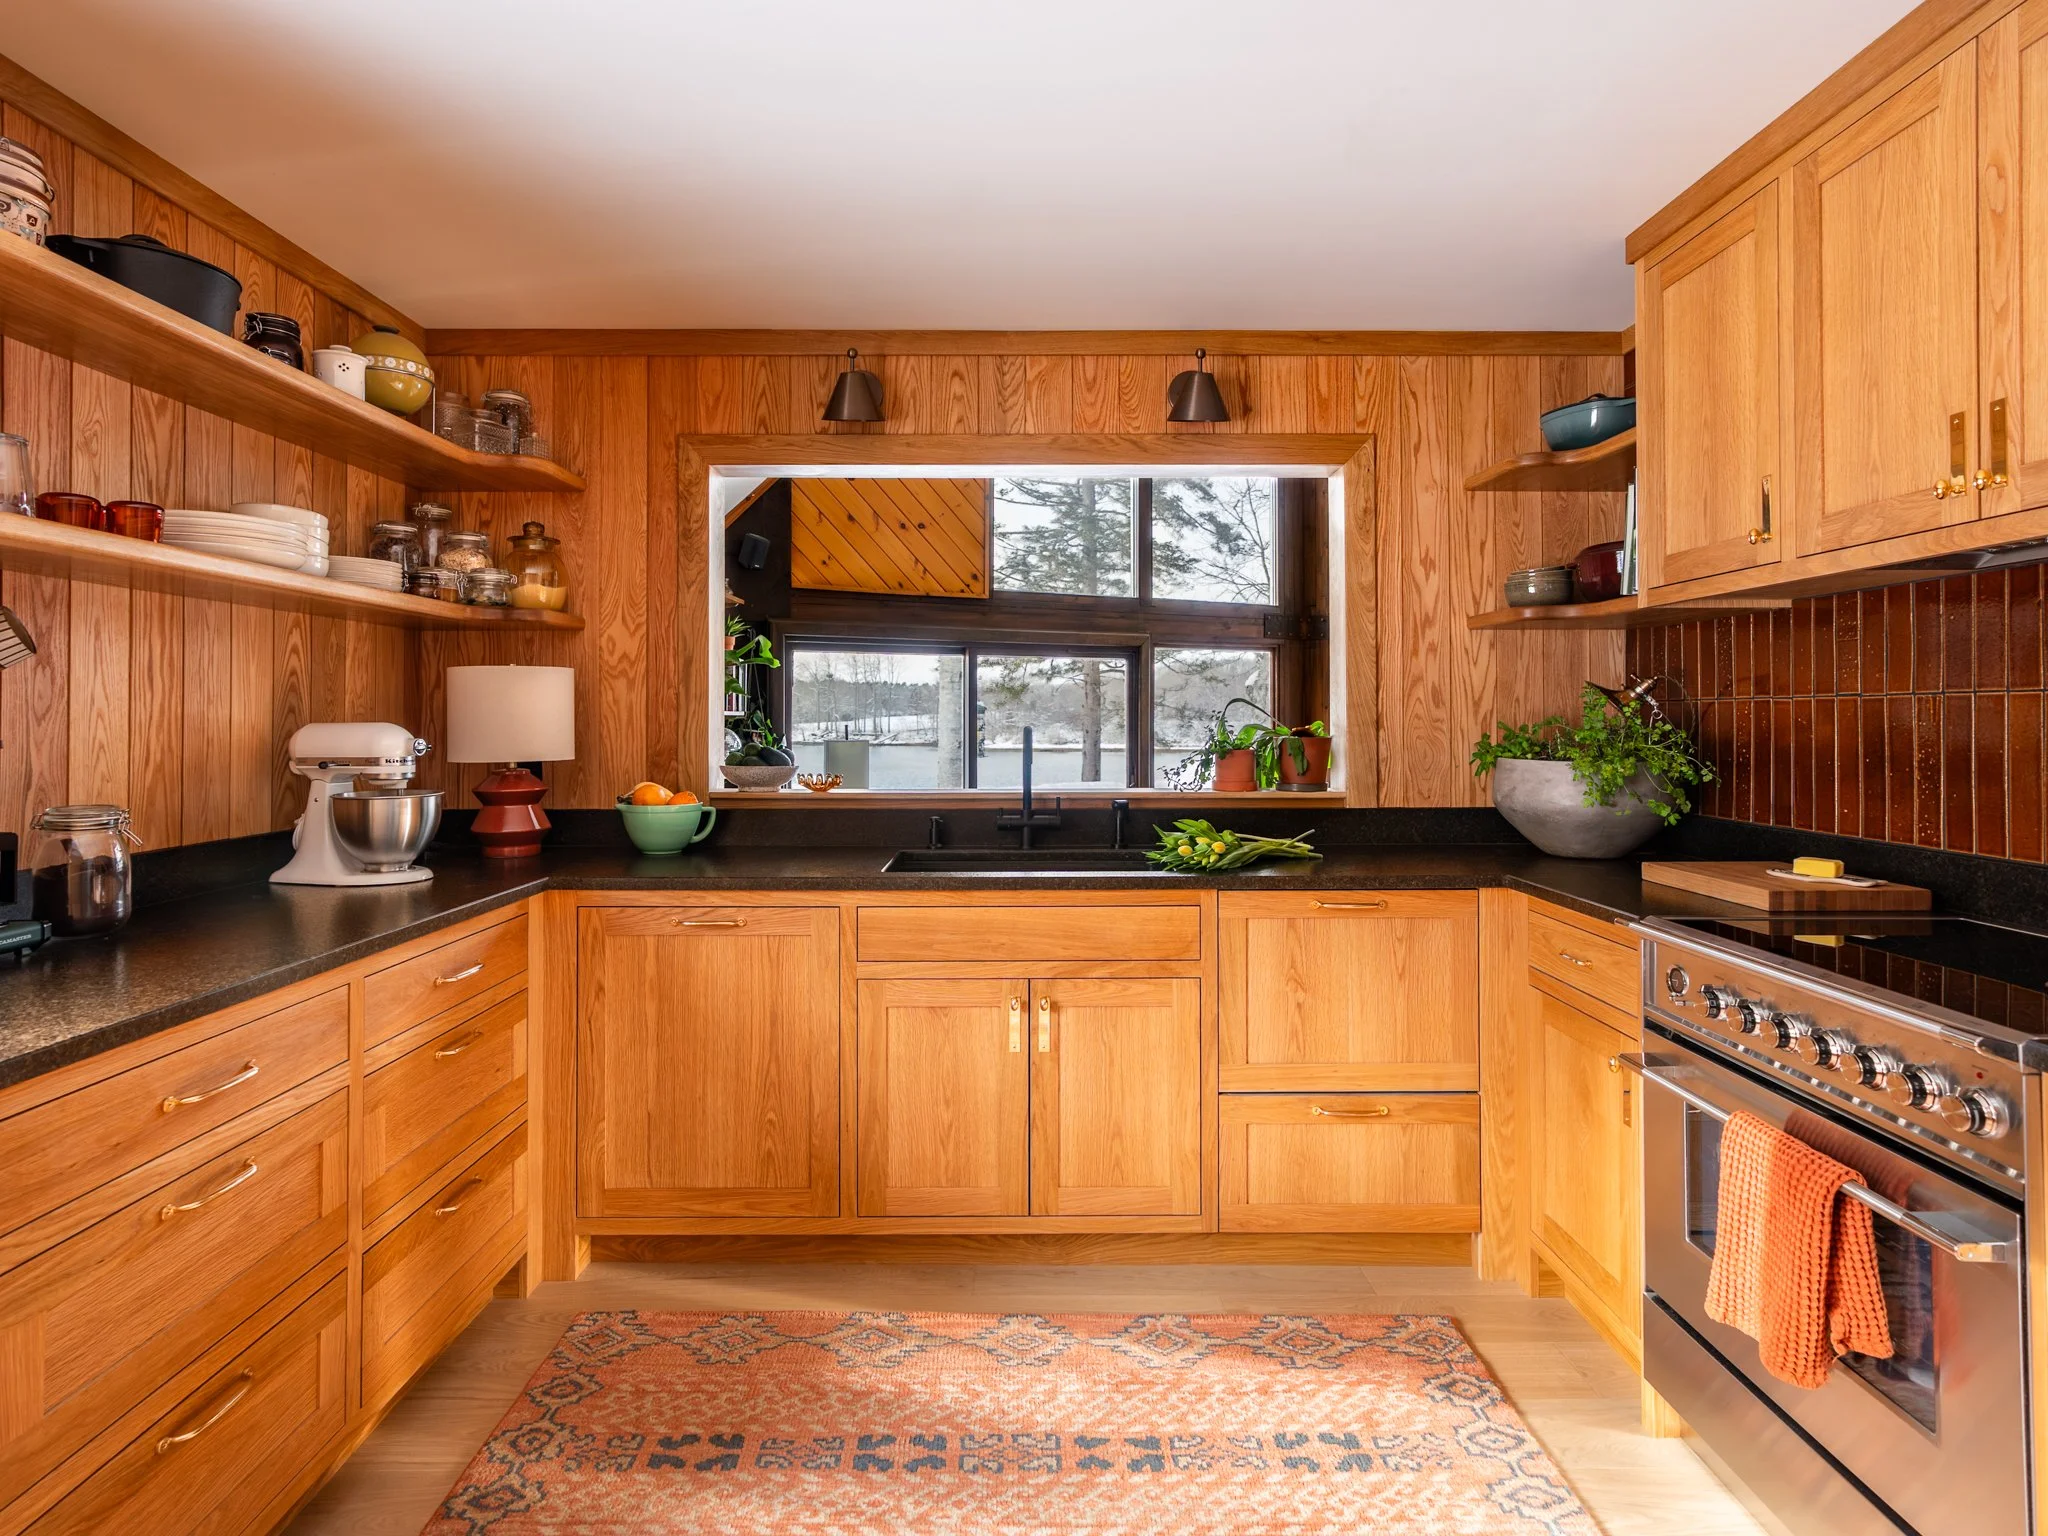
In our earlier designs, we considered making the window smaller to accommodate more cabinets and counter space (see the next image). This was the front running design until we experienced winter. This window allows for the most beautiful warm winter sun to pour in. I looked at Stephen one day in mid-March and said “the window stays, let’s incorporate it into the new kitchen.”

Sometimes you look at a design and think “oh they just tried to max that out and make it as big as it could be” and that’s exactly what this felt like - putting in cabinets just for the sake of it. This design got scrapped pretty quickly.
Another consideration was to remove the load bearing wall between the kitchen and the dining room. This would allow us to create a wide peninsula and even possibly “island seating”. We scrapped this idea after hosting a Christmas party - everyone hung out in the living room (not the kitchen), and we loved that. This house is already fairly open, so keeping the kitchen confined felt cozy and correct. Plus, if you know us, we love to eat at a table.

Here you can see the original layout and the plan side by side. We actually made the opening to the kitchen smaller by extending the range wall, allowing for more substantial cabinetry on that wall.
One of the major sticking points in our design was the fridge - no matter the placement, it felt like a large obstructing block in our design. We knew that we would be using a Fisher & Paykel panel ready fridge that would blend in with cabinetry… but where?!
At the very tail end of designing, we were talking with our plumber and had an epiphany. We would steal 10” from the adjacent bathroom and sink the fridge into the wall. It would then be flush with the rest of the pantry, and narrow enough to not obstruct the window. On the bathroom side we would change from a standard toilet to a wall hung - and regain our 10” in the process.
Rejuvenation Hardware & Finishes
When you think about designing a kitchen, the cabinets are usually the first thing that comes to mind (at least for us.) But this time, we starting thinking about hardware… specifically high quality brass hardware that would compliment our design and home. We have been long time partners with Rejuvenation (we used their hardware in our Boston design) so it was a natural starting point for this project, too.

Our current material mood board. You can see the actual oak cabinet door fronts, countertop sample, rug, hardware, and tile.
Our Boston Kitchen features Rejuvenation Hardware in the Aged Brass Finish. This finish doesn’t patina so there is no need to polish it over time. You can see the full list of hardware we used for Boston in this blog post.

For Maine, we are really inspired by the Massey product line because it is not too fussy, and gives us that cabin/coastal feel. While we featured aged brass in Boston for a more consistent feel - we wanted to do something new here in Maine.
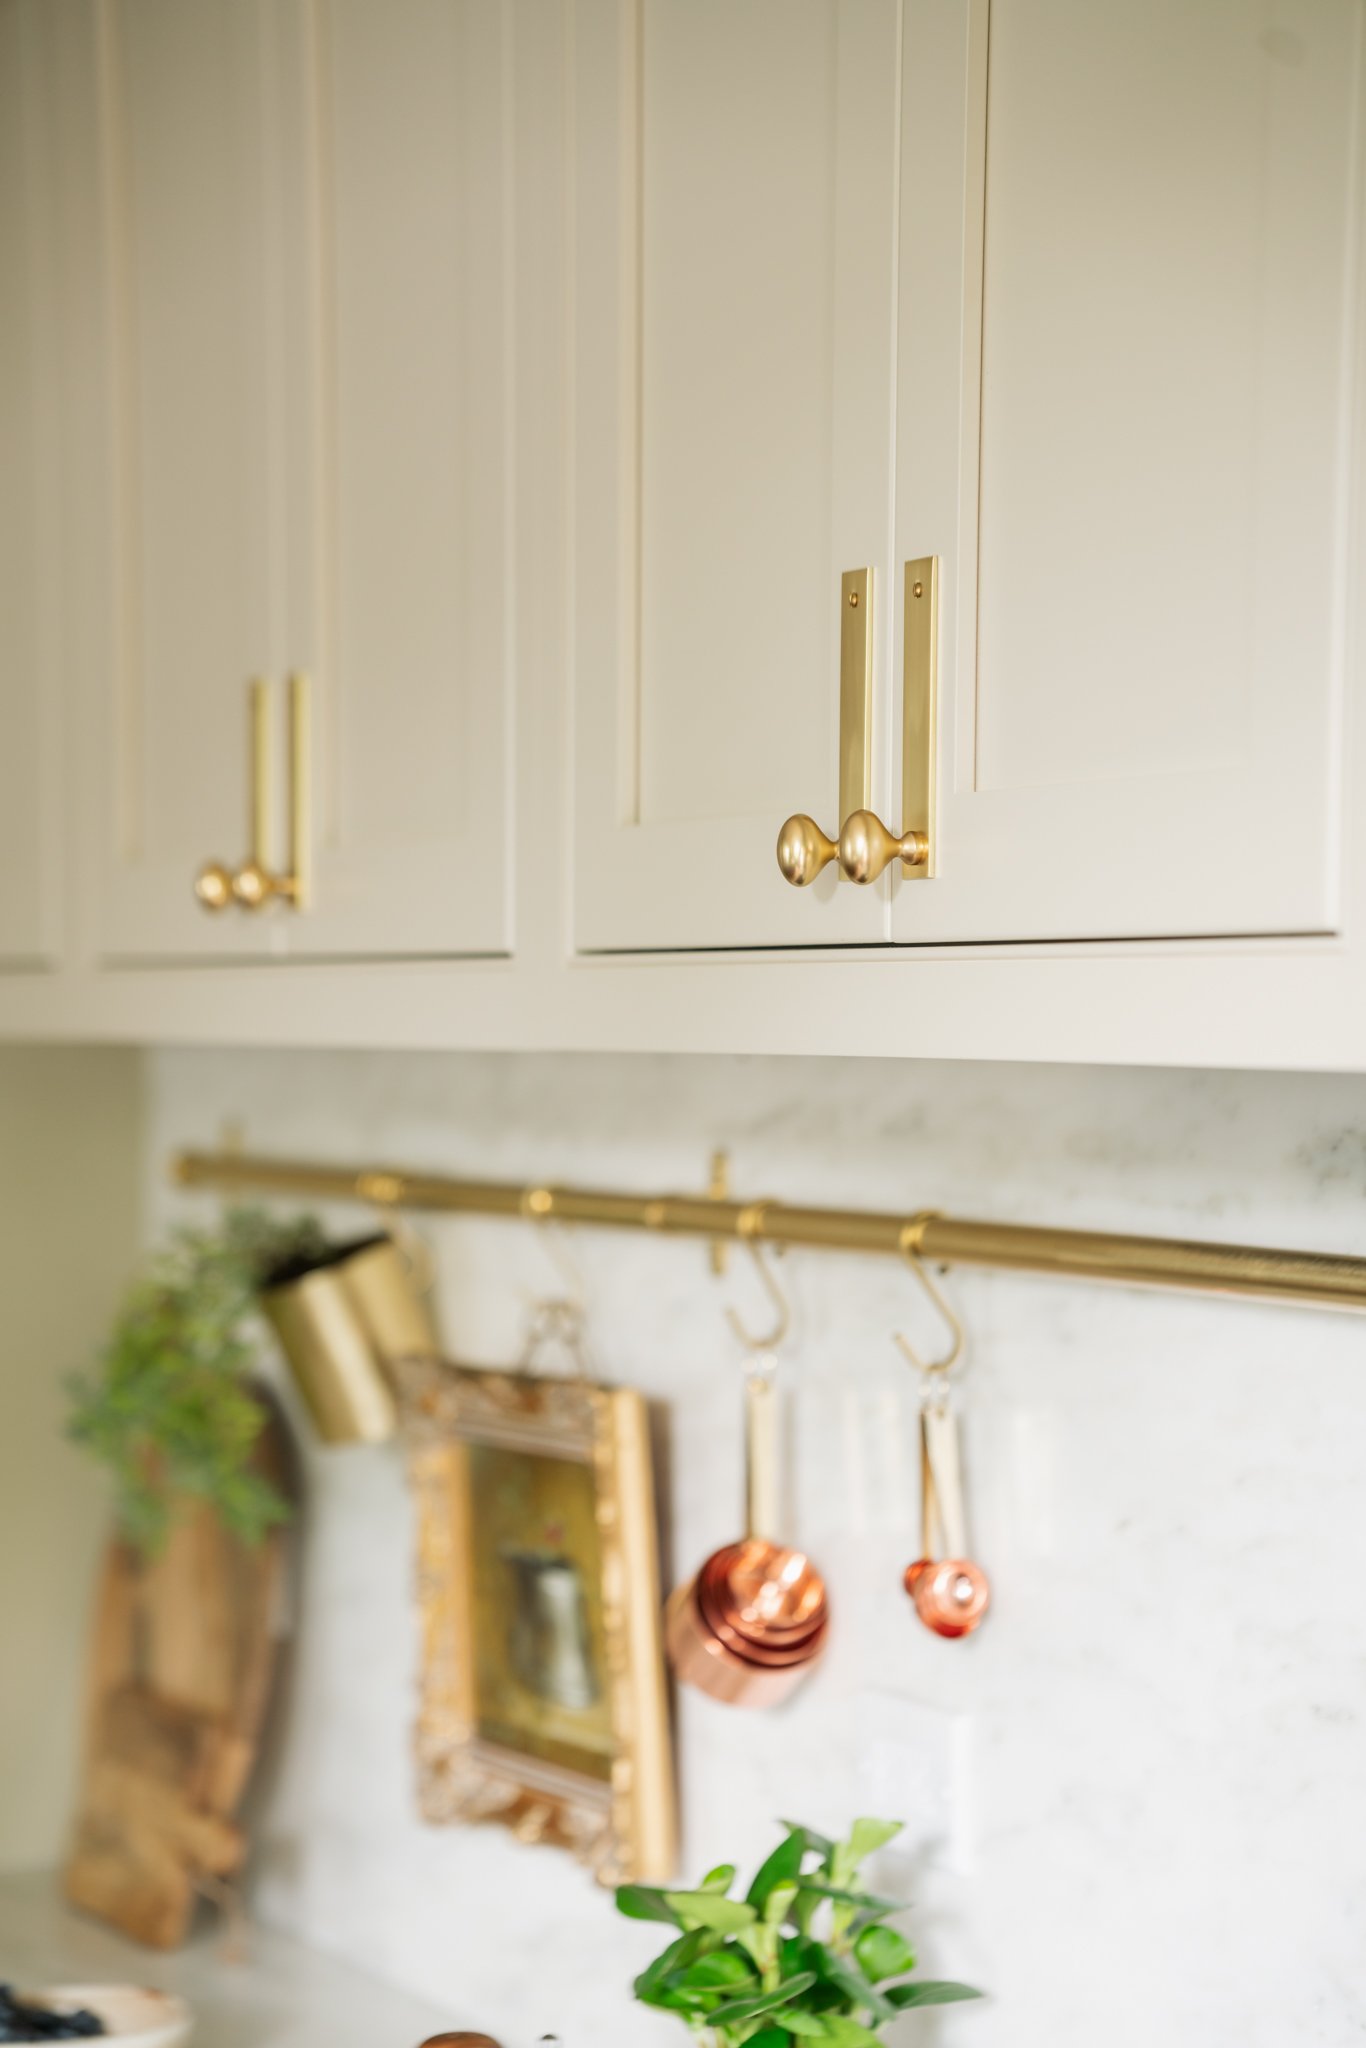
We eventually landed on unlacquered brass which will patina with time and give the kitchen the character we are looking for. In this image you can see the knob in the left has a nice patina, while the pull on the right is still shiny and new.

For the various light fixtures (which are touched only periodically) we deviated from unlacquered brass and opted instead for Heritage Brass. This is a new offering from Rejuvenation - it’s beautifully warm and will not tarnish to the touch. We think you will be seeing us use more Heritage Brass in the future.


Cabinets
Cabinets set the stage (and the budget) for the entire kitchen renovation - and it’s a lot of pressure to get it right. Before we dove into cabinet specifics, like style, we first discussed materiality. Our first designs featured walnut as the primary material, but we began to shy away from walnut because it felt a little too mid-century and a little too polished.
We kept returning to how much we loved our Battle on the Mountain kitchen. These RTA (ready to assemble) cabinets were ultra-affordable and very easy to assemble. They really made us reconsider walnut in favor of something more rustic.

Then we saw it again - the cabinets design by PJ and Thomas for the Holiday House.
PJ and Thomas shared this blog post and we immediately texted them... we needed to know everything about these cabinets. They became our primary reference for how we wanted our cabinets to feel.
Once we landed on white oak - we decided pretty quickly to stick with a simple oil and wax, which meant no stain. This would really highlight the cabinets natural beauty, and cabinet upkeep would be fairly simple. No matching or fussing with stain finishes, and overtime we would be able to polish it up ourselves.
We also knew that we also wanted inset cabinetry to achieve a built-in look. This is when the door of the cabinet is inside of the frame instead of on top of the frame. It’s a really beautiful detail and makes your cabinets feel more like furniture. The only issue is that inset cabinets also drive up cost considerably.
For this project we looked for RTA options but we couldn’t find anything that felt correct or that met our timeline. Instead we started looking for a local cabinet maker here in Maine - and we discovered the Block Brothers. We scoured their portfolio and their Instagram… and their work was perfect. We reached out, and lucky for us, they answered the call.
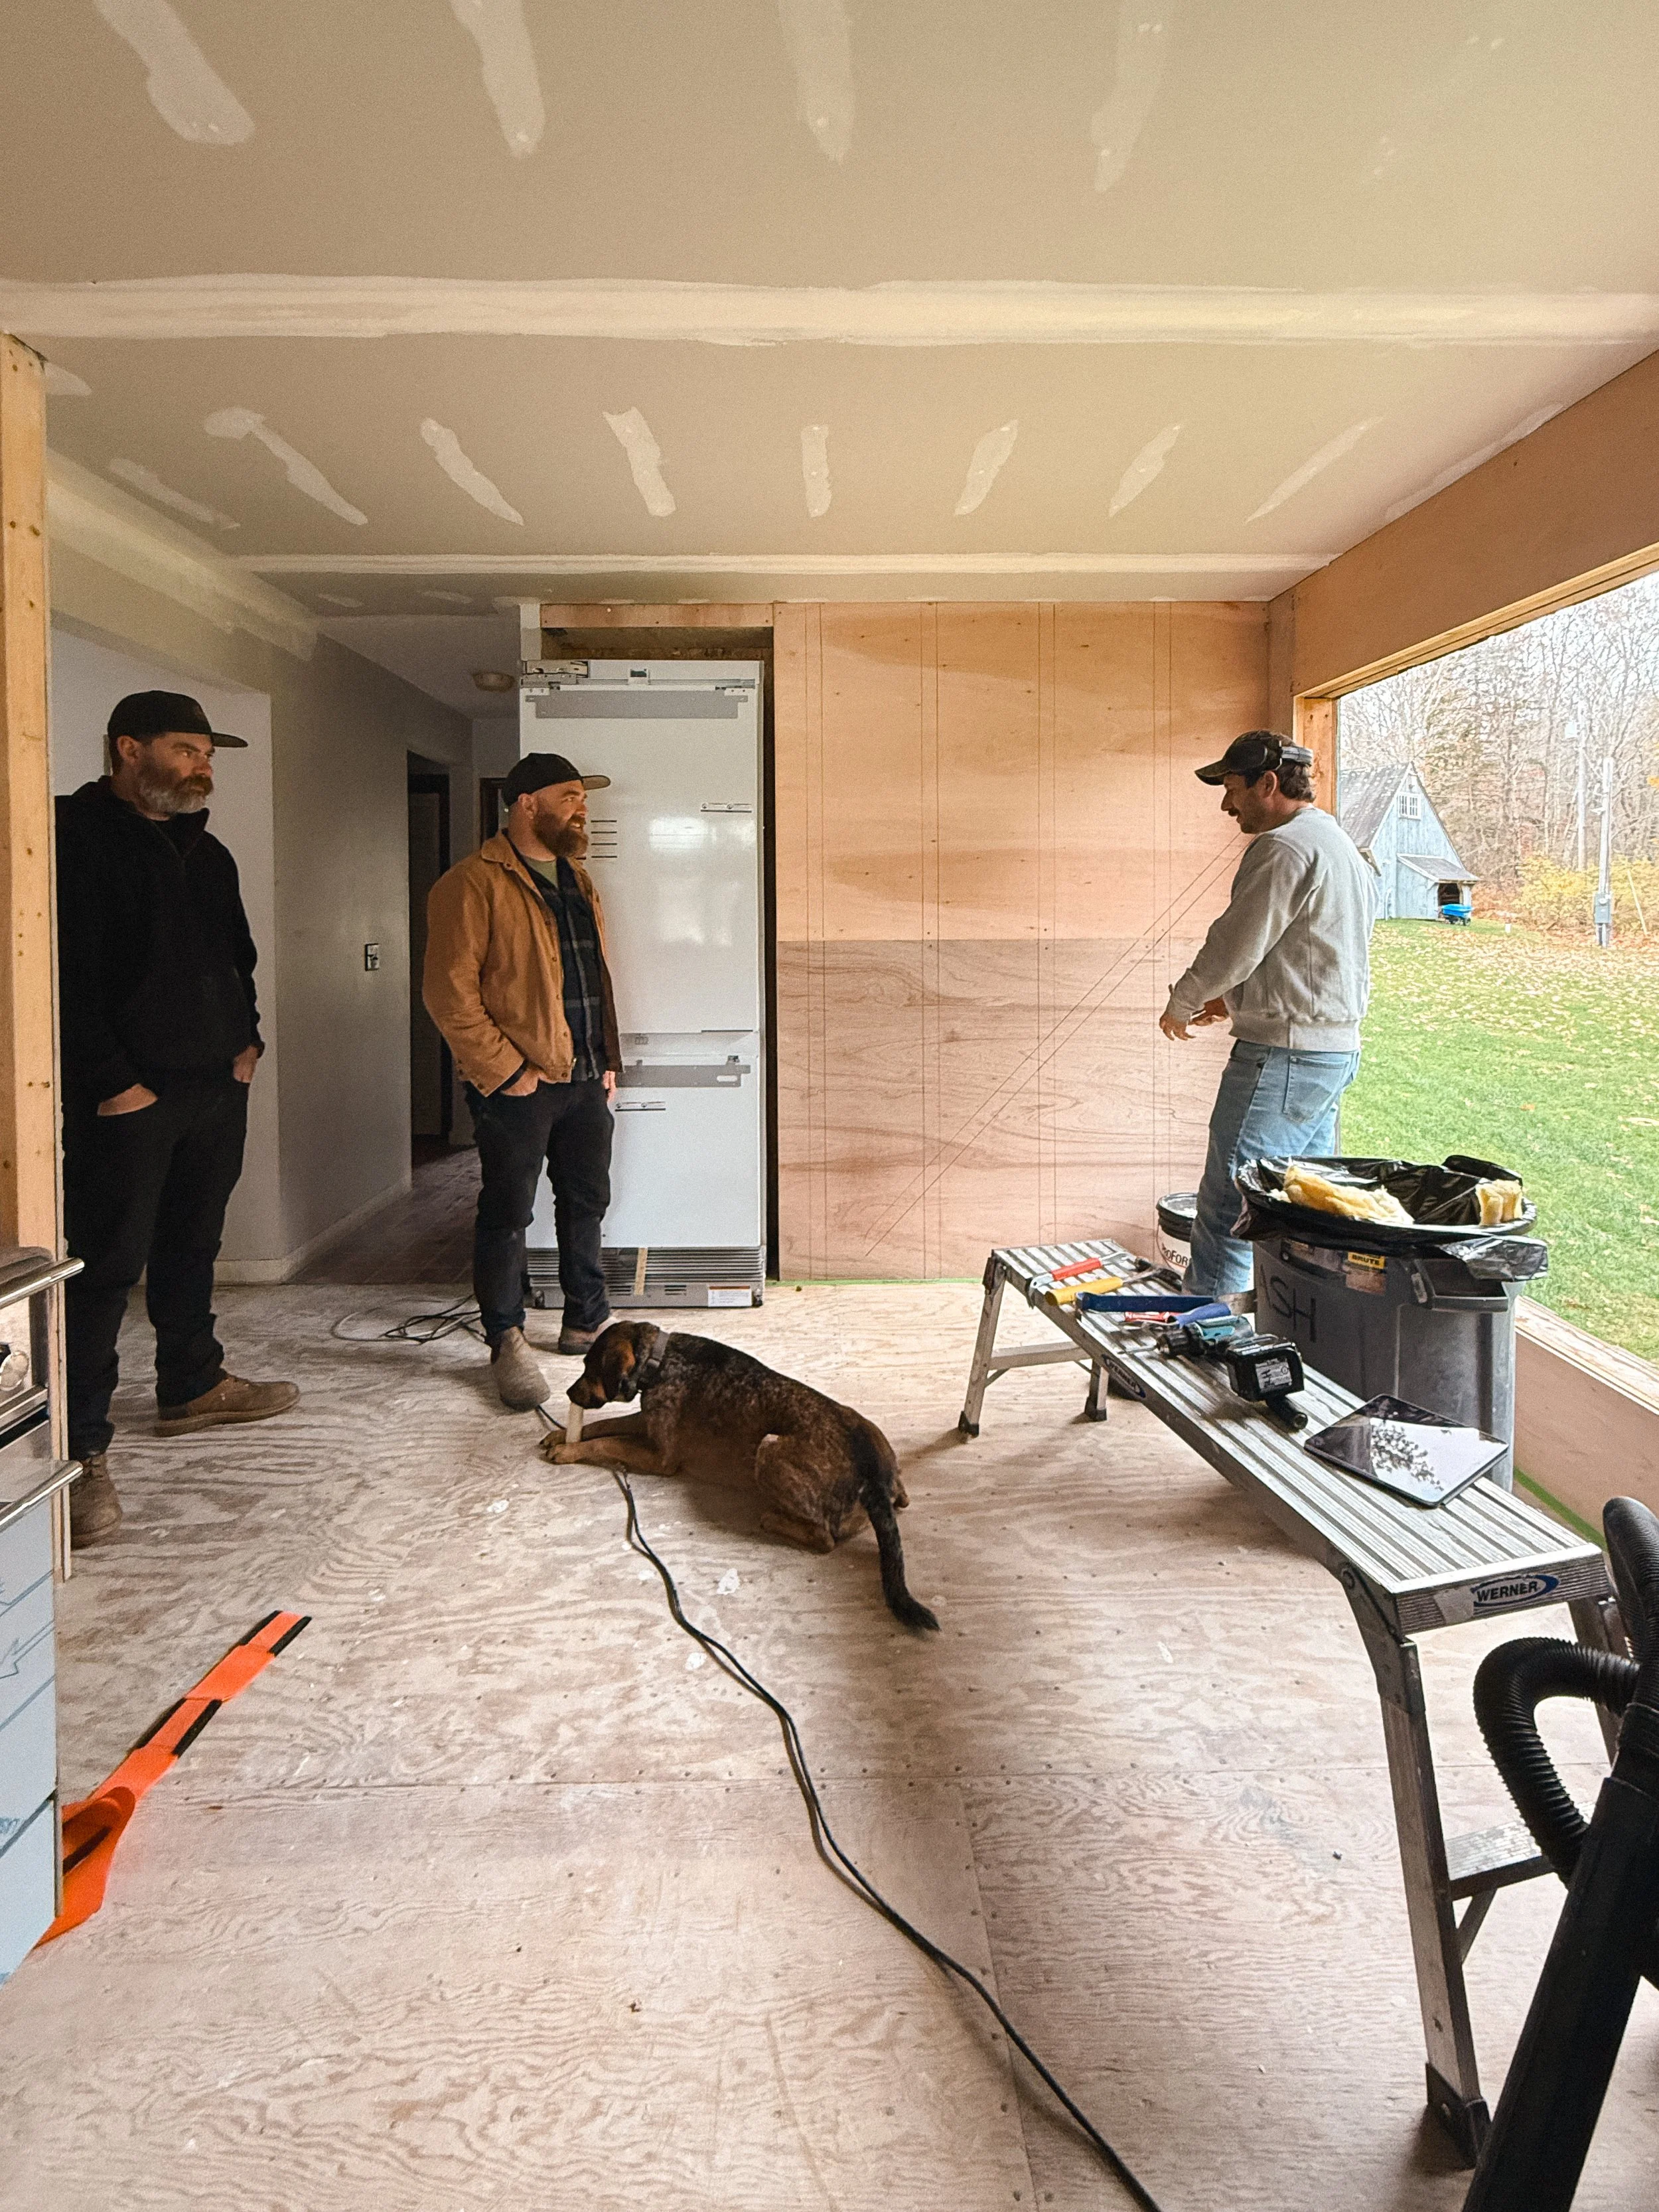
The Block Brothers made a trip to check in on our progress ahead of the cabinet installation date.
Over a several week period, we reviewed our design plan with them, answered questions, and made modifications to the design. This is the best part of working with a team that really understands cabinetry and design - you are able to move from a simple sketch to real shop drawings. Because they are less than an hour from our house, we were able to take a trip to the shop for a tour and to review different oak samples. They even came to our house to take their own measurements!

On our second trip to the shop, we were able to see our cabinets in production. This is the sink and trash pullout being built as a single unit.
We weren’t sure if we were ready to share this just yet… but then we thought, let the people see! Here is a sneak peak of the cabinets being installed in our kitchen. They are gorgeous.

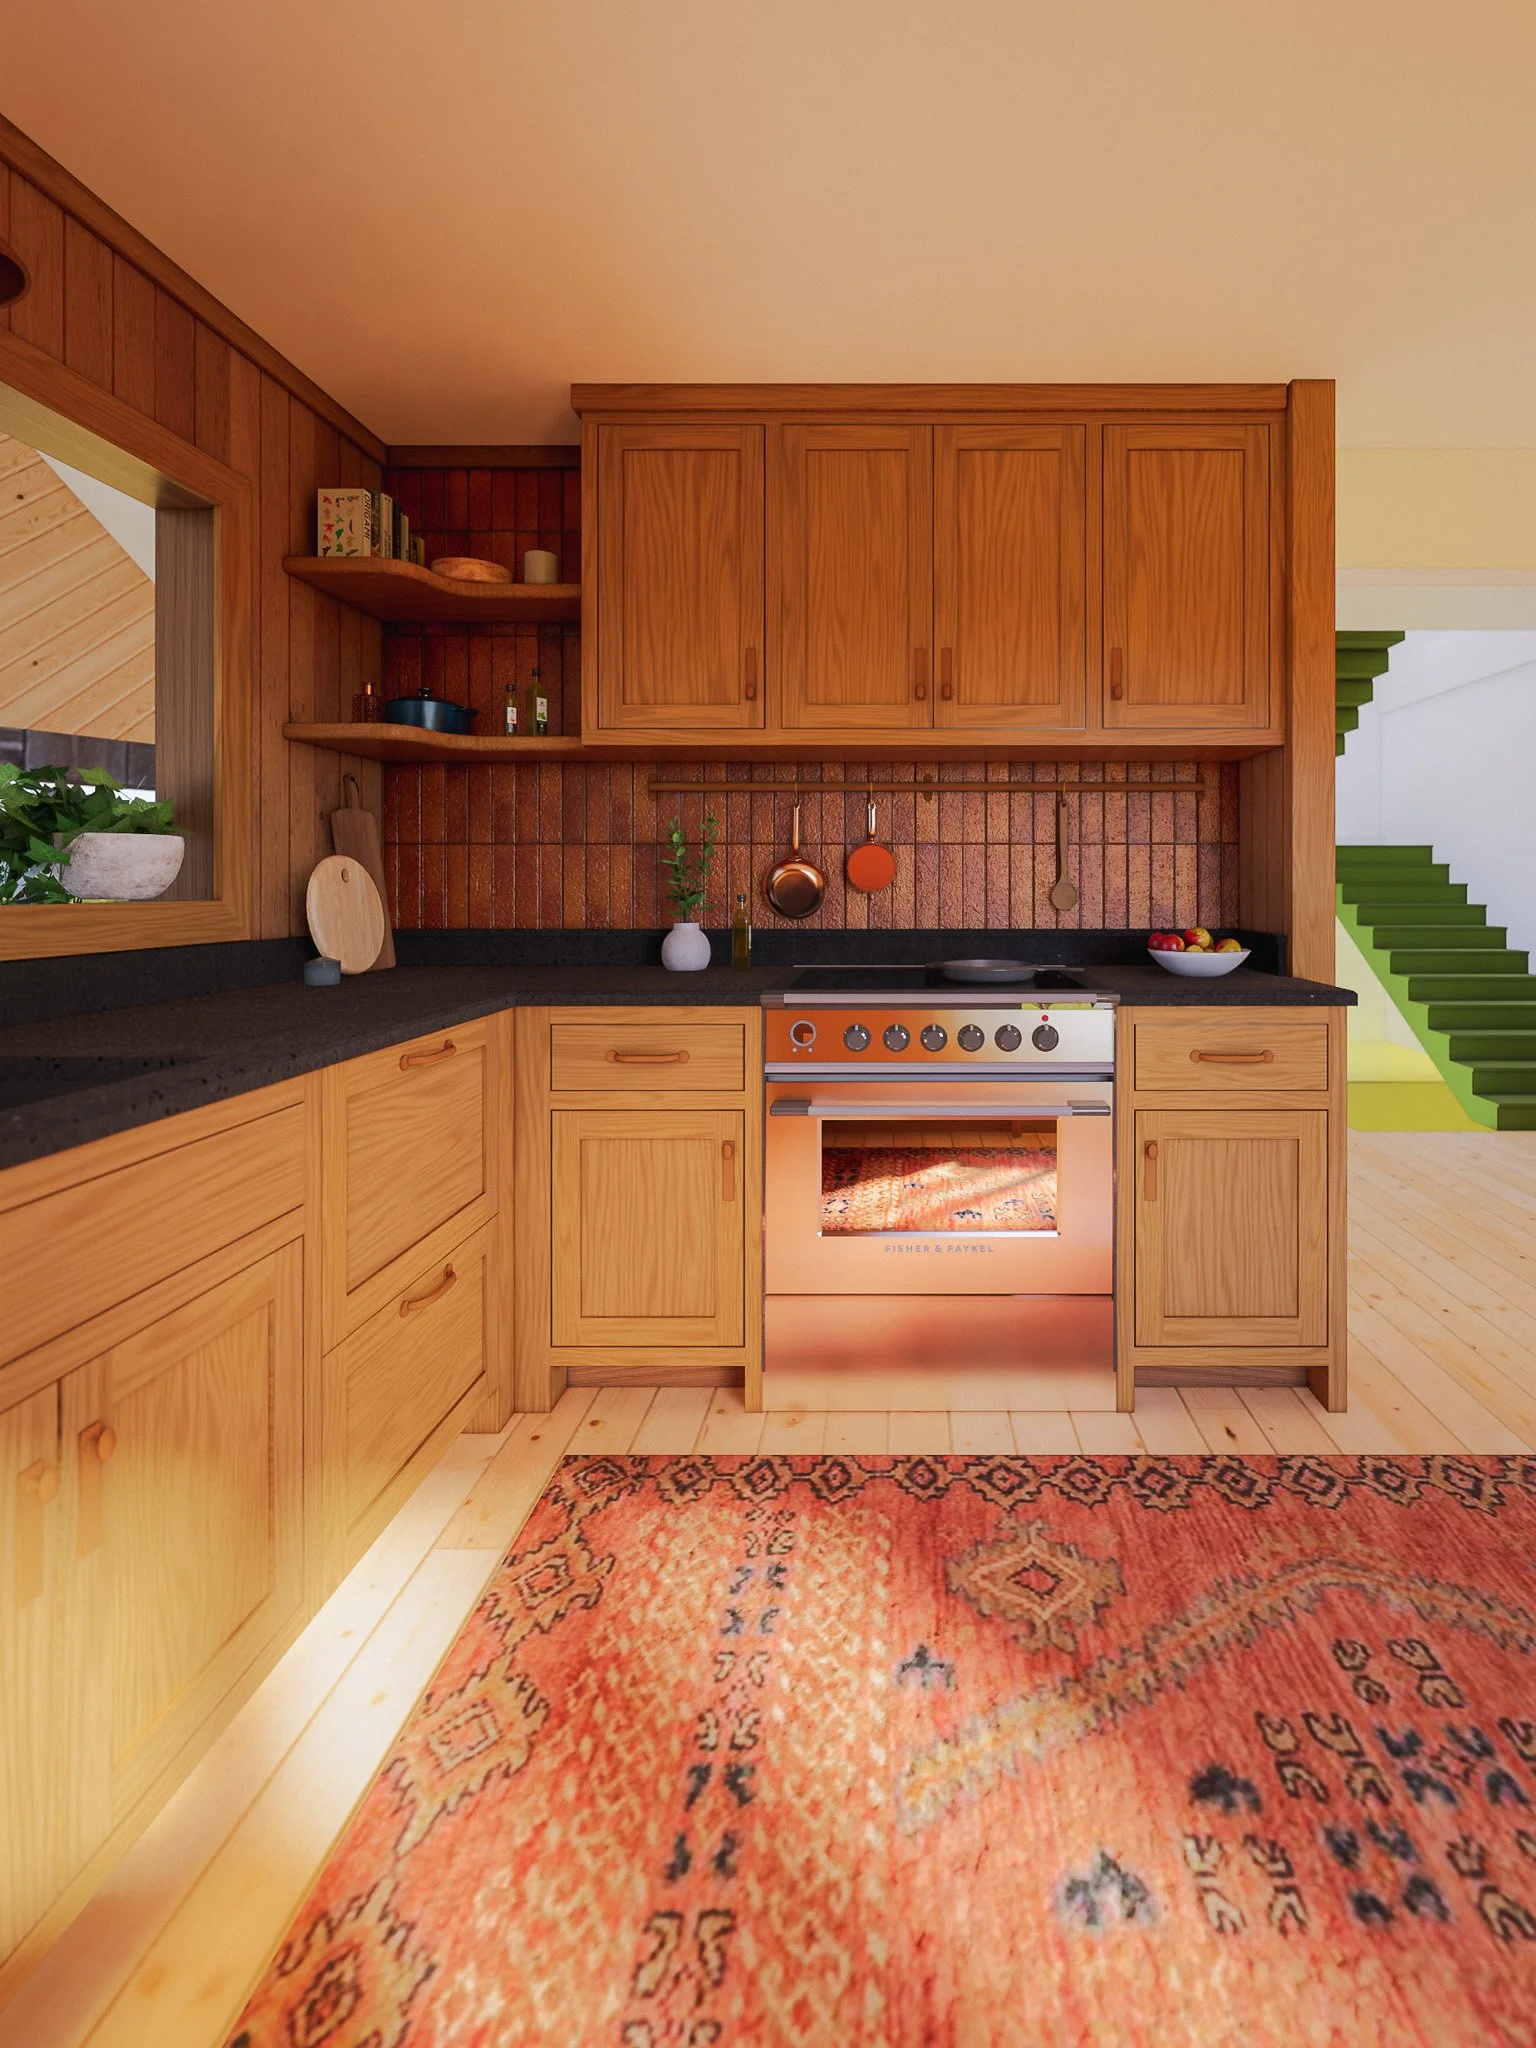
And, here are a few more renderings to help you see the vision!

Final Thoughts
If we have learned anything, it is that good design comes with lived experience. If you can, take the time to build a design plan full of the things that YOU love. We are so happy to have taken our time with this one - and we hope that you love it too!
If you have any questions or comments, drop them below and we will be happy to answer them!